
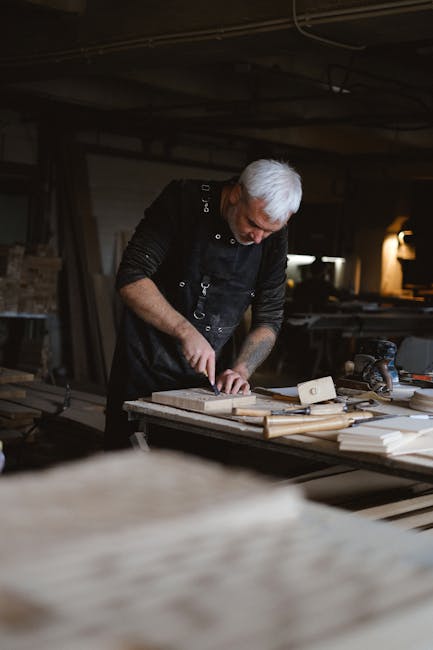
Marc – On today's show we're going to make a unique woven panel rolling hamper because my unmentionables are worth it. (funk music) My wife Nicole very rarely
ask me to build anything so when she does I like to jump on it and get it done as soon as possible. So she requested a hamper that had more capacity then the one we have now. Seems like we just have to many clothes especially with a kid and one on the way. It's only going to get worse from here. So she requested a double capacity hamper, one that she can roll around from the bathroom to the laundry room. One that breaths well and of
course it should look good too. And this is what I came up
with, let me give you the tour. The unit rolls around, it has
four castors on the bottom. The panels are this woven structure here, where we have eighth inch thick stock in these strips, vertical
pieces that they weave between. It's all solid walnut and the front has the weave pattern
as well as the sides.
The back panel is just
a simple ply wood panel. Now the top is hinged and I used Rockler's torsion hinges for that because their nice and that
they kind of stay open. So it's very child friendly and safe. Inside we've got two bags that are held in place with snaps. Generally speaking we
probably won't remove these bags but there's enough snaps to make sure it's secure if there's a lot of laundry in here,
just take the laundry out. Or you can unsnap it,
use the little cinch here and take the laundry bag
wherever you need to go.
Either way it's going to work pretty well. Now all though I've got
the finished products sitting here and obviously
everything worked out. When I started this project
I wasn't a 100 percent sure how all of this would go. I've never done this woven slat pattern. I didn't know if the
wood would handle it well and I didn't know if I could
get the whole thing assembled. So I did struggle through it. It turned out great but
because of that unknown factor I like to make things
as simple as possible, on the joinery task I know how to do. So I used the domino to get
the primary joinery done. You certainly could substitute dowels. You could use traditional
mortise and tenons. And the previous project that we just did, the outdoor sitting bench goes over all the details you would
need to know to replace these domino's with mortise and tenons. So by doing that there
was one thing I didn't have to worry about and I could focus on all of the unknown aspects
of this project that allow me to experiment a little
bit and save some time.
Alright, so we're going to
get in the build right now. But just one word of warning because this has wheels
on it, it is not a toy. Do not ride around on it, do not encourage children to go inside it
and ride around on it. It's just not a good
idea, don't do it people. (child laughter) (playful children's music) Wee Wee Wee – [Voiceover] You see this
amazing pile of walnut off cut's those came from my recent sculpted rocker project that we did in the guild.
And it's the perfect pile of material to pilfer for this project. I had to cut down a lot
of eight quarter stock to make four quarter frame parts. You might thinks that's wasteful, but nothing's more wasteful than a board sitting on my shop floor unused. (upbeat guitar) (power tool) The legs on this pieces are an
inch and three quarters thick so the eight quarter stock was perfect. Everything is cut to
length at the chop saw using the stop block for repetitive cuts. The center divider will be cut to length after we do some dry assemblies. So set that aside for now. I'll be using the Festool
Domino for the main joints. The domino comes in two
flavors the 500 and the 700. For this jobs I'll be
using the smaller 500. Eight by 50 millimeter
tenons should work nicely. The wide bottom rails
will receive two tenons and the narrow top rails will receive one.
Simple reference lines give
me all the info I need. From there it's just point an shoot. (power tool) (upbeat guitar) (power tool) You're looking at 60 mortises
cut in just 10 minutes. Now I like to glue my tenons
into the rail ahead of time just to make things easier later. And it's time of a dry assembly. (hammering) (upbeat guitar) Now with the basic frame work done we can start to focus in on some of those cool details that make this piece unique. And one of those is going to involve this center divider, that's going to divide the whole thing into two compartments. Now we could attach this to the front and back rails using the domino's but I want to do something
a little bit more fun. This is going to be a visible joint, so it might be cool to
do a sliding dove tail.
If you've never seen one of those before all it really takes is a single router bit to do the job and we use the router table. But first we need to
measure for this piece. Now I know the dove tail based on the bit and the size that I'm working with is going to go in a half
inch into each piece. So I need to cut my center
piece, at this point the distance between
the front and back rails and then add a total of an inch. And just a quick tip here, even though this piece is going to go in the center take your measurements from side where you're closest to your joinery. Because here we can
actually have some moment and things can bow out, alright. So let's take our measurement right over here and make the cut.
– [Voiceover] Don't forget to add an inch. (power tool) The front and back rails of the hamper will receive the dove tail slot. So I simple mark the center
point on both boards. At the table saw make a single pass right down the center of the rails. This will reduce the amount of stock the router bit has to remove. At the router table
attach a sacrificial fence to the miter gauge
using double stick tape. With the bit set to exactly
a half inch in height make a cut right through
the sacrificial fence. And this a really the secret
sauce for this process because it give us vital information about the location and
the path of the bit. By marking the center part of the cut out we now have a perfect index line for lining up the center
lines of our rails.
Because there's a lot
of forces at play here it's essential that we
clamp the work piece to the miter gauge before making the cut. Two clamps should do the trick. The second rail is cut the same way. Now for the center divider we'll use the same bit at the same height only now we'll use the fence and a backer board which will allow us to
run the piece vertically. The only way I know to get this perfect is to run a test piece first. After several rounds of
test cuts and fence moves I can safely run my center divider. Now the backer board serves
two very important functions. It keeps the work piece balanced in what would other wise
be a very awkward cut. And it also backs up the wood
fibers preventing tear out. Keep in mind that if the fit is tight now it'll be nearly impossible to assemble when the glue is added
and the fibers swell.
So adjust the fit accordingly. – So now things are about
to get really interesting because these weave panels not really sure how it's going to pan out. We're going to have one in the front and one on each side. The back is just going to be a flat panel no need for the weaved pattern there. So I've got this idea in my head. I think it's going to work but
I don't really know for sure. So you'll sort of come along for the ride and we'll make adjustments as we go. But here's the basic foundation. We're going to have four
pieces, vertical pieces that will be a quarter inch thick. They'll go into mortises in
the top and bottom rails. That's kind of the back bone, that's the real strength behind the panel. Then we'll weave in
eighth inch thick pieces that will go in and out
of those vertical pieces. So we'll need a groove in
the sides of our legs here so those pieces can terminate
and go into the groove.
That's actually one of the things that I'm most stressed about. I don't know for sure how
that's really going to pan out. Right so, we've got to cut some mortises we've got to cut some vertical pieces, some strips at eighth of an inch. And then we also have that groove to cut on the inside of the legs. Let's get to it. – [Voiceover] The center of the rails corresponds to the center
of the leg grooves, so I'll mark those out
on the top of each leg. And while still assembled,
mark the locations of the top and the
bottom rails on each leg. This is a stopped groove, so I marked the start and stop points
of the 3/16 straight bit right on the router table itself. The work piece is then
carefully dropped onto the bit be careful to line up the line on the leg with the line on the table.
Plow the groove until the other line matches up with the line on the table and carefully lift the
work pieces off the bit. The rear legs only receive one groove and the front legs receive two grooves. Remember the back panel will be made from quarter inch ply wood. So let's cut that groove while we're here at the router table, since the process is pretty similar.
For this I'll use a quarter inch bit that's made specifically
for undersized ply wood. Only the rear legs receive this groove. The top and bottom back rails also need a groove for the ply wood back. So you can use the router table or consider making two
passes at the table saw. (upbeat guitar) We haven't talked much about the lid but the grooves are very similar to what we did for the back panel. So we may as well cut those now too. Keep in mind the long rails
have two start and stop points because of that center divider. (power tools) Now with another dry assembly I can take measurements for the panels. Don't forget to add the appropriate amount account for the
depth of your grooves. I have plenty of material
in this 4/8 sheet of quarter inch ply wood for both the back panel and the two top panels.
I rip at the table saw and
then use a circular saw to cross cut to final length. And now for a test fit. The lid looks perfect,
now for the back panel. (upbeat guitar) Looking good. – Now I've got the entire
assembly upside down now because we need to talk
about that bottom panel. Right, basically you're
going to measure to size account for the fact that we'll be cutting some grooves in these rails and it will sit in those grooves. And we'll notch the corners
to go around the legs. The real important thing to
think about here is the castors. Now if you're going to have
a rolling hamper like me you need to have that bottom panel up high enough to allow
this wheel to sit in here. And we have to make sure this thing doesn't rub on the ground, or if you change from
let's say a hard surface to a soft carpet surface you have enough clearance for it to do that.
So I think about a half inch is enough. So with a two and a half inch wheel, the total height is two and a half inches. I'm going to place my
bottom panel up two inches and that's going to give me
a half inch of exposed wheel that should allow me to get over various different terrains in the house. Alright, let's get to it. – [Voiceover] The half
inch bolted birch panel is cut to size using a circular saw. The corners are marked and
then notched at the ban saw. (power tool) Now we can use the dado
stack at the table saw to cut the grooves in the bottom rails. I use special shims to get the stack to the exact dimension that I need. You'll notice that this cut
goes into one of my tenons that's OK, it'll still be
strong enough for the job.
With the test fit looking good we can finally move on
to our weave elements. First we need to cut mortises for the quarter inch thick vertical components. I'm using the hollow chisel mortieser since it make perfect
square ended mortises. I usually make my
mortises with the router, but you can see just how handy this tool can be as it drills a hole while chiseling the hole perfectly square. (power tool hum) Because the wood can
sometimes push the chisel away I skipped to the end of the mortise and then plunge right to the pencil line. Having wood on all sides of the chisel helps insure that it
plunges straight down. I can then clean out
the remaining material. (upbeat guitar) The side rails receive two mortises and the front rails receive four mortises. (upbeat guitar) The mortiser can leave excess material at the bottom of the mortise and that's easily removed with a chisel. The vertical slats are cut to
a quarter inch in thickness.
But I use the drum sander
to really dial it in. Now that we have our mortises cut it's easy to size these
pieces to perfection. For the horizontal strips I
mill some eight quarter stock to exactly an inch and
three quarters thick. Keep these pieces over sized in length since we'll cut them to
final dimension later. At the ban saw I begin slicing the boards to create eighth inch thick strips. (power tool hum) After each cut I take
a light clean up pass on the joiner and then cut again. You need 11 long strips for the front and 22 short strips for the sides. For the final thickness
1/8 of a inch with work, but if you go slightly thinner it'll make it a bit easier to weave these pieces for the panel.
– Now before we can
actually do a test assembly using our strips here we need to cut them to their final length. It's pretty easy to do,
just take one of the rails put the vertical pieces in place and weave one of these pieces in. And give it about a quarter
inch extra on each side and that should get you pretty
close to the final length. Alright, so now for
the nerve wrecking part let's see if we can't get the thing to actually weave together into a panel. I'm sure there are a couple different ways you could approach this assembly, but I'm going to do the method that seems to make the most since
to me, wish me luck.
– [Voiceover] I'll begin
by doing a dry assembly with both rails and both legs. For extra support I'll clamp one leg to the assembly table
and remove the other leg. The only reason I attached the second leg was to get everything aligned properly. From the open side I begin weaving the eighth inch strips in. It's a little awkward at first but you quickly get the hang of it. I found that rocking
the piece back and forth made it easier to
maneuver into the groove. Now I do want a little
spacing between each piece and the Wood Whisperer sticker
seems to work just fine. The second strip goes in the same way being careful to alternate
the over under pattern. (upbeat guitar) As you can see this is very repetetive so ding, ding, ding, ding ding, ding, ding and ding. The last one can be a little tricky so you'll need to un-clamp the panel to make sure that it's
captured into the groove. (hammering) – Alright well that was fairly uneventful so far alright, we
still have the challenge of putting this other leg on here. Now the tenons will line up just fine but what about that groove
that holds these pieces.
Look what's going on here. We've got one up, one
down, one up, one down. So how do we get all of
those to line into the groove as we tap out leg in place. Well the one thing I
was thinking we could do is use calls, if we
have a call on each side we could sandwich these two together so their all mostly aligned. And they should slide into that groove. Hopefully in theory, alright. Let's see if we can make it work. – [Voiceover] A quick clamp
holds the calls in place and allows for any
adjustment in the strips. And now we can add one clamp from the top and one clamp from the bottom. These clamps will hold the calls in place allowing me to remove the quick clamp and giving me room for
the leg to drop in place. – Now as these come together you start to see the reason for
that little hair line gap between each one of the pieces.
If that gap wasn't there,
inevitably these pieces would sit one on top of the other and as you apply pressure like this you'd probably wind up cracking them. Just make sure you have the clearance you need for each one of these. Once you have your clamps on the outside then you could bring
the leg in place here. (hammering) Now as I get real close
I notice that I've got a little bit to much of
a mismatch in the middle so one more clamp here,
one that I wouldn't be able to put on until
leg is already on here. And it should do the trick. (upbeat guitar) (hammering) And there we go.
(upbeat guitar).