You're not going to believe how amazing
this table is! Hey everyone, it's Dylan from The Black Forest Wood Company this week we're
going to be showing you our construction process on this absolutely one-of-a-kind cottonwood
burl dining table it's got midnight blue Black Forest Deep Resin and then the largest
cantilever base that we've ever constructed so you guys are going to get to see this full
build process and then you're also going to get to see it delivered into the final space so it's
not that common that you'll see cottonwood being used to create a thirty thousand dollar piece of
furniture some little-known fact I guess about cottonwood is it's mostly used for like pallets
crates uh plywood fuel like they'll actually burn it as fuel that it's like the lumber
is that invaluable in most cases let's say as you guys can see though this tree is
a little bit of an anomaly it is highly burled highly figured in just a one of a kind
piece and definitely worth using in this table you see how that got in there saved his life saved
my toes yeah i saved his life there haley so this client selected a massive piece of cottonwood burl
we do have to cut it down slightly though but not too much since they are going with a cast so this
slab is going to stay mostly intact i personally think that's probably the best choice for
this lab since it is so rare to actually find a piece this large like this slab in some
sections is over five feet wide so doing it as a cast is kind of the perfect application for
this piece once we got it all cleaned up and debarked then we went ahead to do the pour and the
client selected a midnight blue resin you'll see why once we get to the delivery and we get this
piece in the client space the the resin color here actually ends up matching perfectly of course
as usual we're using our black forest deep resin you can pour the our resin up to like three or
four inches thick in a single shot but you will want to make sure that you have some cooling
involved so we have aluminum tables that have water cooling underneath them and then we also
blow fans on the surface i would say without the water cooling you can probably do three
inches safely just with some fans and then if you're going to exceed that you definitely want
to get some sort of either air-conditioned room the aluminum cooled table or something to
help keep the resin cool while it cures then once we got it de-moulded and lifted down from
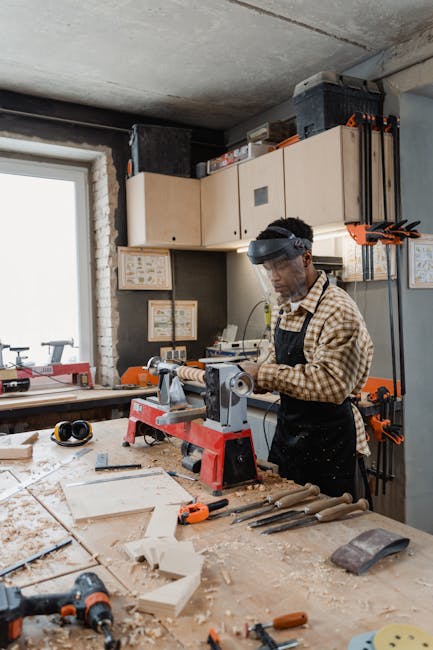
upstairs it's time to put it on our avid CNC for flattening so we actually do have two CNC machines
we have a Biesse that we use for door joinery and table joinery and then we have our avid
that's primarily just used for flattening so this is the bottom side and usually
the bottom side only takes a pass or two one thing though with this table is it's too
wide to fit through our wide belt sanders so to get all these CNC marks out we're going to have
to sand that by hand we like to start with the gem sander and then move to the murka for finish
sanding then it's time to get working on the base so this is another one of our cantilever
bases we've done one of these one time before and it was much smaller than this one so this is
the largest cantilever base that we've ever done the whole thing is constructed from solid ash that
we're going to be putting a blackened finish on and then we've just got our door dowels that
we usually use in our door manufacturing to assemble some of the components for this base
what you're seeing here right now is actually the the center support that will will hold the
whole cantilever up so that that's made out of three plies and then this is the fatter shorter
part of the cantilever that that center support actually passes right through the middle of so i
don't know if i'm doing a good job describing that but shortly here once we get assembling the
base you'll you'll see what i mean by everything and then here's that center support once it's out
of the clamps and what the boys are doing here right now is they're clamping it into the drill
press so that they can drill the angled joinery that's going to hold it into the
shorter fatter piece of the cantilever so again we're going to be using here these holes are going to be for big long
screws that are going to hold this together we could rely on wood glue or dowels but
the screws will actually help to pull the joinery tight so that's what we've decided to
do here and since this is going to be hidden inside the joinery of the base no one is ever
going to see these holes or see the screws so it's just kind of a nice
insurance policy for our joinery and now comes to the glue-up
of the base the final assembly so we do put a little glue on the one face for
that center support and here's the screw holes that I was talking about earlier so we've got nine
screws that we're going to be sinking in there so with all of that support you know this base
should be nice and strong we shouldn't have to worry about anything ever coming apart
or any movement in this space you know it could happen but we've purposely
over-engineered this base to not fail okay after final assembly is done we took
this piece to Jeco to get it blackened normally we do our blackened finishes by hand
but the top for this table was getting sprayed by Jeco as well so we just decided to have them
do the spray finish on the base so that everything matched so they do the spray stain first and
then once that's cured they actually go ahead and spray the same clear coat that
they used on the top on the base now that the base is back from Jeco you can
see the nice blackened finish with the clear coat on it uh it's time for us to install our
metal inlays so on our first cantilever base we did brass inlays this client though has a
lot of nickel in their space so we're doing aluminum inlays that are going to imitate nickel aluminum is nice because it's non-ferrous so it's
really easy for us to cut turn and polish anything like that it's just a lot easier to work with
and john here is just using a bead of silicone to help secure all these in place and then
we tape it in and in our experience the silicone does a really good job of holding
in small inlays like this for the long term oh the supports okay since this tabletop is so
large and so heavy we can't just rely on the wooden supports of the cantilever on their own so
we're actually adding some aluminum dowels on the overhanging edge to give some extra support and
stability so john's just cutting those to length on the Festool and then we actually put them on
the lathe to get a nice brushed finish on them okay switch around isn't that lovely oh that's a beauty
okay now that we've got the top flattened sized and sanded we take it over
to Jeco for them to put their finish on it so this is a two-component acrylic urethane that
they're spraying on here and we have been getting a lot of questions you know how do we decide
whether we're going to do an oil finish or a spray finish and it really ends up coming down to
the client preference so the pros and cons of each finish are I guess let's start with polyurethane
the pros are the biggest one is the durability it has very high resistance against any kind of
liquids or watermarking I think it's actually rated uh for resistance all the way up against
sulfuric acid you know i don't see why that would ever end up on a client's table but should
it happen, they're covered the downsides to a polyurethane though would be that if you get any
kind of accidental damage like a scratch or a chip it's not the kind of finish you can repair on your
own you're having to call us to take the table out of your house and have it resprayed whereas an oil
finish you can easily repair any damage but it is going to show damage easier so you're going to
probably expect to have maintenance like once or twice a year on an oil base finish table whereas
a polyurethane table that's well taken care of may never need maintenance it's just if something
should happen it's a lot more costly to repair okay so we've just pulled up to our clients uh
gorgeous home here um the table's very big so fortunately it's just a straight shot in but
if you look here the door is kind of narrow so it's a little bit of a tight squeeze through
there but then once we're through there that that should be the hardest part and then
the rest should be easy we're hoping you carried it more than me how heavy do
you think it i think it's like 500 pounds yeah at least 350 pounds on the low end do you want to walk right into where it goes on
the edge do the felt then stand it up yeah okay all right let's lift some weight here guys now even when it goes sideways
we can't grab this really no okay which way do we want to look at it I'll be able to get in but we're going to lose
support here I'll try to keep it here can you get inside here Curtis because you have to
there you go, there you go we're getting close on this side here it's tipping keep it
level, which way you want the cantilever to face maybe we can should we set
it on this edge here to do that was the hard part you're not going to
believe how amazing this table is this is incredible this is one of the craziest tables
like with the base concept and everything you don't have your felt certification i don't have
belt certification as of yet good yeah yes okay okay all right don't very well watch your head okay so we
want to pivot it now right as we set it down okay good i guess it's going to be easiest what bring it
off this way and then tilt it up that way to go in let's lift her up a bit guys okay don't come
this far we're good okay keep going alright and as soon as we get a vertical you guys
got to get under it too come under okay go vertical guys we'll be able to kind of tilt it
and walk it around three two one okay okay okay let's go yeah yeah overseas how did she go okay not too much, too much okay right
about there okay now she goes yeah because from here I just see glare thank you guys for watching this week's youtube
video this table turned out absolutely incredibly it's a stunning piece of cottonwood burl like even
just the piece of wood on its own it's very rare to find something this figured and this large and
then just pairing it with this nice midnight blue resin that ties perfectly into the other details
in the home with such a nice touch and then the cantilever base has nickel detailing and you can
also see matching nickel details on the chairs so I am overly satisfied with how this whole
project came together huge thank you to our clients for trusting us with this process
and allowing us to create such a beautiful piece and I hope you guys enjoyed watching
the process and we hope to see you next week