
hi i'm gene cavasses in this video i'm going
to show you how to build this really cool old style trestle table that can work
as a editing table or a computer table and you can build this using hand
tools and three simple power tools a circular saw a cordless drill and
an orbital sander so let's get started so i started by designing up a trestle table that
would be simple to build using two by sixes and even a two by six is a trestle and two by twos
to support it i'm going to also use a door as the table top and then i'll build a shelf on top
this should be really pretty easy construction so i've picked up some really basic materials
like some two by six by eight foot pine some two by two by eight and also some one by
eights to help build the top shelf of this design now it's going to be a trestle table style
which is really quite easy to build it's very sturdy and it makes a really good solid
table for the top i really wanted to go simple so i picked up a hollow core door now i went to
the big box store and found one that was bigger than the one i want but actually they don't make
one the size i want because the table actually is going to be two feet wide by six feet long so i
would have to have trimmed the top off anyway even if i could have gotten a 24 inch one but i didn't
so anyway this was damaged they knocked some of the price down for me so i'm going to be able to
cut it down to size re-glue some of those sides back in it clean it up and it's going to give
me a nice stainable finish surface to work from all right okay now i've cut this from both sections let's see if i can tear the part
i just cut and slide that into the place now that i've cleaned out all the cardboard pushed
that back and then basically trimmed off the wood i think we're ready to start gluing
it into place let's just start carefully gluing it back into place and
setting some clamps on it now keep in mind you want to avoid getting any glue
on the surface as much as possible because that's just going to be more that has
to be sanded off so that your stain will accept i'm going to keep working my way down through this you don't have to put all these clamps on it i
have them i put it on you could also just use some of that other lumber to set on top of it
as a weight so anyway i'm gonna let that set up overnight then we'll start cutting all of our
materials tomorrow to start putting it together okay i've let this set up overnight so it's time
to start pulling all the clamps back off of here we're ready to move to the next stage of this now going off my basic plan that i've laid
out i need to build the top piece for this and it needs to have the side pieces to go in i'm
going to push that out to the edging of the door to help support its strength because that's
where most of the strength is with the door so i picked up a 1 by 8 which is 7 and a
quarter roughly and a 1 by 6 which is about 5 and a half now i'm going to use this 1
by 6 to be the the height of the shelves and what i want to do is cut that at an angle
that all i have to do is slice that slice this and reverse these and i can have as many of
these as i want so if i go seven and a quarter and then like say i need to determine how much
angle now i'm thinking probably an angle of about something like that but i should make it to where
it's an even well that would be ten and a half so now we know here i got 10 and a half so
now if i go to the top i should be able to mark that where i want the next cut should be
there double check here seven and a quarter so that gives me two of them so
now i'm going to do the same thing a again so that's going to give me one two three
four and i've got room to cut an extra if i need one but i'm not going to do that yet because
i may end up using that for something else now this board which will be the top board i'm going
to cut it down an inch under and that's going to allow me to have just a little play of safety
back and forth once that's on the top of the on the top of the desk and get out
the saw and we can start cutting these okay so these are all now cut but you know now it makes me
think i may want to take the saw and put it on a slight angle and match this angle
here just to give it a little neater look to it i don't know if that's possible to do it with
the hand saw but what the heck let's try it okay i'm going to try cutting it i've
set this saw to an angle and i've clamped this down so hopefully it's going to stay well
enough and let me do it so let's give it a try okay i think it worked i think now
these boards will be able to set like that and have a very flush even look
to it i'm i'm really happy with how that that worked for doing it with the hand
saw yeah i'm going to use this as the lower trestle for this so this needs to now be
basically the same length as the same length as the um the table i may make it an inch under so it
doesn't protrude so we can go ahead and cut that now these are going to be the top and bottom
under the desk like the truss in order to do these right i want to make them probably 23
inches that keeps me down just a little bit short of being directly the same width but enough
to give you the strength of it so let's cut those okay now we're going to line up and i'm going
to cut these 2 by 12 to be the uprights we're going to need four of them for each of
the uprights now i'm going to cut these at 30 inches that's going to be a little high in
fact maybe i should pull it back down a little bit because i want the table top to be right
around 30 inches it's an inch so i could go 29 let's go 29 i know that's kind of odd height but
you're making this custom for yourself so do it make it how it works best now i have three eight
foot lengths that's gonna give me a little bit of a spare and i can cut off anything that i don't
like like some knots over there but i do think i'm gonna cut them at the same time if i can so here
we go okay so i i think i've got all of my pieces cut i'm ready to do some sanding so we can start
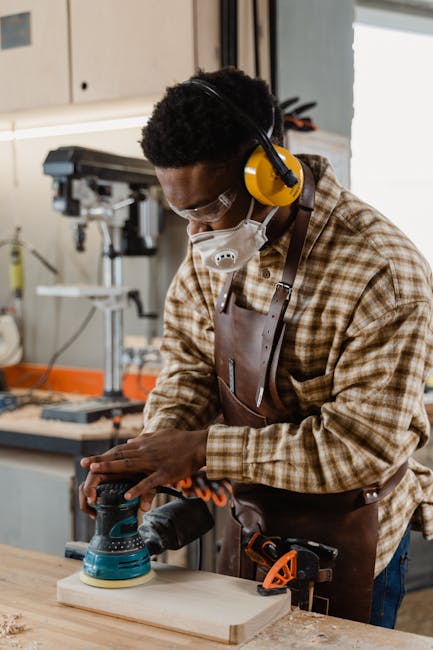
doing a little sanding with the orbital and get this thing ready to start staining and the next
steps okay i'm moving this outside so we can start sanding all of the wood down i'm actually going to
use a pretty coarse grit because i'm going to for kind of that spanish mission style and sometimes
that does have a little bit of a rough look to it before i start sanding i'm going to take
a wood rasp and i'm going to start knocking some spots off the edge of this along this is going
to give it kind of a used antiqued out or a relic look and uh and i'll do that
all with just using a basic rasp foreign well i've sanded everything down except for i
started thinking i wouldn't mind putting a second shelf on the the top piece that will hold the
monitors so this is all i have left of the board but i also have this piece that i trimmed off with
the circular saw on that same angle as the front of each of these so you know what i'm thinking i'm
going to laminate that to the front of this and make an extra shelf in there and utilize some
of the materials that i've got it should work i'm going to be using some star bond super glue
in a super thin this is great stuff if you're wanting to to get wood set really quickly and it
holds well and it does really well and i'll put a link in the description down below and i
think you can still get a discount from that link if you order from it this is
really good stuff now you could still use titebond with this the difference here is
you're just gonna have to wait longer and i don't have the patience and this stuff is fantastic
it comes in a thin a medium and a thick version and also you can use an accelerator that you
spray on before it's good stuff give it a try so now i'm going to glue these pieces up so i'm
going to take each of these and i've i've set this on top of a couple of two and a half inch
blocks so that i can use that and now i'm just going to take some of this thin glue
and put some of that along here like so and then i'm going to take this the
accelerator i'm just going to adjust that like that and set this on top to get
that setting up it only takes a second i'm going to do the same thing on this side and then shoot a little accelerator on there this down bring this in
see if i can lock that down there's that a little better stability let's set this up i'm going to want to go and
then right on the back i'm going to mark it here in here so i know where that's going
to fit so now i'm going to flip this up i'm going to go ahead and use the
thin glue again but if you have time and you want you could also use the tight
bond you're going to run a bead of this like this right here the accelerator real quick nice spot
like that i'm gonna bring this this up and drop it down here where i want that there
i am going to set a couple of finish nails i'm going to take a punch and just
countersink these a little bit that way i can sand or putty these a little bit
sand them and they'll they'll work just fine i'm gonna set this up on the end i'm gonna want it to
set inside about a quarter of an inch okay we're going to start staining this now and i'm using
verithane's oil-based stain you'll want to stir it well to make sure you get all the pigment up off
the bottom of the can this goes on really quick and easy i put some paper down underneath it
because it can be messy and also using some latex gloves once you've covered every side of
this i'll then let it set up for a few minutes and then i'm going to come back with a clean rag
and wipe it down look how the grains start pulling up and looking really good with this you're
going to want to continue this process through the rest of the staining of all the raw materials
on this and that includes the desktop as well but don't stain the sides i'm going to show you what
you'll do with that in a few minutes i'm going to let the stain just kind of soak into this door
for a little bit i don't want it to be spotty but i want it to have a rich color and i'm
afraid if i take a rag to it now wipe it off it's going to make it much lighter than what i
really want so we'll let that kind of chill for a little bit then i may take a rag and just kind
of lightly dust it off and i can tell already that i'm going to want to be careful and try to
keep this going with the grain oh look at that that's this is bringing this out really nice i
like i like how this is this is looking let's i'm going to take some of this polystyrene now
you can buy this at the big box stores this is an inch and a quart inch and a half excuse
me and by a quarter inch it's great stuff you can work with it real easily and it
cuts drills it's it's it's a great product and i'm going to drill this out and i'm going to
put some wood plugs in this to make it look like rivets similar to the um refrigerator steampunk
refrigerator i did i'll put a link up here in the top so you can check that one out too so
we're going to measure this often from center to six foot one half inches because the material
is a quarter inch thick so that's going to allow for a quarter inch over and i'll miter cut that
to fit so this front will be six and a half inches the sides will actually be 24 and a quarter inches
something you're going to want to consider picking up is just a little miter box frame these
are cheap and expensive that but they work great for cutting trim if you're doing trim
around like baseboards around your house or anything like this this works really
well you can use this with a simple saw and it will get more precise and you don't
necessarily have to have an expensive chop saw all i'm doing here is just scoring this so
i can heat it up and bend it i want to put a rivet on each side of this so i have the
two side pieces ready to drill the two braces and the long piece so i'm now going to
set up and drill those to fit this hole so this is the little wood plug that i told you
about and there will fit just perfectly down in that hole and we'll come back and glue them
in later so now you're just going to take this and just take a knife and just kind of pack up
the edge of it just occasionally not everywhere just to give it kind of a a roughed out
feel i've got these all drilled out now and i'm ready to start setting the plugs in these
but before i start doing that i want to actually use those to help me to secure these to the
top so i'm going to go out and i'm going to pre-paint and spray all of this and these as well
and then glue them in after it's installed okay so now i'm gonna go outside and spray paint uh all
this material and i'll use some gray some black and a little bit of a bronze tone to give
that that metal feel so i'll be right back i'm actually really excited how this
is going to start coming together so this has got a nice look to it one of the
biggest things to remember is try to use the same brand of paint with what you're working
on and that way you're guaranteed that the paint will adhere will work well with each other
especially when you're blending that all together i'm going to take these throw a little heat on
them where i've already grooved the back of these i'm going to set this up heat this up and get
a bend around these and let's see how that goes if you don't have a heat gun a
hair dryer will work just as well that works so incredibly well this makes a
perfect uh like a hinge style joint so that's going to work so now after i have bent these
over these are looking good i think i'm going to give them a little bit of a copper spray this
is also part of the rust-oleum paint and that'll give them a a little difference from the rest of
these and help them to stand out with the corners i'm excited let's uh let's start putting this
thing together everything is dried up on this so i'm ready to start putting it onto the door now
what i'm going to do is use some like liquid nail or construction and adhesive in fact i even have
a partial tube of flexi glue that my son gave me as a gift so once i have uh this glued down i am
going to take and put small wood screws into each of these holes to help secure the material down
and then i can put the rivet heads over the top of that i'm more interested in making sure that
i keep the glue though away from getting on the front of this that's not going to look good if i
get it there so i got to be very careful with that and put it down just like this come across
take one of these with the tapered end fine i'm gonna set it here i'm going to move to the hot glue now and
start gluing up the back of these wood plugs and setting them into the holes and then
just using a soft mallet tap them in there once you have those hot glued in they're not going
anywhere and you just move all the way around the desktop and it gives it a really cool old iron
rustic iron look so i'm going to just take a cloth and just kind of wipe this down i'm going to use
varithane triple thick water-based polyurethane for the top i think that's going to to work
better and this is supposed to be a self leveling now when you're painting you want to make sure you
as much as you can go with the grains of the wood as you see me painting it against the grains of
the wood there you'll see the bulk of it should just kind of flow right along with that and
with this i think you're going to really you want to work in about a 12 inch square area
and try to flow it out make sure it looks good it actually looks a little bit milky
that's okay because it dries clear you want to keep what's called a wet edge and
keep keep your paint or your your clear flowing on this if it's starting to
drag on you it means your paint is starting to to set up too quickly and
you'll end up with flatter looking edges back yep i can see lots runs
right under each of these i've put two coats on this and i'm not totally
happy with it i love the sheen i think machine's doing fine but it's gonna need a little bit
of a light sanding and i'm going to have to flood one more coat on this and
really kind of try to get this to to smooth out a little better
so i'm going to use some 220.
I'm gonna make sure i put enough on here so that
it really kind of floods out or it's you know this is supposed to be a self leveling so need
to make sure i give it a chance to self level okay i've got everything pretty well cut stained
clear coated we're ready to start putting this together so what we're going to have to do is
drill all these pieces and then bolt them together now i bought just regular bolts and nuts
for this so i'm don't really want shiny on there so i'm going to take them outside
and spray a coat of flat black on it i think that'll help to work with the metal that we
did on this and give it that design that we're hoping for one thing i think i'll do though
is because without with only using a cordless drill you need to make sure you're
drilling a good straight hole each time so what i think i'm going to do is i'm going
to pre-drill a template that will be the exact from the bottom with the two holes pre-drilled
that i can then set on top of each of my boards clamp it and pre-drill those and that
should help to keep me lined up fairly well okay this is going to be to
the front and it's the top okay thank you yep looking good
looking good on this side to the bottom the top this is the chiseled out part so i want to chisel
out part here to go with that fit these in okay here's the first one put together and i think
this is this is coming together exactly the way i want it to i think it's very strong it's it's
gonna it's gonna work it's gonna work pretty cool one word of thought is when you're doing this keep
your your holes as tight as you can this thing is tight and it made it a little difficult to tap in
but we got through it just be ready to make any adjustments but for the most part that's exactly
what we want let's put the other one together now that i have the basic side trestles ready to go
i'm going to go ahead now install these levelers for the feet on these this is going to help make
sure that no matter because wood can be wood and sometimes not be perfectly straight this will help
level it out and make it easier to set up the desk i've set this in place and just put a couple
clamps to hold help hold that into place while i kind of set this in
and decide my distance on these then i'm going to set this one up over here and
i'll probably use some clamps again just hold that into place make sure i have the fronts in the
right place because those are the ones with the all right let's say seven on that come back here
and look at this i think we can work with seven because i can adjust this one inward so i think
the trick right now is to make sure that i have this in the place i want that to be square
with a carpenter square to help make sure that this is in the right place i should be able to just use this same template that i made for cutting earlier and set
that into place just to drill my basic holes this is the same height as everything i need on this
and so long as i keep it consistent we should be fine i picked up a longer paddle style bit
that i'm going to try out that should be long enough to get me through all of these boards and
that will help with the setting these into place okay i've got the trestle part completely put
together this thing is strong i could probably park a truck on this i don't think
i want to park a truck on it but i wish i owned a truck because then i'd want to park my truck on this so now we'll put it down
and set the top on it and see how it looks okay i'm going to bring the base
in i've got the base set into place next is to bring the top down and to
make sure i secure that down properly i'm so excited about this table this is
going to to just work out so well for me i need to secure the top and the shelf
down to everything so it's good and solid i picked up a combination of
some black painted l clips that will work underneath to help
secure that down but on the sides of the shelf they need to be close enough to pick up
right inside that wood on that i'm actually going to use some little three-quarter inch
brass brackets i know they'll show but you know that kind of ties in with the corner
brass pieces on this anyway and we'll be okay okay then i'm going to put do the
exact same thing on the other leg and then we'll set the table on top
and put our screws up this will be okay now i'm going to scoot the table over that
until this drops just down in there like that this comes with the shop cap seal of approval
old world craftsmanship combined with turn of the century industrial design relic finish it's almost
as if diy gene collided with restoration hardware this was a really fun project i hope you'll check
out some of the other videos give me your comments let me know what you think or if you've got
some ideas and in the meantime i'll see you soon