
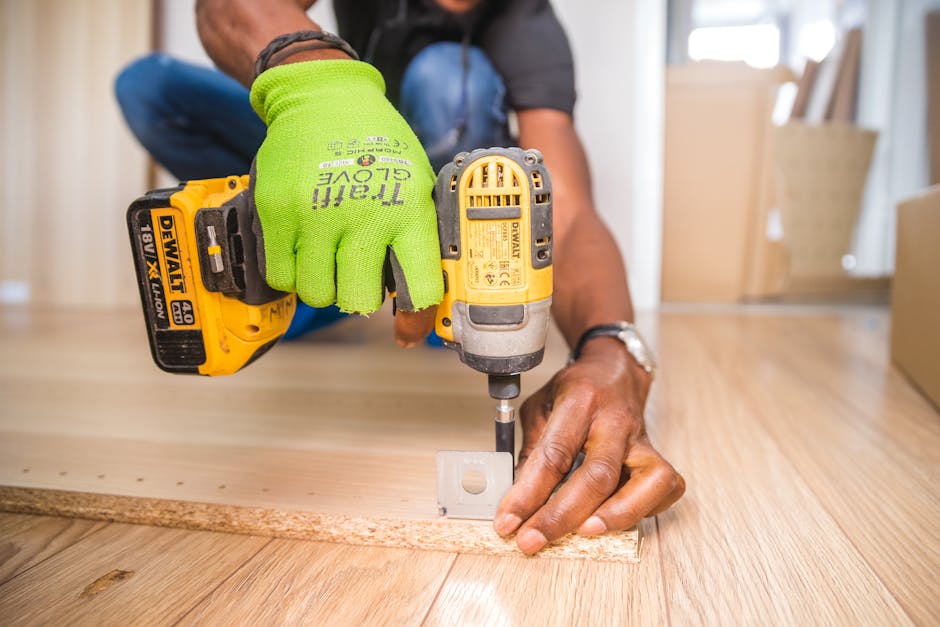
Assembling Artificial Wood Fences Assembled and stylish "resin wood fences" are made up of resin wood panels and aluminum components. Let's DIY using this tool. There are two ways to install the fence. One is to dig up the soil and bury the posts (posts) to install it. The other is to fix the post base to the concrete foundation. This time, we will construct concrete on this foundation. Decide the placement of the fence and post, and decide the position of the post base at intervals of 180 cm. Place the short side of the post base parallel to the panel. Mark the location of the holes that secure the post base. Draw the center of the hole to make the hole accurately. Drill a hole with a depth of 80 mm or more (12 mm in diameter) for embedding anchor bolts using a vibrating drill for concrete . Carefully drill a hole in the center of the mark. Make 4 holes per base. Sweep the scraped powder so that it does not get into the holes. If the bolt goes all the way in, the hole depth is OK! While pinching the bolt, turn the nut to tighten it and bite the nut so that the anchor does not spread.
If you tighten it too much, the anchor will expand and you will not be able to enter the hole. Place the post base in the hole. Insert the anchor bolt into the hole and hammer it to the end. After embedding the anchor, temporarily tighten it. When constructing with anchor bolts before February 2022 Drill a hole with a depth of 60 mm (diameter 12 mm) for embedding. Please note that if the hole is deeper than 70 mm, the bolt will sink and it will be difficult to remove it. Hit the anchor bolt with a hammer to embed it.
After embedding in the four holes, remove the nut and washer. Install the post base and temporarily tighten the nuts by hand. Now let's get back to the story and post a post next time. Insert the post into the post base. While checking the verticality of the post with a level each time, fix the post to the base with the attached drill screw. Please note that if you continue to turn it with an electric screwdriver even after the screw has been inserted, the screw hole will be scraped and you will not be able to tighten it. If you want to check if the screw is tightened , use a screwdriver to do it by hand. If screwing is difficult, use an L-shaped attachment or install a base with a pre-attached post.
Attach all posts to the base. Cover the top and bottom of the panel to be mounted with rails. Insert L-shaped metal fittings on both ends of the lower rail in this direction. Insert the rail into the post and slide it all the way down. After checking the level of the rail , screw the L-shaped bracket to the post. Finally, fully tighten the post base to firmly fix it to the foundation. Fence panel 170 is assembled with the convex sane facing up. Slide the panel into the groove of the post and fit the panel into the lower rail. If it is difficult to insert, insert it with a rubber hammer and work while checking the level of the panel.
Continue to fit the panel while paying attention to the direction of the seeds from the second sheet onward . If you want to make a gap in the fence to improve ventilation, insert the fence panel 95 next to the fence panel 170, and then insert the two panel spacers evenly. Be sure to put side covers 30 on both ends of the spacer . Fit the fence panel 95 from above.
Since the spacer is fitted in the groove with a margin, you can move it by hand even afterwards to adjust the position. If you want to fix the spacer, use an outdoor bond. The rest will be constructed in the same way. After inserting the planned number of panels, cover the rail from above. For the upper rail, insert the L-shaped bracket in this direction, fit it into the post, and fasten it with screws. The height of the fence changes depending on the combination of panels. When attaching the side cover to the top, cut it according to the post. Since it will be covered with a cap, mark it so that it is about 5 mm shorter , cut the side cover with a gold saw, and then return the cut side to the post. The height of the fence can be adjusted by the number of panels, but if you want to set the height more finely and freely, cut the top or bottom panel at the time of construction and adjust.
Cut and remove the rail side of the panel by the height to be adjusted, and adjust the height of the entire fence. Since the L-shaped bracket is attached to the upper part of the post, it is necessary to leave about 4 cm or more from the upper part of the rail. The width of the fence can also be adjusted by cutting the panels and rails. The panel can be easily cut with a saw. Rails can be cut with a gold saw, but it is recommended to use a push-cut or circular saw to cut aluminum parts.
Posts can be installed by connecting panels in three directions. The part where the panel cannot be inserted is hidden by the side cover of the same length as the post. Let's put a panel next to it in the same way and connect the fence. After installing all the panels, insert the side cover and finally fit the post cap. The resin wood fence of concrete construction is completed. The construction time is about 1 hour per span (180 cm)..