– Welcome back to the
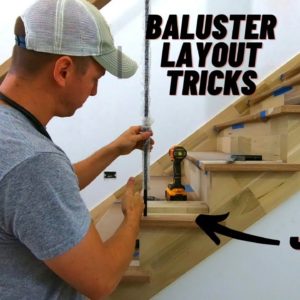
insider carpenter channel. In this video we cover baluster layout. Be sure to let me know
if you have any questions or comments below and
hope you enjoy the video. So, first thing I'm going to do is put down some tan masking tape that's gonna allow me to have something I can easily see my pencil marks with and that way I'm also not
getting pencil all over the nice treads.
The tape will also serve
to help protect the treads whenever I'm installing the
balusters using adhesive. If you get adhesive on raw wood, it'll often block stain from penetrating, and that can lead to
problems later down the road. Next, I'm gonna use my combination square to mark the center line of my handrail, where all the balusters will go. Using a double square
or combination square works best for this. To get the location of this line, you can just find the center
point of your newel post and then put your square
on the outside of the tread and align the end of
your combination square with the center post of your newel. And that's also going
to be the hand rail line that you wanna follow. – Now, the next step in the layout process is gonna be to figure out
the baluster's spacing. One note that's kind of important whenever you're laying out balusters, most stair guys will tell you
that a good principle to go by is to line up the front
edge of your baluster with the front edge of the riser.
That also makes layout a lot easier. That's what I typically always do unless I have some really weird
circumstance to deal with. So that's what we'll be doing here. The first thing that we need
to know is what the run is. Now, it's important, don't
confuse the overall tread width with the run. The run is the front of
riser to front of riser run. I don't know what else or how to say it. So front of riser to front riser, that's going to be 10 inches in this case, not the 11 and a quarter tread length. So we're gonna use that number 10 inches to find our baluster spacing. Now I know I have half
inch iron balusters here, and I'm gonna have
three of them per tread.
So the math is really simple. I'm gonna take 10 inches
minus an inch and a half, which is three half inch balusters and then I'm going to
divide that by three. And that's gonna give me three spaces of two and thirteen sixteenths. As you can see here, I
cut a jig 10 inches long, which represents my run,
front of riser to front riser. So I can push this to the back and the front of this is gonna line up with the front of the riser.
So from there, I'm going
to start out my layout. Now, I wanna find the center points and be able to transfer those
center points onto my tread. The reason I want center
points is to mortis these I'm gonna be using a drill bit, which to use correctly, I
need to know the exact center and then we'll use these
square bit to square them up. I found my centers and
squared down those lines. So from here, it's just
a matter of transferring those center points onto each tread. One of the important
principles of carpentry is to avoid mistakes
when it really matters. And in this case, we're
gonna be putting holes in these lovely wide oak treads. So we don't want to screw that up. So that's one of the reasons
I'm using a jig here. And whenever you do use a jig, make sure that you double
check and triple check it for accuracy, but once you do that, you know you can trust it and you're not gonna make
a mistake as you go along whereas if you were trying
to individually measure and mark with your tape measure, you'd be a lot more
likely to make a mistake that could really screw something up.
One important thing to mention here is to make sure that
your runs are consistent. I know that I have 10 inches
or at least really close to that on all of these runs. If you have inconsistency in your framing, and let's say some of your runs are 10, some are 10 and a quarter,
some are nine and seven, eight, you're gonna need to be
a little bit more careful with your layout. A jig won't work as well for that. An important note on newel post placement whenever you're placing your newels, I like to try and make it so the space between the edge of my
newel and my baluster is the same as my baluster spacing and that's how I determine
where I want to locate my newel.
So you'll see here, the
space between my newel and the front of my riser is the same as my baluster spacing. Also wanted to show here,
same principle applies. We've made the jig for
the easy (indistinct). Now I've got this off
angle, which is a 26 degrees so I cut another piece, 26 degrees, 26 degrees minus an inch
and a quarter nosing. And I can put my marks on
there and then transfer those to each step also. So now that I've got all
my center points laid out on my treads before I mortis
these it's really important I transfer that center point up onto the underside of my hand rail.

Now, to me, there's probably
a lot of different ways that you can do this but what I always do is just
use my trusty PLS 180 laser. It's a little more about
10 years with this thing it just won't die. And I just line up the
laser with my center point and I just take my pencil and
marker, cross that handrail, move it over. Same thing. All right, timeout for a second. I just about screwed something up, got a little ahead of
myself making the video and thinking about that
instead of carpentry work. This is really important, a long hand rail like this,
whenever you put it in place, even if it was straight,
when you put it up, it's gonna sag a little bit
without having any support in there.
And what happens is whenever it sags, that's gonna throw off your marks from where they're supposed to be. So then if you have the sag
in it and you mark your holes on the underside there borum, and then put that handrail back up and try and straighten it later
is going to screw things up. So right now, what I need
to do is I need to make sure that that is still
running perfectly straight and if it's not, I need to
put a temp support in there to give it some support and
help it support its own weight. And I'll show you why here. Let's go around to the
underside of this handrail. Now you can see here
where this lasers are, and I just marked that. But watch what happens whenever I push up or pull down on this handrail and see how it's throwing
off where that mark is. So that's really important. It's really important to watch that before you start marking out your holes.
Thankfully, this one was
pretty close to straight, but I'm gonna double check it
here before I go any further. And if I need to, I'll erase these marks that I've gotten the
center here and redo them. One of the easiest ways to check and see if the handrails nice and straight is to grab a long level and use that. So here you can see my long level. See I've got about an eighth inch gap, so I need to prop this up a little bit. It's not terrible, but not great either. Now, I can see, I don't know if you can see it or not, but that threw off my
mark about a 16th inch.
So I'm going to go ahead
and erase these through here and just redo those quick. Now we're back in business
and off to the races again, as you can see again, using the PLS 180, just a line laser set on the
plum setting to hit my marks and plumb up to the bottom
side of that hand rail, same process up top when this off angle, just make sure that your
laser is perpendicular to the handrail as best as you can, doesn't have to be perfect. So, now the underside of
the handrail is marked for all the balusters and this is possibly
the most important part of this process.
You need to double check to make sure you didn't make any
mistakes with your layout and the easiest way to do
that is to measure the spacing on the underside of your handrail to make sure that that is consistent. And it's going to be really
easy to pick up a mistake if you made one by measuring. So I'll show you what I mean, I've got all of my marks
on the underside here so now I'm just gonna
take my tape and measure, it doesn't have to be exact, but just getting close
between each of my marks and those should all be close to the same. And by close I mean, I'm talking within an eighth inch or so. But if you made a mistake and let's say I've got a three quarters
of an inch difference, that's a dead giveaway. It's important to remember even the best most experienced carpenters make stupid mistakes every day, but the truly great carpenters
and productive carpenters know when it matters and
know how to not make mistakes when it matters. So in situations like this, if I miss something and I just go to town, putting these holes in,
it could be a disaster, I could ruin the whole hand rail, I could put a hole in a
tread in the wrong place, but by double checking, in the end you'll be much more productive.
I think this is a
situation where you can say "Slow makes smooth, smooth makes fast" Just take a little time, make sure you're doing it
right before you go to town making holes and stuff. And life is just a lot
less stressful that way. – At this point, I'll go ahead and check all my measurements, make sure I've got consistent spacing and then I can take the
clamps off my hand rail and take the handrails down. Before you take the handrails down, you may want to make some
marks on the newel post that way you can easily get those back exactly where they were before. Hope you guys enjoyed this
video on baluster layout. Be sure to check out the
previous video on balcony layout and mortising the balcony,
shoe rail and handrail. The next video will be about
how to tackle the mortises on the rake, how to mortis them, how to make square mortises in the treads, as well as the handrail with
the hallow chisel tilt mortiser So be sure to stay tuned for that.
Thanks for watching. Don't forget to like and subscribe and we'll see you on the next video..

