How you doing? I'm Matt with 731woodworks.com. Today, I'm gonna show you
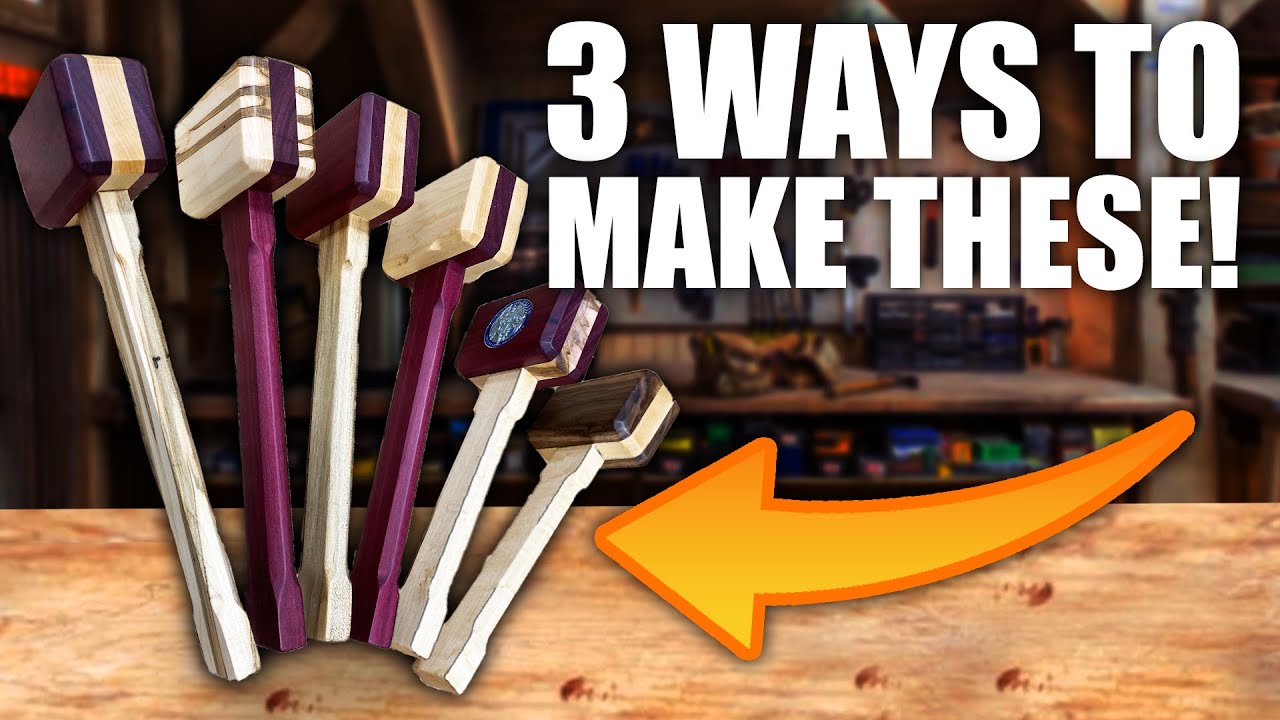
how to make these mallets. So you can make a mallet
out of most any hardwood, it's recommended hardwood if you're gonna be beating on things. These are actually made to be show pieces. So you're just gonna sit them on a shelf. So I've got three versions for you, ready? First version is just a plain mallet.
We got ambrosia maple,
purpleheart in the middle and a purpleheart handle. It doesn't really matter what
type of wood you're using but this ambrosia is absolutely beautiful. Check that out. Oh my goodness. That's my favorite. This is my pick of the litter. My pick of the litter. Second version is a weighted mallet. So this one is weighted inside the mallet. You can hear it (rattling) Hear that rattle? There's BB's inside. So I put steel BB's inside
this (bearings tapping). It's weighted (rattling) This one has purpleheart, ambrosia and then birdseye maple in in the middle. Absolutely beautiful. The handle on this one
is absolutely awesome. Third I wanna show you how to embed a challenge coin into a mallet.
This one, this is a
ReLEntless Defender coin. Come from relentlessdefender.com. Totally not associated with me. They don't even know who I am, but they make awesome shirts. If you've seen that shirt,
"In God We Trust," shirt that I wear, it come from them. I bought this challenge coin from 'em and it's gonna be a coin on
each side of this mallet. You'll wanna stick around. In this video I'm gonna tell you an amazing story on how God works, and how He worked through this mallet. If you make one of
these mallets like this, please do me a huge favor
and tag me @731woodworks. Best place to find me is on Instagram. I bought from woodcraft.com,
ambrosia maple, birdseye maple and some purpleheart. I'm gonna attempt to make
a unique-looking mallet. So I will be using my
jointer from Brother Riv, 'sup, man, thank you, sir. Also, if you haven't seen
that video well check out the, "Wahuda Jointer Unboxing", awesome. A really awesome story on
how I got that jointer. Now I'm gonna use the
jointer, probably the planer and the table saw, my miter
saw, things like that.
So it's gonna be a power tool build. There are some ways to build
these with only hand tools. I'm not that guy. I have this mallet, okay. I gave you the other two away. One of them was given away in
a "giveaway" a few weeks back and then another one I sent to a friend. So this is the only one I have left of the original three that I made. This is a white oak mallet. You've probably seen me
use this in my videos. I've beat on stuff with it. Pretty simple build. Basically you got three
part or actually five part. One, two, three, four five. So these are two pieces on each side. It's gonna sandwich (smacking) in there.
I'm gonna show you how to do it. It's real easy. Six parts if you include the little wedge that goes in there. First thing I will do
is cut my wood to size. I want my handle to be
about 12-ish inches. This one's a little bit long. I think from the bottom it's 11 1/2 inches from the bottom of the mallet though from the top it's 14 1/2. I'm gonna cut some handles out. So this has a little bit of a twist in it. I'm gonna use the jointer to
face-join it and get it flat. And then I'm gonna– This is a five inch
wide board by two feet. That's what I order from,
this is bird's eye maple I ordered from Woodcraft
five inches by 24 inches. I'm gonna edge joint one side, cut an inch and a half strip out, that's gonna be my handle,
1 1/2 inched handle. Then I'm gonna use the remaining
three and some odd inch piece and cut a three
inch strip out of that to make the sides of my mallet.
So it'll be three inches this way, handle's an inch and a half
wide by 3/4 inches thick. We'll probably do some rounding over or some chamfering on the handle. Kind of like I did this one, give it a little bit of a detail, just so that it's just
not a square handle. These are the three inches. I cut these on five inch angle. I don't really like that
angle, five inch degree. I think I'm gonna move that back to about a three degree angle. I think that'll be a little better for the (smacks lips) dead-blow part. Edge jointing coming up. (lively slide-guitar music) Now I'm gonna rip an
inch and a half strip, set my table saw, add an inch and a half and that's gonna be my
handle, an inch and a half. And what I'm doing is I'm
gonna take an inch and a half out of this board and inch
and a half out of this board. I'm gonna go ahead and
get some handles made, before I start cutting
out the actual mallet.
This purpleheart's very dense. It's very heavy. We'll cut it first. My blades all cleaned up from
the stuff I use the other day. Put that jointed edge up against
that fence on both of them, brother Riv come through
again, new push sticks. I'm gonna use this. Never used it before. Got a nice little thing says, keep my hand away from the blade, here we go. (saw blades whooshing) (lively slide-guitar music) Now imma move my fence
out to three inches. I know that I want the head of the mallet to be three inches tall. And all of these are
more than three inches. So imma go ahead and rip everything down to three inches and then
we can start build 'em out. In case you don't know ambrosia
maple by far my favorite. I love the wood grain in that. And I can't wait to see
what the mallet looks like.
(fast-paced instrumental music) I'm going to cut the handles to length but because my piece of maple was only, bird's eye maple was only 24 inches long, I'm gonna go ahead and
cut this right in half and make it 12 inches. These are going to be
short handled mallets. Should I do that? These will be purpleheart
handles at 14 inches long. And then of course, once they
go through the mallet head and get trimmed off a little
bit they probably going to be around 12 1/2, 13 inches from
the bottom of the mallet here. Imma get two pieces out of this. So we'll have two handles
here, one handle here. (lively music continuing) I'm going to have a little piece over.
I'm gonna keep this
because I'm going to need to cut some wedges with this. (wood clanking) You'll see why later. So this is where a table saw
is going to be imperative or very very handy, unless
you can do it with a handsaw. This makes it a lot easier. So I built this G, all it
does is sit over my fence. So whatever width that
goes over your fence with this, this piece just
holds these two together. And then I've got a flat
part that goes vertical sits right down over there. What's that's for, cause we
got to cut some shoulders in these handles so that the
head slides down on there and then lands on top of those shoulders.
So we're going to be
taking just a blade width off of each side of this handle right? (upbeat music) On the jig, this piece is at a perfect 90 degree angle with the table saw. It doesn't really matter
about where you put it so long as it's enough
room that when you push your jig by still got some room back here. I raise my blade up to three 1/8 inches because my hammer or my mallet
head is three inches thick. So I want this to go all the way through and stick past an eighth
inch, trim it off.
This needs to be clamped on. Don't try to hold it because
bad things can happen. Good and snug. It's 90 degrees angle back here. I want only the blade width on each side. So we're going to cut this side, flip it over and do the other side. (lively guitar music) You know what time it is? Power tip time! All right. Hi, so I messed up. See that that's not 90 degrees folks. It's about 88 degrees. I forgot to check to make
sure that my table saw blade was perfectly square with the table. So you wind up with that angle.
I got it fixed. That's the power tip. You make sure that that
blade is perfectly 90 degrees with your table saw table
and the blade is 90 degrees or you'll wind up with that. I still think I can work with that. I'm going to give it a try,
but for the rest of 'em. So I got this little magnetic tool. You just set it on the table saw bed, it's magnetic, click calibrate.
It goes to zero. Then you put it on your blade. Then you can set your blade. It gives it a perfect 90 degree angle. These are extremely fantastically awesome. You should get one. I'll drop a link in description below. If you want to check one of
these, let's get them back to making those shoulders
on those handles. Also you'll notice that I
cut too far in that more than I wanted, I just want
to take the edge of it off. I don't want anything
left hanging like this. Some of that has to do
with the wrong angle. Some of it has to do
with, I was too far over. I fixed that. Now I'm going to cut the rest. (lively music) Right, so now we got the shoulders cut. We gotta to cut a split
right down the middle so that we can drive a wedge in there. And that is going to
wedge it into that mallet. So I don't want the split going
all the way down, obviously.
So we're only going to make
it about halfway there. We won't drop that blade down. (clamp handle squeaking) (clears throat) So I'm going to drop
the blade down till its 2 3/4 of an inch tall off to the table. That's going to give us a slot right in the middle 2 3/4 inches. It is going to be a little less
than what the shoulders are. Some people go all the way, the same dip. I just, I prefer not, no really
right answer I don't think, just whatever you want. So we've got to move the table saw jig in that it's halfway.
So the halfway point is going to be just a little over 5/8
of an inch over each way. So, and you're not building the clock. Okay, so if that's not perfectly center, it may look a little off but it's still going to work just fine. Don't fret too much. Now the main thing is
getting that first cut on your first piece as
close to center as possible. If it looks off and you're
making more than one mallet, then you can move it at that point. But I'm gonna try to get it close. We'll try that and see what happens.
(upbeat music) I cranked that splice or
this clamp down pretty good because I don't want this
thing to move at all. (saw blade whooshes) (lively music) It's pretty close. (plank clanking) Pretty close. Hello?
(fast-paced music) Got 'em all cut out. What we wound up with, I've
got two purpleheart handles, two purpleheart handles with a groove cut right in the middle or dadgum
close to the middle anyway, close enough for what we're doing. And I've got two maple handles. And then I had a leftover wide Oak handle that I found the last time I made mallets. It was about probably a year
and a half, two years ago. I had this piece leftover. If you're only building one
mallet at home, that's okay. You can see, I got these
shoulders cut on there. They're about an eighth
inch is about all they are. We've got that slot cut down the middle and it's about maybe a half
inch less than what the other is about a half inch less than
what the shoulders are. I just prefer that I don't
want it to go all the way down and then take a chance
to shove him through when I put my mallet head So now we're going to start
cutting that mallet head.
I got old trusty here and that's what I'm basing this design off of. I don't like the five degree angle that this is cut on,
though I'm changing that. I'm going to make three degree angles. However, first I'm going to
cut these pieces out to size. Then I'm gonna start
putting this thing together. So I've got a little glare,
but we're going to go in and cut these out more square
the end of this board up.
And then I'm going to
cut four 1/2 inch pieces, and I'm going to cut several of them because I'm making several mallets. If you're only going to make one mallet you're going to need
three, 4 1/2 inch blocks. Well, I gotta square it up first. (saw blade whirs) Well, if I had some
stop-blocks on this miter stand (blade whirs) so I like to lay my pieces
on top, flush this side up. You've seen me build
before, you know I'm going to just slide it back till it touches that table saw to the blade. We're going to make sure
this is still flush. If it's touching that blade
and this is still flush these should come out exactly the same.
(saw whirs) (lively instrumental music) (saw sawing) Purpleheart. Now I wanna saw these
into the pieces I want. So I got purpleheart, ambrosia, bird-eye. So I know, so if your
mallet's gonna look like that you're going to want to know which side is going to look best. I like the stripey side. So I got enough ambrosia there for that. I've got a birdseye over here. That's birdseye, birdseye, ambrosia, ambrosia inside there, that's ambrosia. It'll look good on the ends though. So we know that's what you
do, is just going to pair up what you think looks best. Got some Walnut I had leftover. See, there's a different color there. And when you cut Walnut little
way, gotta love the smell. Then we got that bird's eye maple, gonna have one of those
with the purpleheart center, purpleheart, with the
birdseye in the middle.
So I've got five. I got five mallets I'm going to make, they're basically (speaking gibberish), basically going to look like that. Each one of these centerpieces,
I gotta cut in half. So I've got my edge pieces. That's why you need to figure out now which ones are going
to be your centerpiece 'cause you're fixing to cut those in half. Half, a 4 1/2, there's 2 1/4,
and imma cut that in half. That's too close to my little fingers. I got to find something to hold that with. (upbeat music) Slow and steady wins the race! (blade whirring) So I'm gonna take my combination square at two 1/4 inches and make
a mark down the center. These are lined up, should
be able to take this put it on that line, looking
straight down in there on that line, line, everything up. And then mark the outside edges of this. You're not gonna be
able to see it on camera but you can look down through
the slot and see that line. Put it right in the center.
Before I start gluing (clears throat) I'm gonna measure not from the cut side but out here on it's edge can
see if I got an equal distance on each side, should be
about an inch and a half. That is inch and a half exactly. That's square, so I'm gonna
mark both sides of this. That way I know where the handle's going. I'm not sure if you
can see that on camera, but the line her, line here, we're going to put glue over here. We're going to glue these
pieces on up to that line. I'm using Titebond 2, don't be shy, one of a kind glue spreader out there. You probably have one too. So you don't, it doesn't matter
if it squeezes out up here or up here or around this
edge you don't really want a whole bunch inside there 'cause you have to clean
that up, the handles or when the, it would
just be a hole in there You had to try to get in there to it.
I'm just looking to see which
end I want to show through. I think I want that through one through just because I do,
lined up with that line. I'm just going to take a brad nail and nail it in place to the glue. It just keeps it from slipping
and moving when you clamp it until your glue dries, (brad nailer smacks) it only takes a couple of 'em. When you go to put the second one on, you're going to line that
with that line obviously but also whatever handle you're using you gonna stick that in there and then just push this
piece until it snugs that up. So you shouldn't have
any, any gaps here at all. Make sure these outs, not
sure what all we missed. 'Cause my battery went dead. You gotta put that handle in there press this piece up against the handle. Make sure they're flush on each end on the out on the top and
the bottom of your mallet and then tack that on there and then you can remove this handle.
We're going to glue and tack this piece. We're not going to tack this. We're going to glue this on and then clamp everything together and let it dry. (lively music) I know I need a brush. We're just going to eyeball
line it up on each side. (music continuing) Should start seeing a
little squeeze out out here, probably on tops and
bottoms like that as well as on the inside corner
and you're going to have to get something in
there and get that out. You don't want to leave that
glue popping through like that 'cause it's going to restrict your handle when it goes in there. I've seen people use pencils or whatever. Just the end of this
pencil will work just fine to stick in there, just
something that's got a pretty good sharp point on it and just get that out of there.
We'll clean that up and then
we'll let this part dry. We'll wipe up any excess squeezing out with the damp rag and
then we'll let this dry while I put the other ones together. Still curious to see if imma
be able to make this one work. Get a damp rag. More you clean up now, less
you've got to clean up later. (upbeat guitar music) I got most of that glue cleaned up. Imma let that dry for an hour or two before we start cutting it. So I'll show you how I'm
putting together one more before we move on to cutting everything. Is that going to be prettier or what? This is that ambrosia maple,
that stuff is so pretty. It does have a little
imperfection, those little holes, little pin holes and things,
that's just part of the wood but those stripes that's going
to be pretty, pretty-pretty. Same thing, 2 1/4 inches. We're gonna mark the center,
sure you mark the right side.
And I always just flip this around and make sure that we're
still in the center. And just in case this moves somehow. Now I want a purpleheart handle, this, and then on this one, we'll
put a maple handle on it. Kind of get those contrasting colors. I think that looks really good. I'm actually really excited to see how this ambrosia mallet
is going to come out.
(lively instrumental music) (brad nailer smacking) When we started putting
these things together we're going to need some
wedges to go inside here just going to put the
miter saw at 3-degree angle and cut a small wedge,
so it's gonna be about an eighth inch at the top,
maybe a 16th at the bottom. Give or take we'll put some glue on there. We'll drive it in there once
this is inside the mallet head and that's going to wedge
everything in place. It doesn't have to be all, some people cut them all the way down. I don't think that's necessary. I usually just cut them about, well, they're an inch and a half wide. So it's going to match this. Just going to cut several out of this and a couple out of the maple. (saw whirring) Cut it slow, and it'll
will come out there. (saw whirring) If you want to add a
little weight to the end of your mallet you can just
drill some holes in there. We're going to put some steel
shot in there like BB's. I've only got this three
heads I wish I had a one inch.
I'm just going to drill a
couple of holes on each side. We'll fill them up, then we'll
put the other piece on top and that'll lock everything in. It'll just give it a little more weight. (machine drilling) I just drew down until I hit that other purpleheart in there, brad nail's right in the way. We'll see if I can remove
that brad nail, move it. And then we'll put another hole in there. (drill whirring) It won't be a whole lot of weight, but it'll be a little bit. A lot of people put some brass in there. You can see 'em put those
brass fittings in there. So this is just copperhead brand. BB's comes in like a pouch of 6,000. (BB's rattling) Yeah, started goin' everywhere. So this is not going
to add a ton of weight, but it will add a little and make it more, a little more heavier on the top side.
Some people prefer that in their mouth. I'm just showing you
because, so you'll know. (BB's rattling) All right, BB's! Y'all realize I'll be finding
these two years from now. I just want to make sure
that they're not sticking up and it's going to cause
you any problems there. (lively instrumental music) Once you have them in there
you can take some CA glue pushed down in there,
I'm just going to put some wood glue in there,
it's going to make that hard and kind of lock everything in place. Keep them from rattling around when you will hear that pshh,
pshh, when you're rattling or when you're hammering something.
(upbeat music) I'm gonna give the handle's
a little definition. We'll use my little Palm router with a 45 degree chamfer bit on there and I want to attempt to
make it look all right. You don't have to have a chamfer bit. You don't have to have a router. You can just round them over a little bit with your sander if you want to, but giving them a little more, I got a round over bit that I'm probably going to use as well because it's really comfortable in the hand when you round them over, I'm worried this chamfer
bit may be a little harsh. I don't think so though. I think it's going to be nice because I tried it on
this piece of leftover. I had it worked out pretty well. I like how it looks, so I'm gonna try it. The only thing I don't
know is if I want to, I don't know if I want
to take it all the way to the end and have it
all the way like that on both sides or leave
it like this on the end.
Hmm. Decisions, decisions. So I run a little test piece. And so if I chamfered it
on both ends on both sides I get that weird point on the
bottom and I don't like that. But if i chamfered down
to, and then all I did when I'm running my router
down, I just stop it where the edge of the plate is. And that gives me that
look and it makes it the same all the way around. I liked that better because
it gives it a shoulder for your hand to stop on. If I don't have that, it could be slick. And your hand could slip
off if you're using these, although I'm hoping they're for display. And just so as we're on the same page I'm going to stop it this
much away from the end.
Where the plate ends as
well as up here at the top. So it should look similar to this one. (planer whining) Whoa, wee! That's good and snuff as they used to say. I like how that worked out. Purpleheart's a different kinds of beast. You need really, really,
really, really sharp tools to work with it, to not get any fraying. I read about that or
saw some videos on that.
But for the most part
that come out really nice. I'm going to send this to 220 grit and then this will be ready, ka-blam! To go in the mallet. (laughing) I can't wait to see it. It's going to look good. It's going to look good. I hope it looks good. I'm going to do the other
handles the exact same way. I'll try to get a little
close-up so you can see exactly where I'm stopping and starting. Basically, I'm just taking that
plate right up to the edge. You just want to stop at
the same spot on each side you can set yourself up
a jigsaw to this perfect. Or if you'd like me and
you're not building a clock just guesstimate it. And it comes out really close. I don't think you'll ever be able to tell. (lively music) So, I got them glued up. I'm going to let them sit overnight.
It's actually a Saturday. It's going to be Monday
before I can get back to them. You won't know that if
you're watching this, only because I told you, you'll know that. I did put one together
whoop, whoop, whoop, sneak peek, and see if
it was going to work. It was glued up about two and a half hours and I consulted with brother Riv who makes some awesome cutting boards.
I consulted with him
and he thinks I should let them dry for about six hours. So that's what I'm going to do. Also out of this bunch, brother Riv's getting the pick of the litter. I'm going to send him one of
these, whichever one he wants just because he's an awesome guy. He gave me that Wahuda jointer. I have no way to repay him
back other than gratitude. and I want to give him the first batch or the first one of this batch. (upbeat music) Also in the event that
nobody's ever told you, purpleheart is very hard to work with. It's a very dense wood. You can tell it. When I got that board
it was a really heavy.
Just one board was really heavy. So it's really dense,
tightly packed fibers. You need sharp tools. A good thing I cleaned my blade last week, so the blade is nice and sharp. It was really clean, so it cut good. The 45-Degree Chamfer bit. I got a cheap bit, so
I'm gonna be ordering me a Freud 45-Degree Chamfer
bit from a router. 'Cause it'd be sharper,
and will the last longer. The one I've got was just
a cheap one off of Amazon. So I recommend the Freud
bit because they're sharp and they last a long time.
All right, let's get back at it. So we'll just take 'em outta
the clamps when I come back, and then we'll get started
with the rest of the build. I wanna show you what I got so far. The test one is ambrosia
maple in the middle, purpleheart on each side,
with a birdseye maple handle. This thing is beautiful. So this is purpleheart with
birdseye maple in the middle. This is ambrosia,
purpleheart in the middle. This is walnut with
birdseye in the middle. I had a piece of walnut from
that box I ordered off Amazon. Remember that in the,
"Where to buy wood" video. So I had walnut. I used that piece of walnut for that. And then we got birdseye, purpleheart, purpleheart, birdseye. So we got a lotta good
combinations going so far. That one's my favorite. This ambrosia one, the one
that's ambrosia on the outside is by far my favorite so far. And I'm going to have a hard
time letting this one go. Just gonna tell you that right now. But if brother Riv picks
it, (bang) he's getting it.
How ya doin'? We're gonna finish up these mallets today. That ambrosia maple with that
purpleheart in the middle. You're gonna see that
ambrosia figure right there. This one's gonna be pretty. So we're doing mallets
three ways, obviously. We're gonna have a standard
mallet, just like this. Nice. Yes. I built a weighted head
mallet as you seen. Put those BBs in there. (BB's rattling) You hear that? I thought maybe putting that glue in there would seal that in there,
and wanted to to make it to where they wouldn't
rattle, I was wrong.
It's almost like a (rattling) ♪ Come on baby ♪
(rattling) ♪ Let me talk to ♪
(rattling) ♪ Talk to you about a songa ♪
(rattling) ♪ Baby I don't know this songa ♪
(rattling) (Chukachukachuka)
(rattling) And for the third mallet, I had an idea. I don't know if this is gonna work. Actually, I think I know it's gonna work. Pretty sure it's gonna work. Back on the channel, if you remember, I embedded a coin into a display. If you don't know about that, go find it. Be a cool little treasure hunt. So I have this coin right here. This is from relentlessdefender.com. They put out a Challenge Coin every year, the 2019 every officer that was killed in the line of duty.
I don't want to make light of the fact that they gave their lives. Attacked in their city,
their county, their state, this country. I appreciate their sacrifice. And so I wanna dedicate
this mallet to them, and we're gonna embed
this coin in the mallet. So I went to Ace hardware and got a 2-inch Freud Forstner Bit. You wanna use a Forstner Bit for this because they cut so clean. And so this is a test piece of spruce. I wanted to make sure
that it was gonna fit before we did our mallet. Spruce, 2-inch hole (soft
clanging), and we're gonna embed it into the mallet just like that. That's gonna look sharp. Now, just to decide if I
wanna put it in a purpleheart or a maple. So I'm just gonna… So that's what it'll look
like on a purpleheart. That's what it'll look like on a maple. I really liked the way
it looks on that maple.
Probably gonna go with that. First thing I wanna do is
cut these mallets down, and get them exactly ready before I embed it into the mallet. That way we can get our
center because when you start cutting these things you may
cut a little more on this side, a little more on this side or whatever. A little more to the left,
and you don't want to have it off-center.
It'll look kind of goofy. You don't want that. Let's roll. So you don't make the same
mistakes, and mistakes were made when I was making these mallets. When I clamped them together I didn't put, either a scrap piece, so I
don't have parallel clamps, and I need to get some. The parallel clamps… When you use these F-style
clamps, that little circle that you're clamping down, will actually put an
indentation into your piece. So make sure you're either
using parallel clamps or, before you clamp you
can just take a scrap piece, lay up against it and
lay up against that side and then just clamp everything down.
And then when you're gluing everything up, these two pieces will
be sandwiched in between the two test pieces and
it won't cause any damage to your work. How I'm going to fix that,
is I'm gonna take the jointer and just joint about a
64th off the face of it, at a time, until that
little mark has gone. I am also gonna take the
jointer and joint the top and the bottom, so that all
of that is exactly even. Don't have a way to do that,
you can use your table saw. Just be really careful because
it's such a small piece. You should come out pretty close to even. If you don't feel comfortable doing that just take your sander and
sand that down smooth. (rhythmic guitar music) So this ambrosia maple has holes in it, like wormholes, I guess.
I don't remember exactly what they are. But they have those
little pin holes in there. One I had made an ambrosia maple handle for one of these mallets. And this is just Starbond CA glue. I have a video on this stuff. If you wanna go check
that out, I'll put a link in the description below. But basically use this to fill knot holes as well as stuff like this. This is brown and so I'm just gonna drop in those two holes there. And that way it would just seal
this up and just let it seep in there just a minute.
And then this is the activator. Spray that activator on
there, and that'll dry within 30 seconds. And it'll be ready to sand,
joint, whatever you wanna do with that there. That both holes will be filled. You don't have to worry about them. That's some really good stuff. I did this a couple of minutes
ago and it's extremely dry. You're not gonna cause any issues. I'm gonna sand all this flat. We'll get rid of all that extra.
For the mallet heads now,
you can use them square, you can cut them square. But whatever degree
angle you want on there, I prefer three degrees. Five degrees… I made a mallet five degrees like this, and I just don't like that angle. It seems to be too sharp especially if you're
using it when you strike. It just seems to be too
steep of an angle for me, for my preference. So you do what you wanna do. "You do you," as they say. So, the top angle you
wanna make sure they're cut opposite each other. So that again, it looks like this. (handle clanging) So I'm gonna cut this angle
and then we'll move it, and cut this angle. So I'm just gonna make
sure that the blade… Around here where you can see. When we pull this down, we wanna make sure that blade barely cuts
the edge of this end off. And the reason for that
is we're trying to save as much material as we can.
So we're just gonna cut that edge off and then we'll do the same
thing on the other side. So about halfway of that
blade, the half, the width of the blade should be right there. Let's cut it. (blade whirring) (mallet head banging) Just roll her over, exact same thing. Just about halfway. (saw blade whining)
(rhythmic music) (rhythmic music) Now you have a couple
of options on what to do with your mallet. You can take something
like this tiny little plane and just scrape the edges
off around those over. You can take your sander around those, sand those edges over. You can take your router,
do a 45-Degree Chamfer like I did here, all the way around. Just make sure you have a really sharp bit because that purpleheart don't
like dull bits (clanging).
And it's not without its imperfection. It caused some chip-out here
on the bottom, see it or not. But it caused some chip-out there, and then a little bit of
chip-out right up there on the top corner as I
was coming to that edge with that router bit (loud clanging). So if you have a sharp bit, I don't think you'll have that problem. I'm gonna do all those
the same way, I think. I really like how that looks. Keep everything nice consistent. And then we'll start embedding a coin. We'll embed a coin in one of
them, and then we'll start putting that Odie's oil on there.
It's what I'm using to finish them off. I've never used it. So we're gonna see how that works for us. (rhythmic guitar music) So I got all these sanded. My gosh is my hand hurting. That's a lotta sanding. So I sanded 120 grit up to 400 grit. 400 Grit was the highest I
went and now we're gonna start installing the handles. Think first though I'm
going to embed the coin in one of these. (rhythmic guitar music) ambrosia, purpleheart,
purpleheart, birdseye, walnut, birdseye, purpleheart,
birdseye, birdseye, purpleheart. And then purpleheart, ambrosia. So which one needs the coin? Let's see. Where's my coin? Stands out on the purpleheart. It's pretty good on the maple. It looks pretty good on
the Walnut. (squeaking) I like it though on the purpleheart. I don't know. I like that a lot. So it's either going
to be one of these two.
To embed this coin into a mallet (mallets clanging) You need a Forstner bit and
you need to find the center. The way you do that, you're
just going to measure from this top to the top
or bottom of the bottom doesn't matter, and then
find the center this way. And then this way it's
going to be different for every mallet because
of the way we made these and the way we're cutting these. So it's imperative that
you measure each one and not, don't just depend
on the previous measurements, and I've lost my tape measure again.
So we're going to measure here. find the center measure
here, find the center. Once the center is found you're going to take a center punch,
hold it on that mark. Hold it on that mark,
"bam!" hit that center. That leaves a little indention in there, that leaves a tiny
indention in your mallet on each side, that gives
the Forstner bit somewhere to start off of, a good contact point.
And that way it won't,
especially if you're doing this by hand it won't walk on you. My handy dandy Wen drill-press,
this fence is awesome. If you get this drill
press I have a unboxing initial impressions of
this on the channel. If you want to go check it
out, as well as this table, that I bought with this. We got that indention
and the tip of that bit, will sit down in that
indention and hold it in place. While I pull the fence up there,
this has a measuring marks on the fence so I can make
sure that it's going to be the same on each side. The main thing is I don't
want to go too deep. I don't want this coin to be
inset all the way in there. I want it to be kind
of flush but this is a three-dimensional coin because
it has that raised part. I just want the edges to be flush. Let's try it. (drill humming) We're going to drill it slow as well. I'm going to take this
down really, really slow.
(drill whirring) So I'm just taking this
down a little at a time. I don't want to take too much. I don't want this splintering. And this thing's not that
powerful, so far so good. I need to go about another eighth inch. (mallet clattering) (saw whirring) – Almost.
(saw whirring) It's looking good though. That's awesome. I have another one of these on order.
It's going to come in in
a few days because I don't feel right about putting this face as the only face out and then not having the names displayed on this mallet. They deserve better than that. I'm going to implant the face side-down. So you'll have the names out on one side onto the fallen, ReLEntless
Defender on the other. This isn't glued in yet. And I want you guys to see that and this isn't even oiled yet. When I get the oil on there, it's really gonna make those colors pop. And that'll be the other side. We'll have a challenge coin mallet. Maybe you ever seen one of those? Because I haven't, I'm excited to see what it looks like when it's finally done. I want to sand this back again because just because
where we drill that hole I don't want all that to
be frayed out a little bit, 400 grit sandpaper over
this and we're going to be start ready to put
handles in the other one. So we've got to stick this.
Oop, I dropped it… This mallet handle into the
mallet head, should go in there. It maybe be a little snug
and if it is that's okay. I like for the wedges to
be a contrasting color. So I just cut a purpleheart wedge. It's a three degree angle. We're going to put glue all
the way around this thing, glue on the wedge, hammer that in. And then we can cut this off
flush or really close to flush. Alright, so this is the birdseye maple, put that purpleheart handle on there. Not a whole lot to this. Just going to put some
glue on this handle. (upbeat instrumental music) Store my extra glue under there, in case I need it later. (music resuming)
(mallet tapping) Should be a little snug, not too tight, but it should be snug. (mallet tapping) (upbeat instrumental music) (Matt talking faintly) This is a piece of ambrosia maple, I cut a wedge out of. (cheerful instrumental music) Once that is in there snug, break it off.
We're going to cut that smooth. I'm gonna make sure you
clean all that glue up. You don't wanna leave that on there. Cause it'll discolor that wood, especially if you're
staining or oiling these, last thing we want is
discoloration on there. I'll sand this to 400 grid after I get all this cut off and smoothed over. Move that saw to three degrees. That's going to put it on
the same plane as that.
I just want it close. I don't care that it's perfectly flush because if you get too close to the blade will get into the hammer
and you don't want that just get it really, really close. (saw whirring) Low and slow is the
name of the game there. So you're just going to go real slow. Say that it's not perfectly
flush and that's okay 'cause I'm gonna joint that on the top. If you don't have a jointer,
you can just sand that flat. (cheerful instrumental music) Got them built, yeah. These look nice. I like these. So I bought some Odie's oil, this stuff ain't cheap,
$40 for nine ounces.
They say this stuff will
last a extremely long time because a little bit goes a
very, very, very long way. I've never used any. You're supposed to take a Scotch-Brite pad or something like that. Get it on there. We'll stir it first and
then put it on your mallets. Let it sit for 45 minutes. No longer, no hour, no two
hours, an hour at the most 45 minutes, an hour, no longer. If you take longer than
that, they say it's almost impossible to get it all off. 45 minutes, set a timer. Then we're going to come
back with a Terry cloth, old shot rag and just buff them off. Buff the wood, buff the wood. It's gonna buff it off until
it gets to the finish we want. They say, once you can't
see your fingerprints on it anymore, you're done. Let it cure for three days,
three days, ain't happening. Scotch-Brite pads. Supposedly this is like
a high grit sandpaper but it may screw the whole mess up. First thing I had to do, I'm hungry. It's 11 o'clock here in South Arkansas.
Country folks eat 11 o'clock. I need a stir stick. I need a stir stick. It's waxy. It's ooey and gooey. Y'all come on, watch this. So I got an old Woodcraft
box, actually the lumber all the wood that come right
here, come in this box. So bringing it full circle, they say you really need to stir
this stuff up pretty well. Whoever knows how they always say stuff. I done a lot of research on the internet about the stuff before bought it. Just wanna stir it up. It look like that old corn-huskers lotion. Pretty much though. – And I seen multiple people
say a little bit of this goes a very long way.
So going to heed their warning. (high-tempo instrumental music) Supposedly the Scotch-Brite pad gets it down in there somewhere. (music continuing) Somebody is watching this going, "Oh, he's using way too much." "He's going to be screwed later." If you're that guy go ahead and comment. I'm just making sure that
everything is coated. I don't want any dry spots on this wood. So that's just, just gonna take my time, make sure I get it all coated up. And this is purpleheart and birdseye maple with ambrosia maple handle.
So that looks really pretty, it's nice. Then we'll do the handle. (cheerful instrumental music) So here's an amazing story on this mallet. You have to understand,
according to Google there's 95 million posts per
day on Instagram, 95 million. So what's the odds of
any of the family members of any of these names on
the back of this coin, seeing my posts, slim to none. So I posted a picture of this
on Instagram a few days ago and said, just said that I
was working on this mallet with this challenge coin with
these heroes' names on there. One of the officers that
gave their life serving his community was Deputy
Sheriff Jacob Howard Keltner from McHenry County
Sheriff's office in Illinois.
His brother saw my
posts and how he saw it. 'Cause I asked him, he sent me a message, wanted to know how much for the mallet? I'm going to send him this mallet. Because when I started
building this mallet I really didn't even have
anything in mind to do with it. Other than I just wanted to
put a coin in the mallet. And I wanted to also honor those who gave their life last year. After he messaged me the next day I'm thinking, how do you even see that? So I asked him, how'd you find this post? He messaged back and
said that he was looking, and he was a woodworker
himself and was looking for purpleheart projects
and saw this mallet. If that ain't God working
in a mysterious way. I don't know what is, because out of 95
million posts on that day he happened to be looking
for a purpleheart project and happened to see this
mallet that happened to have his brother's name on it. That's amazing.
To the brother of Deputy Keltner
and the rest of his family and all the other people
on here who have families they left behind. Thank you so much for your service and thank you so much for your sacrifice. Not only did these men and
women's sacrifice for us, these family members
also sacrifice for us. So thank you. So this one, the walnut one is
by far the most imperfect one I've made, I've messed up,
putting a coin in there.
There was a gap all the way around it because it's the Ten Commandments-coin. It's a little over an inch and a half. So an inch and a half-bit wouldn't work and inch and five-eighth
bit is a little bit too big but I've already drilled the holes. And I put the coin in
there and I didn't like it. Cause I tried to fill all the
way around it with CA glue.
And I didn't like how it looks. I got it out, but I buggered up the side of the mallet a little bit doing it. So I had to shave all this down
so that it's got that weird, (laughing) it's got a weird angle on it, but Imma go ahead and
put these coins in there and just have a gap all the way around. It's just, just the way it's going to be. And I'll just glue those in
and we'll see how it looks. So this side of the coin
has the 10 Commandments. This side has John 3:16
as well as the cross. So this is going to be really neat. There'll be a link in
the description below to where you can get these coins. So I'm putting the all this oil, all the way around the inside of that cut so that it's darker. Hopefully it'll hide a
little bit of that gap. Now I don't put a whole lot in there because I don't want us to
squeeze out around the edges. (coin rattles) If I want to come back and put clear epoxy on this later, it should be
plenty of room to do that.
I'm just getting the equal
gaps all the way around. That a spider? Get outta there! And then I'm just going to mash on it. Just a little bit. (upbeat music) These mallets are far from perfect. I am an imperfect being. So I create imperfect things. It's just how it is. Mistakes were made building
these and I've learned from 'em. So you may see certain
imperfections in these, this one doesn't have a wedge
in it because it was too tight for a wedge, but it does
have gaps on each side. It's okay, it's glued in there. It's not going anywhere. It's a solid mallet. It's still beautiful. This one, the dead-blow mallet. And the one that's weighted on the bottom has a little bit of a gap. it's glued in there, it's solid. It's not going anywhere, but I mean, it has imperfections. With that said it's also
got hole right there that I had to fill in.
These mallets I made to be show pieces so that you could just
put them on a mantle, especially, most especially
the ones that are going to have coins embedded in it. I made six of these
mallets, six, that's it. One of them I'm going
to give to Brother Riv. He gave me that, the Brother
Riv's getting the first pick, he gets pick of the litter
of it all, any of those six. So once he picked that,
there's going to be five left. If you stuck around
this long in this video, you're either in for, you want it, and you're going to go look for it and find it or it's going to be sold out. So to keep this fair, the only fair way I know to do it is I'm just going to put them on my store.
731woodworks.com/store. You can go and look and see if
any of those five are there. If they're there, you're more
than welcome to purchase them. If not, they're sold out, probably not going to make any more,
unless demand is so high that you guys want them. And I'll see what I can do if time allows. If you want a mallet, comment
below that you want a mallet. That's the only way I know
to see how high demand is.
And if they've already been
sold out, go look first. If they have, of course there's only five. So the odds are stacked
against you, I think. (cheerful instrumental music) If you enjoyed this video, you can click that box right there. It takes you to the next video. I would appreciate it. And you know if you click that box, you're getting the virtual fist bump. Hey, don't forget to subscribe if you haven't already also share this on your social media, you
know that it helps me out. Also, if you give me that thumbs up. If you would like to see more videos like this, comment below..