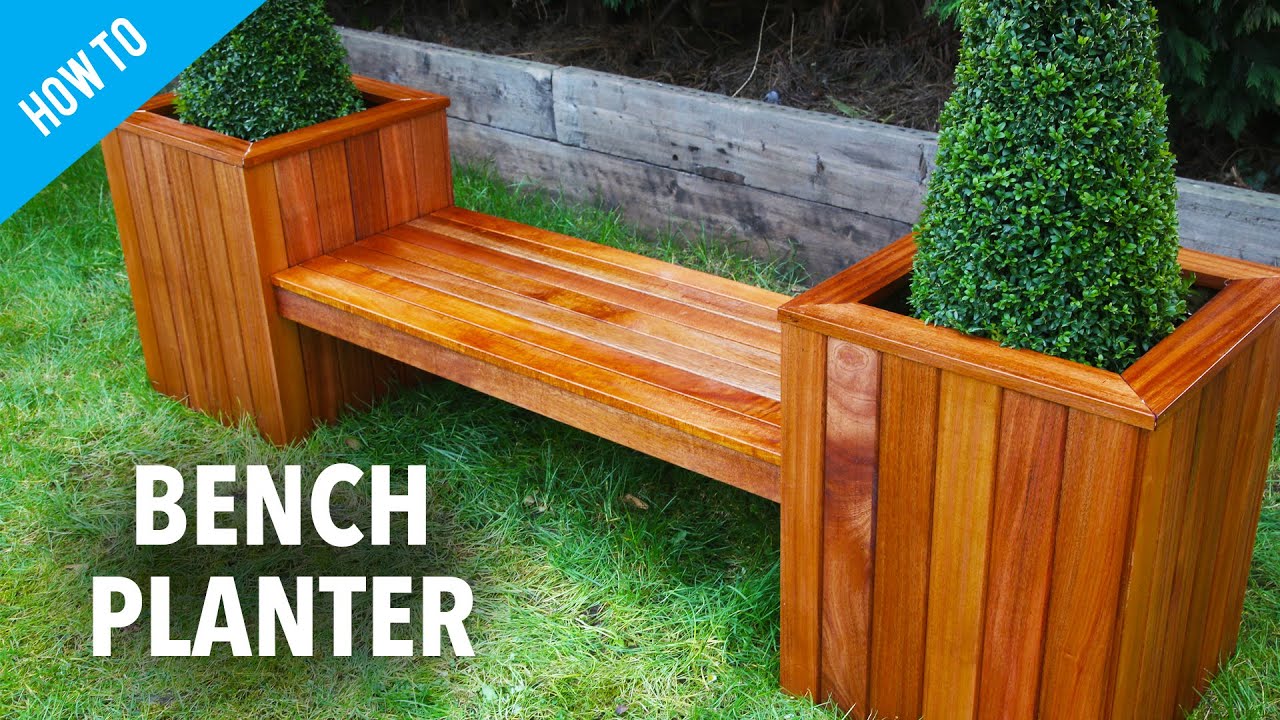
How to Build Your Own Bench Planter: A Comprehensive Guide
Are you in need of a bench and planter for your garden, but don’t want to spend a fortune on buying one? Look no further. In this guide, we will be showing you how to build your own bench planter from scratch with just a few tools and materials.
Tools Required:
– Chop saw (or hand saw)
– Set square
– Cordless drills
– Tape measure
– Pencil
– Various size drill bits and screws
– Glue and a cork gun
– Hammer
– Sander
– Spirit level
– (Optional) Compressor and nail gun
Materials Required:
– 2B2 frame for cube boxes
– Tongue and groove hardwood for cladding
– Mitered joints for cap
– 3B2 frame for bridging
– Reclaimed bed slats for bench top
– Oil for finished product
Step 1: Sketch and Determine Dimensions
Before starting with any construction, it is essential to plan everything out and work out the dimensions of your bench planter. Start by making a sketch of what you intend to build and note down the measurements. For this project, we will create two cube boxes on either side of the bench planter with a bridging frame.
The cube boxes will be made with a 2B2 frame, standing at approximately 650 millimeters high and 500 millimeters square. The hardwood cladding will be added on top and capped off with mitered joints. The bridging frame will be over a meter long and made of 3B2, cladded on top with hardwood for an aesthetically pleasing look.
Step 2: Create the Cube Boxes
To make the first cube box, you need to create four parts of the frame with two equal-sized 2B2 parts and three noggins to hold them together. The width between the two frames should be 500mm. The larger of the two frames, incorporating the 3B2 timber, will be bridged across the centre.
Use polyurethane glue to hold the frames together firmly, and screws to strengthen the bond. After completing the first cube, make the second one the same way.
Step 3: Build Frame for Bench
Now it is time to start constructing the frame of the bench. Use 3B2 cut into 1200mm lengths to span across the width of the cube boxes. Place three pieces against one another and screw in place. Cut two more pieces to go on either end to hold them together.
Make allowances for the bench top and also consider the cavity for the cube box to sit inside, sizing accordingly. The frame should end up just under 1290mm to provide a 1300mm gap between the cube boxes.
Step 4: Glue and Pin Hardwood Cladding Onto Cube Boxes
The next step is to apply the hardwood cladding to the cube boxes. If you use a finish nailer and an air compressor, it will be a quick and straightforward process. However, if you use a hammer and nails, it may take longer. Apply glue on the bottom and join the edges together, pinning them in place. Position them at the top and then apply more glue, fixing them in place with the tongue and groove cladding. The Mitered joists will also go on at this juncture.
Step 5: Cap Off Cube Boxes
After that, it’s time to cap off the cube boxes with square edge hardwood. Cut each piece with a 45-degree angle and then fix them in place on all four corners so that it hangs over the edge of the box by a few millimeters, giving a waterproofing finish and adding aesthetic value.
Step 6: Fix Reclaimed Bed Slats to the Frame for Bench top
Clad the top of the frame (3B2 seated frame) with reclaimed bed slats nailed in place. Ensure that the slats lie flush against the frame.
Step 7: Attach Cube Boxes to the Frame
Place the cube boxes inside the frame and clamp them together. Fix them securely in place with screws.
Step 8: Finish with Oil and Plants
Finally, sand the bench planter, apply oil for a finished look and add plants to complement your garden.
Conclusion
In conclusion, by following our step-by-step guide, you can easily build your own bench planter. It requires a few materials and tools, but the result is an aesthetically pleasing and functional garden feature. Additionally, you will save money that would have been spent purchasing one from a store. Happy building!

