Introduction
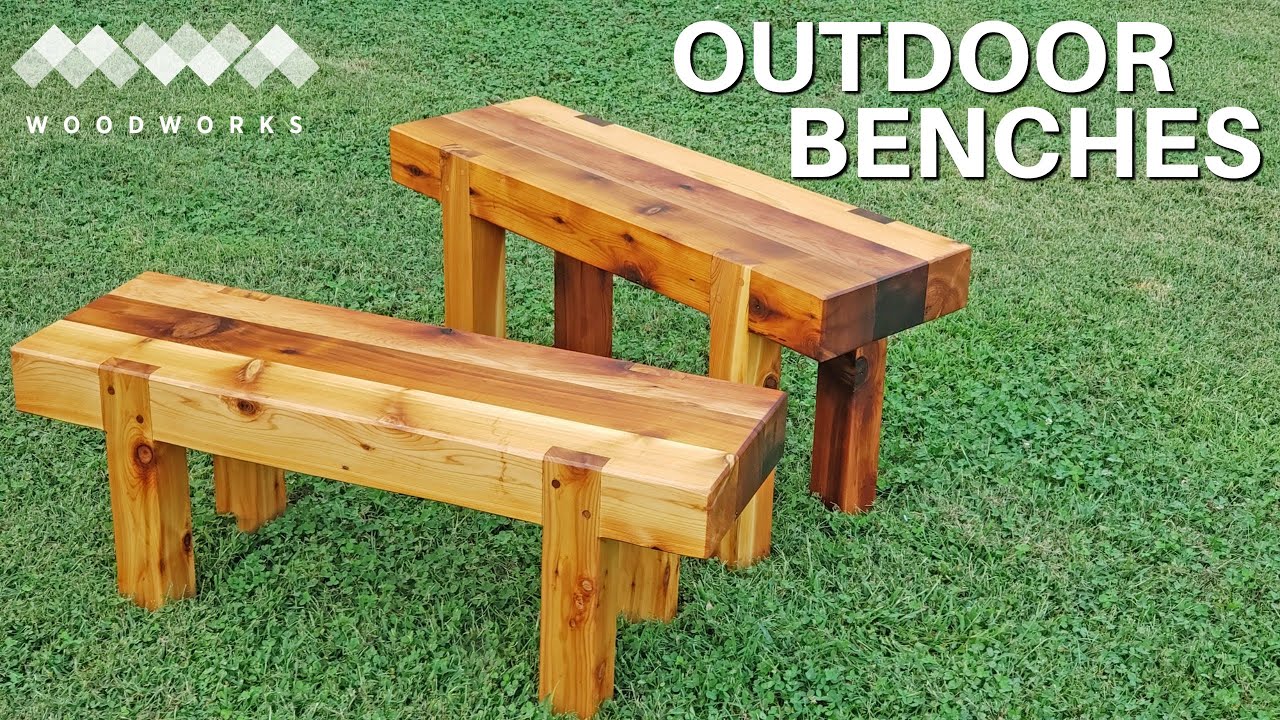
Need seating for your outdoor living space? Why not make your own bench seating? In this video, Matt from MWA Woodworks shows you step by step how he made an outdoor bench seating from red cedar. He takes you through the process of milling the wood, cutting joinery, and applying finishing. Let’s dive into the process!
Milling the Wood
Matt starts the project by using 6×6 red cedar beams, which are typically used for building outdoor structures. He mills them up square by taking a couple of passes across the jointer to flatten one face. He then flips the beam, runs it across the jointer again to make sure he has two flat faces that are square to each other. Milling the beams was the most time-consuming part of the project.
Planing the Beams
After milling up the wood, Matt heads over to the planer to get the other two faces of the beams flat and square as well. He puts the sides that he joined and face down on the planer, and the opposing faces are made parallel to it. After a few passes, all four sides of each beam are flat and squared up. He also cuts the legs for the bench out of these beams, which is a suitable task for the bandsaw.
Trimming to Final Length
Before cutting the joinery, he needs to trim everything to final length at the miter saw. Even for his 12-inch slider, these beams were a bit too much, so he finished off the cut with a handsaw.
Assembling the Bench
To assemble the bench, Matt uses epoxy, which is a great choice for an adhesive because it’s water-resistant and strong. He combines the resin with the hardener in a two to one ratio and applies an even coat to the glue joints. The seat of the bench is made from three of these beams, cutting down on assembly time and the amount of resin needed. Clamping pressure is applied evenly across the length of the glue-up, and he wipes down any excess epoxy.
Wrestling the Bench Through the Planer
The exciting part of the project is wrangling this bench through the planer to clean up the surfaces and get everything flat again. Since he already flattened everything before, it doesn’t take many passes at all. He also squares up the edges again at the jointer.
Cutting the Joinery
To cut the joinery in the legs, Matt lays out where the notches will be cut in the bench top using a marking knife. He uses one of his legs as a guide to lay out the other side of the notch. Then he hogs out these notches using his table saw with a dado stack.
The goal here is for the legs to recess into the sides of the bench and sit flush with the sides. To make this cut, he uses a table saw to establish the top and bottom of the notch in two passes. He finishes off this cut with a handsaw.
Reinforcing the Legs
Matt thinks it’s a good idea to reinforce the legs with screws. At the very least, the screws can act as clamps while the epoxy cures. Once he has his pilot holes cut, he adds plenty of epoxy to the joints and installs a couple of three-inch screws to the legs.
Finally, to cover up the screw holes, he makes some plugs using a plug-cutting bit on the drill press, which cuts the cedar effortlessly. He adds copious amounts of epoxy to plug the holes and sands away the excess material with a flush trim saw.
Applying Finish
Now for the finishing process on this bench, Matt starts by applying TotalBoat’s epoxy sealer, which is very thin and almost like water, using a roller. Once the sealer is cured, he sands everything with 320-grit sandpaper just to knock down any dust nibs. Then he applies TotalBoat’s Gleam 2 Marine Varnish, a high gloss finish suitable for outdoors, with a foam brush.
He applies three coats of the high gloss before adding two coats of flat varnish to knock down the sheen. The color of that cedar just pops, and they are well protected from the outdoor elements.
Conclusion
In conclusion, making your own outdoor bench seating is not as hard as it may seem. By following Matt’s step-by-step guide, you can have a sturdy bench seating that is ideal for outdoor living spaces. So, why not give it a try? Head to your workshop, grab your tools, and let’s get started. Don’t forget to subscribe to Matt’s Youtube channel for more woodworking project ideas.

