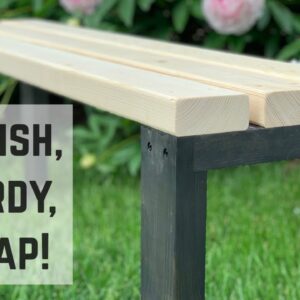
Building a Garden-Inspired Bench: A DIY Challenge
A few weeks ago, Jeff from Weekend DIYer challenged Brent of the White Lab Workshop to build a garden bench. Of course, Brent being a DIY enthusiast, couldn’t turn down a challenge. He quickly roped in his wife, Amy, from the White Lab House to come up with a design. She found something she liked on Pinterest, and Brent made a quick sketch to keep track of the dimensions.
Garden-Inspired Bench Design
Brent explains that the garden bench is going to live indoors instead of actually out in the garden. For that reason, he used construction lumber instead of something more rot-resistant. However, if someone prefers to build this design for outdoor use, Brent suggests using something like western red cedar for more durability.
The Materials Required
The design is simple and only calls for three different lengths that can be cut from three two-by-fours. The top is made from three pieces cut at 46 inches. Brent picked out the best-looking sections of boards for the top because that’s what you see first.
Next, they measured out four pieces at 17 and a half inches for vertical sections of leg assemblies. Brent’s dad set up a stop block for him, and he made the cuts. Brent then did the horizontal sections of the leg assemblies, four pieces at ten inches.
For the leg assemblies, Brent wanted to get rid of the construction lumber edges to make cleaner connections with the joints. He took off one edge and then set up for a three-inch rip for the other edge.
Building the Bench
Brent explains that he opted for using his tenoning jig to cut rabbets to use for lap joints because he wanted a stable leg assembly. He set the saw blade to slightly less than the width of the jointed piece and cleaned out that last extra a little bit with that second cut.
Brent wanted to make a cut in the middle of the board, but his tenoning jig came up just a touch shy of letting him do that. It was good enough for him, though. Once he used the tenoning jig, out comes the crosscut sled to finish cutting out the rabbit. Brent used the adjoining piece to measure so that the outside of the blade lines up with the outside of the piece, then he set his stop block.
To ensure that the joints were well-fitted, Brent cleaned up the joints with a chisel. Once the boring stuff was out of the way, it was time to get to everyone’s favourite part of woodworking, sanding.
Brent then made his dad step out of the way so he could handle the fun part. Since Brent does all the work around there, his dad made him mark three-quarters of an inch at the end of the wood so they knew where the screws go because they planned to leave the screws exposed.
Brent then glued the leg assemblies, clamped them, and screwed them into place. For the top pieces, his dad positioned them as evenly and squarely as he could, and then he pre-drilled and screwed them down.
To give the leg assemblies a two-tone look, Brent took the garden bench apart again and gave the leg assemblies a coat of a nice dark stain. They are still trying to decide what to put on it for a final sealing coat, probably some water-based poly.
Outcome and Takeaway
Sean in the Shed over in the UK, Brent’s buddy, was next in the challenge to build a garden bench. The DIY challenge proved to be a lot of fun, not just for Brent and his wife but anyone who loves watching and doing woodworking. The final product was a sturdy and functional garden-inspired bench that could be used indoors or outdoors.
The Final Word
Building furniture and other household items with your hands is always a fulfilling experience. It’s a way to add a personal touch to your home while also learning a new skill that gives you a sense of independence. As Brent and his team showed in the video, building such items is not only an efficient way to save money but also an enjoyable activity. So, if you are up for the challenge, grab some timber, tools, and get creative. After all, if you get stuck, there is always YouTube with hundreds of videos on DIY projects.

