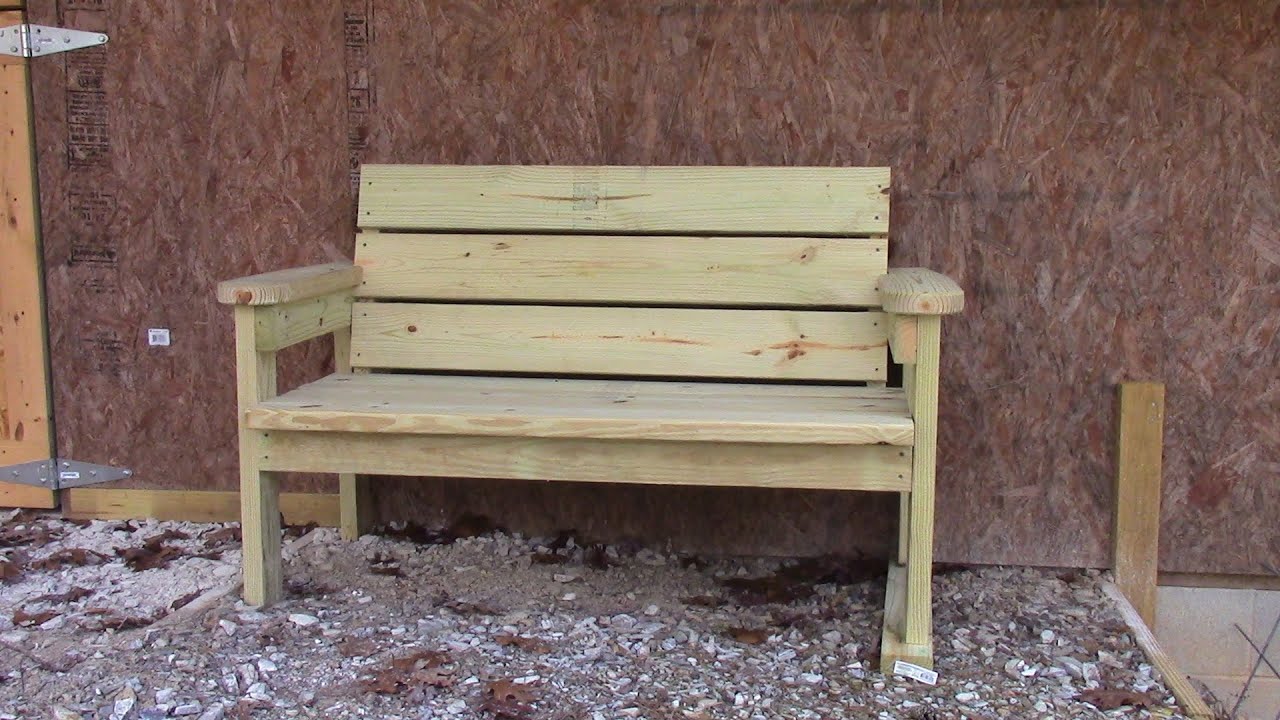
How to Build a Garden Bench: A Simple Step-by-Step Guide
Looking for a way to spruce up your garden without breaking the bank? Look no further than this simple DIY garden bench! In this step-by-step guide, we’ll walk you through the process of building your very own garden bench using just a few simple materials. With just a bit of time and effort, you can have a beautiful and functional bench that perfectly complements your outdoor space.
Step 1: Gather Your Materials
Before you can begin building your garden bench, you’ll need to gather all the necessary materials. For this particular bench, you’ll need the following:
– Four 2x6s, 8 feet long
– Three 2x4s, 8 feet long
– Screws
– Sandpaper
– Drill
– Saw
– Clamps
Step 2: Cut Your Materials
Once you have all your materials gathered, it’s time to start cutting them down to size. Here’s a breakdown of the cuts you’ll need for each piece:
2x6s:
– Three pieces, 48 inches long
– Three pieces, 45 inches long
– Two pieces, 25 inches long
– Two pieces, 21.5 inches long
2x4s:
– Four pieces, 23.5 inches long
– Two pieces, 23 inches long
– Two pieces, 48 inches long
– Two pieces, 20 inches long
Step 3: Create the Armrests and Back Braces
The armrests and back braces of your garden bench will add to its strength, so you want to make sure they’re sturdy. To create the back braces, you’ll need to make a cut at 5 inches from the bottom of the 2×4. Then, measure 1.5 inches from the top of the 2×4, make a mark, and connect the two marks. This will leave you with a triangle-shaped piece at the top of the 2×4 that you can saw off.
For the armrests, cut 14 inches off the front and 4 inches off one side of each 2×6. Then, connect the two lines to create a notch at 7 inches up on one side.
Step 4: Round Over Edges
At this point, you’ll want to round over the edges of the armrests and the front edge of the front board of the seat. This will make the bench more comfortable to sit on and give it a more finished look.
Step 5: Create the Leg Pieces
Take the two 23.5 inch 2x4s and attach them to the 23 inch 2x4s to create the leg pieces of your bench.
Step 6: Add the Seat
Lay the bench on its side and add the 48 inch 2x4s as the seat. Use a half-inch MDF to space the boards evenly from the back piece.
Step 7: Add the Back Braces
Attach the back braces you created in Step 3 to the sides of the bench.
Step 8: Finish with Armrests
Finally, attach the armrests to the top of the leg pieces. To customize the fit of your armrests, clamp them in place and use a saw to cut off any excess.
Conclusion
Building a garden bench doesn’t have to be a complex project. With just a few basic materials and some simple tools, you can create a beautiful and functional addition to your outdoor space. By following the steps laid out in this guide, you should be able to build your own garden bench in just a few hours. So get started today and enjoy the fruits of your labor for years to come!

