
The Wood Whisperer is sponsored by PowerMatic and Titebond. So about a year ago, I made a video on how to make bread board ends. And to make it believable, I made an actual top when I did that, I didn't have a purpose for that top. So it sat around the shop thankfully has not gotten damaged yet. And I think it's time that we design a base to go with the top and I happen to need an end table right now. I decided I wanted to take a theme and see how far I could go with it. I wanted to take a basic curve and cut that into the outside of this bread board face on both ends and then extrapolate that curve and put it across the rest of the project.
And one of the things with design is if you have a cool design idea, there is absolutely such a thing as over doing it right. If you just do too much of it, too much of a good thing is bad. So I wanted to see if I could take that subtle curve and incorporate it into the entire project as many parts of the project as possible without making it look awful. So we'll see if I can succeed with that. But that's kind of the fun thought experiment here and we'll see where we end up with that. The other thing I want to do with this is I'd like to practice a little bit with some CNC, I don't have a whole lot of experience with it, certainly not on the software side. So I wanted to challenge myself to see if I could at least make some of my templates from this project. I mean it's already in Sketchup.
Yeah I can come into the shop, draw my lines fair to the line and get templates like I've always done. Or I could spend about 15 minutes to get everything done on the computer and see if I can get my CNC to do what I need it to do. So that's actually where we're gonna go with this little bit of a different approach than usual. But the next step is to head into the office, hop on the computer and I'll show you where I'm at with that Sketchup drawing. Okay, so here we are in Sketchup and you can see my model so far, if you look at the top, you'll see I've modeled in the curve in the bread board that I had mentioned and I have taken a very similar curve and kind of put it everywhere and tried not to make it annoying.
So I don't know if I've succeeded but let's dig into some of the details. If you take a look at the legs, the legs feature very subtle curve on the outside face, two outside faces. Uh We actually have curved rails. So you can see the profile on this top rail as well as the bottom rail. And the shelves take a look at this.
We've actually got this center one has the curve on both sides, and then I follow that curve with the outside slats for that bottom shelf there. So that should be fun to make. And in the front here, I'm undecided about a drawer. If I do a drawer, it's going to obviously follow that same curve. This would just be a drawer front and not just empty space as it appears right now. So I will make a decision on that later. One thing I also want you to notice is when you have a curved leg like this, it's curving up this way and it meets a flat apron. I don't necessarily love the way that looks and I don't feel the need to sketch this in. But I wanted you to see that this will probably change in the final version. We will copy this curve and change that front face of that apron and we'll be doing that on all sides.
So, how do we do this? How do we get this stuff from sketch up where I've already drawn it? How do we get these shapes into? Well, I use um V carve for my CNC. Work. So how do I do that? Well, thankfully you can actually just take the Sketchup file and bring it right in, but I'm going to clean things up here a little bit. I don't want to mess with my main model too much.
So I'm just going to copy and paste the parts that I want, bring them into a new Sketchup file and I could work with them separately that way. Now I had mentioned making the bread board the start of it and then kind of taking that curve and putting it everywhere. But the reality is the longest curve here is the leg, that's the longest part. So that's kind of what I want to do. I want to get the shape of this leg into a template and then I could take that to any shorter piece and grab a section.
A portion of that curve should work really well. So I'm going to get one of my legs and then I'm gonna take this rail. Now I need to square this up because I don't want my template to necessarily have these curves on it because the template I'm going to make of this rail is really there to assist me with these through mortises, you know, something I normally don't need a template for, we just use a router and a guide, but it'll be fun to make a template and see if we could use some kind of a flush trim bit and get some good results with that.
All right, so let's copy and paste these guys and bring them into a new Sketchup file. Alright, there is my objects in the new file Now at this point, the cool thing is we actually could just take these and export into something. We could pull into V-Carve and it will basically just take a profile face off of the widest face and utilize that and that, that could work. But I need a little bit more out of these. I need to make a complementary curve to this convex curve. I need the concave version of that and I need to square this guy up.
So I'm just gonna monkey around here a little bit and basically get 2D versions, flat versions of what I need. And this is in a Sketchup video. So I'm not going to go into all the detail on how I do that and there we go, just like that. I've got some flat 2D profiles here at this point, let's export, going to go up to file and save as actually And for whatever reason you have to go back a few versions when it comes to V carve to accept this file. So I'm going to go to 2018 and I'm going to call this uh huh curvy and now we got to jump over to v carve… Alright so inside v carve, all we need to do is import vector, Go find that Sketchup file and there's a lot of settings here. I don't really mess with much of this. If you have a complex model that you're importing a lot of this really will make a difference in how it imports.
Um but I don't know much about it and that's one of the reasons why I go to a simple flat 2D. Um you know, model essentially to keep it as simple as possible. And really the most thing I'm concerned about is this our auto orientate largest face is top face and that just means it's going to focus on the largest face. And of course, if it's flat, that's all you need.
So there you go. Check it out. All three pieces are there and ready to roll so I can take this guy and rotate them around and just position these for the most efficient cutting for the piece of material I have in the shop and now I can just use the program to generate my tool path and export the code that I need on the CNC. So now I'll just save my tool path to my USB stick and head to the shop. So no surprises there. The three templates came out as I expected them to thankfully. And if it came out right, I should have perfectly complementary curves here. So these pieces meet perfectly. That's real nice. So at this stage we really just need to kind of pivot to doing more of a classic woodworking project with the templates all ready to go and I'll show you as we build the project, how we're actually going to use all of these. Okay, let's get to it.
So the first thing I'm gonna start working on is the legs and fortunately I use cherry a lot in my work and I've got a lot of cut offs that I can use, so I can get a couple of legs out of this piece, certainly one out of this piece and then definitely more than one out of this piece I got plenty to work with. But I want to show you what I'm going for with the grain because the grain direction can really impact the appearance of a leg.
So what I'm shooting for is something that we would call rift sawn grain. So if you're looking closely here, you can see the grain, it's kind of going up this way on this one, similar on that guy and now this is a wider board. So we're going to get a nice selection of what's effectively flat sawn grain here. And if you go toward the end, that's where we start to see that rift sawn. Now the flat sawn material is what gives you these cathedral patterns and also a lot of variety there with the way that the grain lines move through the piece. Some people like that, some people don't, what I'm going for is the rift sawn portion where the grain takes a little bit more of a straighter run, it's a little bit more cleaner and consistent and I just like the way that that looks on legs.
So I will be cutting this portion out of this leg. two legs out of this guy and then one single leg out of this. So let me mill those up. All right. So our four legs are milled to size. Now if you aren't sure what you want to do with the legs, maybe you want to change the curvature or do something a little bit different with it.
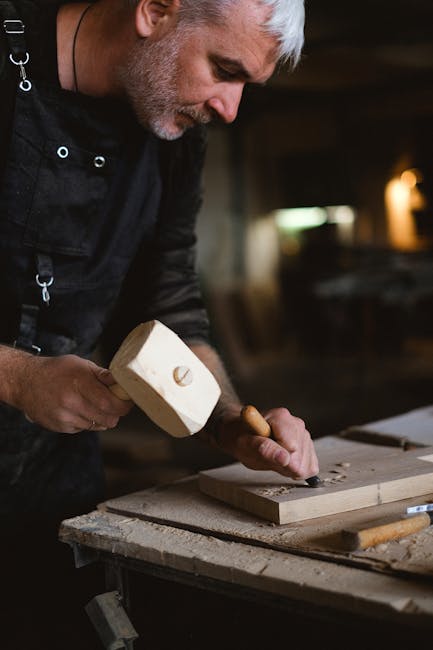
Cut yourself a fifth one because then you can practice on that one and then apply it to the rest of the legs. But we are not ready to do any of that shaping yet. We still have joinery to do before we do that. I think we should probably cut the apron stock and also the material for the bottom rails and that's all going to come from standard four quarter stock milled to three quarters of an inch. So for our joinery we're going to do loose mortise and tenon joinery. Now I've got a video out there showing you how to do this with a standard router and an edge guide, highly recommend you watch that if you don't have the tool that I'm going to use, which is the domino. Now the domino is something that I tend to breeze through all the details because it's really a point and shoot kind of machine, but it really comes down to reference lines and surfaces that you're referencing from. And I think that's an important thing to understand.
Even if you don't use the domino, you might do things like biscuits, you might do dowels where it's also important to know where your center lines are, which face you're referencing from. So let's go ahead and run through it. So the very first thing that I'm going to do is decide the orientation of these pieces and which face is facing out. This is important if you have grain that does something very specific, you want to know where that grain is going. So I've labeled all of my parts out. I know that if I could read the writing, it's upright. Okay, so this is the top surface. This is the bottom and of course out means the outside face and I will always reference from the outside face when I use this tool putting the fence against the outside face That actually makes it a little bit less critical that I nail the central point of this board, I could be a little bit off if I'm always referencing from the same face. So everything is consistent.
Once we know those faces, we have to decide what size dominoes we're going to use. I think the eight by 50s will be pretty good here because on the upper rails, I'm going to have two of them roughly centered like that. And then on the bottom we're going to have a single and that looks like pretty good spacing to me. So now I need to know where to plunge with my domino. Typically what I do, I get these guys in place just visually and I want to make sure everything looks pretty good. Something to keep in mind with the spacing is if you have some kind of significant curvature, we have a slight one, it's not a big deal, but if you've got a big curve down here, you're gonna be cutting that material away. You don't want to cut into your joint. Once I get the spacing that I like and then get a couple of squares and I set them to the center point of where that Domino is positioned.
So that's our top one and that's the bottom one. Obviously set these up before. Now, if you're thinking logically one of the things you might be tempted to do is just simply set one square up in this way, you can kind of get them symmetrically laid out by going one from the top and then one from below and it certainly would make them symmetrical. But just knowing how wood works. What if these aren't all dead on the same width? I mean they should all be close but that table saw cut sometimes it might be slightly off. So my preference is to actually continue in terms of these reference surfaces. I'm always measuring down from the top each and every time. And then I can be sure that those will be located perfectly and flush with the top of my legs when it joins to them. Alright, so I'm going to lay these out, I'll do these on each of my work pieces. Top rails at least. Another trick you can do that will come in handy on other projects.
This one I've got my square set up, so it's no big deal, but you can set up one of your pieces that's already marked against one of your pieces that is not marked, make sure they're nice and flush at the top and then just transfer your marks that way. So that's it for those wider top rails and these two smaller lower rails. We just need a center line. Of course the rails are only half of the joint, right? So the other half is in the legs. So we need to know where those holes are gonna go in the legs. I haven't committed my legs to an orientation yet. And for me, it's all about the end grain and then looking at the faces to make sure they look the way I want them to look. So let's take a look at that end grain. Now, you may find other people like to do this differently.
This is just what works for me. I like to have symmetry and something of a mirror image. Almost like a four way book match in a sense here. So, um the way I'm looking at my grain, you can see this one goes this way, this was just following that same orientation and that's not actually what I want. I want them to kind of mirror each other. So let's see if we can turn this one around and sometimes you have to flip them the other way, you could rotate them around and you see how they sort of look like there was a mirror between them, they're both opposing one another. That's what I'm going for. Let's bring this guy in and see if we could find a good spot for it.
Well, again, this kind of just looks like it's continuing right, I don't want it to continue. I want it to look like that mirror, let's give it a 90 degree turn. And now that's what we're going for right there, let's take the final guy, drop them in there and there we go. So you see what I've sort of simulated. Is this circular action. Now you can orient them with the lines pointed into the center if you want to. Um and that'll be fine. Again, just as long as it's like a four way mirror image. I think this will look pretty nice and as I'm looking at the faces here, I don't really see anything that's worrisome. So I think we can go with this orientation and I will mark the legs, front, left, front, right, rear, left, rear, right now using my front, right leg as an example here, we're going to set up for marking our lines, so we know where to plunge on the leg.
And I've got one of my rails with a center line. Now when we make our domino mortises in the rails, we are going to aim for the center. So if I know where the center is that, I can kind of locate it here and transfer that line to the leg. So where is this rail located in space along the leg? Well, as I've designed it, it's a half inch in. So I just have my square set up for a half inch and I can bring my rail over When I made contact with the square, it's in as far as it's gonna go, okay. And now I don't let it move. This is hard to do trying to stay out of the way of the camera, but you get the idea once it's in position, then I can transfer that mark to the leg.
And this mark is going to help me set the fence position on the domino. If we were doing something where these were perfectly flush, let's say just by design, we wanted a nice flush leg and rail or apron. We wouldn't have to do this step because they would be the same right, we're gonna reference from the outside face. We could reference from the outside face here and we'll be plunging with the same setting. But because this rail has to go in a little bit, we need to know where is the center point of that plunge. And that's why we transferred that one. The other thing we need to know is where do these lines correspond here? But you can certainly just line it up like this, go flush on the top and transfer your marks. That's a handy way to do it. But guess what? We still have, I still have squares set up that I used to make these so I can just measure from the top. There's the first one, there's the second one.
Now keep in mind we're gonna plunge here, right, well we can't see those lines when we're plunging into it. So I need to be able to see them on this surface. So when I make those lines I'm gonna make them up here on the adjacent face. And just to reiterate because I want my holes here. I need to be able to see through this little view finder this way.
Now that fence setting, I only need to have on one of these legs, I'm gonna set it, tighten it up and then I'll be able to do all of them. Um So I only need that on one but I do need these other marks on the other three legs. For this lower rail, that position is pretty similar. We already have a line here representing the distance in from the inside. Right, so that's gonna be the same on this one, we don't need to do that but we do need to know where the center point of the plunge is. Just based on my plans. I know that the center point of this rail should be three inches up from the bottom of the leg. So all I need to do here is go 3" up. Once again, if I need my mortise here, I need a line on the other adjacent face. Then I can come in like so and make that mortise.
So now for the boring part, dupe. Something I'd like to do on domino projects is pre glue my dominoes into the ends of any rails. In this way, the dominoes just kind of become part of the project part of the rail, I should say. And We can treat them kind of like integral tenons at that point like a traditional tenon and it's a lot less gluing to do in the final glue up and then clean up the squeeze out. I'm gonna let that dry. Yeah, now we've got a lot more work to do to these parts but this is a good time to make sure that we have put all of our mortises in the right location.
We actually have sort of a table base at this point. So let's do a dry assembly and just make sure it's all good. Keep in mind if you're fairly new to a tool like the domino, this is something you probably want to do before gluing those into the rails. But the other side of this is if you somehow misplaced that mortise, guess what you're gonna do, you're gonna glue a domino in their, slice it off and cut it in the correct location. So let's get some of these together. So I should mention here that these will not go together completely because their tenons are colliding inside the leg. That's okay, we can just miter the ends or during the domino process, we could have gone a little bit deeper into the rails to take that extra material but it's all good either way, see that gap there, can't go any further until we do that miter.
And I think that is enough to serve as our proof of concept here. Right. So we may as well create that miter and then maybe come back and just make sure it all closes up. Should've done that first. There we go. Boom baby. Now, at this point I'm gonna look at every joint, I'm gonna look at the way the legs are sitting if there's a wobble in there, try to address that. Maybe even add some clamps because sometimes the clamps will cinch things down just a little bit more. But this is looking pretty darn good if I see any discrepancies if I look at a rail for instance and I see that there's a discrepancy between the rail and the top of one of the legs.
I could do some work to those tenons at this point, make that adjustment. And while all my rails at this stage are exactly the same. This is a point where if I have to do work on one, I'm gonna kind of label that and make sure that those two are going to stay together for the final assembly. So just put some kind of a mark here that says these two are married at that point. So, um, everything's looking pretty good though. That's one of the joys of using a tool. Like the domino is the fact that usually it's pretty much dead on. All right. So we've got tons of shaping quite a bit more work to do on this piece, but this is a good start. Well now that I'm pretty confident that we have all the joinery we need in our legs. We could actually start shaping those legs and there could be a lot of labor in this depending on what you want to do.
I'm actually going to create a curved surface in the two front faces. So the two inside faces of each leg are the ones that have the joinery on them. The outside faces are the ones that are going to receive this shaping. So I've got my template in place and I could just draw my line on there. I could certainly cut that at the band saw and then smooth it out. But if I want absolute perfect results, I could always just use this as a routing template and I think that's what we're gonna do here. So let me just get some blue tape, CA glue, right? Quick set activator. Now, I actually was gonna go right to the router table, but this is quite a bit of material for a flush trim bit to handle. So it's a good idea to get some of this excess off of here with a trim at the band saw first Now, at the router table.
I've got a really cool bit here because it's got a bearing on the top and the bottom. This allows us to make safer routing decisions, ideally you don't really want to route against the grain. We're kind of going uphill, especially if we try to start right here, it's probably gonna catch on this corner. So we have to be very careful if we're going to do something like that, you can get a lot of tear out what is best is if we could just avoid that altogether, maybe start our cut around here, work our way through trail off of that end. This should be perfectly safe because we're going downhill, then I'm going to flip it over Now my template is on the top, you can see the bearing is mismatched. So all I have to do is lower the bit so this bearing makes contact and then I could finish off this leg blank because I'm now going downhill again.
So that's why this guy is pretty handy to have around. Now, that's just one of the faces. We have to apply the same shape to another face. I'm just gonna carefully pull the template off. Let's peel up the blue tape. You get over there, right? And it's important to make sure we understand we are not putting this into any of the mortise faces. Right? So this one now has a curve. We need a curved in this face. It's the easiest way to do that is on this flat surface. Now think about it. We could go here but we already have a shape there, it's already curved. So that's not ideal though. I mean, I guess you could do it because it's not that much of a curve but I think the safer bet is to go right here. You can see why this blue tape / CA glue method is attractive. I do have a video on this if you want more information. Pretty straightforward, but there's no residue left over and you don't have to deal with trying to get that double stick tape, the backing off of it, which is super fun.
Now for the second cut, we do need to be a little bit more careful here because there's really no other way to cut this without, you know, the curved side down. But again, that curve is not that severe. So I can kind of just work my way through the cut and make sure I'm always in contact with the table for flush trimming the second curve. I'm going to be pretty careful about this. I'm going to go on the bottom here. This one will be nice and easy. I don't know that. It's a great idea to do the flip on this one because now we do have this movement here. That does make me a little bit nervous. So it's kind of like picking your poison here. I actually am a little bit less concerned because we only have a little bit of material to remove here. I can kind of work my way slowly but surely just taking very light passes and I'll avoid this very tip. We can always fix that later with a hand plane.
So I'll just take my time and see if we can't do this safely. We can pop off that template. And that little tiny bump there. We could just get with a block plane. Yeah, okay, now, you know, I can't leave well enough alone. That's just the first step. We do have one more thing we're gonna do to this leg. All right. So I slept on it. Well, not the leg itself. I thought about it while I was in bed, decided I want to add a little bit of a pillow. So of course we have our curves that we cut in this dimension. But if we can add a softening a little bit of a pillow in this dimension, it just makes the legs look a little bit softer. It's a subtle detail. Takes a lot of work, but it's a subtle detail that when you add the whole thing together and look at the final piece, it's just one of those things that just has a big impact, even though it's a minor detail. So we've got a lot of work to do.
I'll be doing all this work by hand. So I want to make a little template here. So this is my inside corner, that's my outside corner. And I've got a piece of mdf here cut to an inch and a half square. And look at these little marks I've marked in about 1/16 of an inch on this side, 16th here and then 1/16 on this front corner. And now I just need to connect these with a circle. I happen to have a circle template that will get the job done. Let's get that lined up. I'm not going out to the corner. I'm going to that line that I just drew. We'll do the same thing over here. Now mind you, you could just do this drawing on each one of your legs. but I really want these marks on both ends and it just makes sense to make a template to make it all faster.
Just sand those to the line. Maybe I'll use a block plane first. Boom baby. To create the pillow there's a bunch of ways you could do this, you could just purely sand and just keep moving back and forth and then just look at the ends to see when you're at your line. You could do something like a block plane, even a card scraper. There's really not a whole lot of material here to remove. But I'm going to go with my block plane and just do long passes and this way I can try to stay even. So I don't have any reference here in the middle. I only have my reference at the end but that should be enough to get me where I need to be. Remember I'm planning on a curved surface. So you're gonna want to stay skewed with something like a block plane. If I go head on like this it's gonna be a lot harder for me to follow that curve surface.
And if you do something like this, keep in mind the curve is going this way. So this is now uphill, if the wood is temperamental or your blade is not sharp you may get a lot of tear out so you might have to reverse the blank and plane from the other side. You might be able to see my strategy here. I start at the corner, go down to my line and now I basically have like a flat here almost like a chamfer and I'm going to start to make more passes to blend this in to the rest of the curve, it's just not a whole lot of material to remove. So I'm gonna take my time. Then I'll repeat that process over here, removing down to my line and then blending it in, flip it and work on the other face. The important thing to remember when working on subtle curves across long distances like this is that the eye is very forgiving when it comes to curves, so if it's not dead perfect, no one's ever really gonna notice.
Now, for the final shaping we'll just employ some flexible sanding implements basically. I've got a thin piece of material with sandpaper on it. We can bend that to the shape and go back and forth. This is good because it's rigid. Uh So that will actually take down the high spots and really even things out and then we could probably finish up with something like this. This is just uh flexible foam, but it's still still kind of rigid. Uh And we should be able to do our final smoothing with that. All right, these legs are looking pretty smooth. So we will do a little bit more refinement on these edges, but for now I think we're good uh We do need to work a little bit on our rails and you don't necessarily have to do this.
But I think it would be cool if we made the face of these rails, sort of match the profile that's in the legs. And let me show you what it looks like without it. So you could kind of decide if you think it's necessary when I bring in one of the rail pieces, you can kind of see what I'm talking about here. We go nice and flush at the top. We have a curve in our leg, but our rail is of course, perfectly vertical straight up and down. So it's this reveal here is a little bit smaller than it is right here. So I don't think we necessarily need to mimic the curve because realistically this little segment of the curve pretty much can be represented by a small straight line. But what I do want to do is make sure that we remove material from the top of the rail just by making a nice bevel cut here, so that it at least looks pretty close to parallel.
So how we're going to find out where to make that cut. If I turn this rail upside down this way the top is going to be flush. I can grab one of my other templates here and kind of approximate where this would go. So what I'm looking for is for this this curve to represent the leg curve. I know I don't want to remove any material from the bottom so I'm just going to go right to the point where it makes contact at that top corner and then I can strike a line down here at the bottom and then draw a straight line between those and that should be close enough, something like that. Right? So now all we have to do is set the table saw and make that cut. Yeah, okay at the at the table saw I stayed a little bit shy of the end here because I knew I wanted to do a few smoothing passes with a hand plane that would allow me to clean up all those saw marks and then also bring my line out to this very tip or the bottom of the rail.
Alright, so that surface is now super smooth. Ready for the next step, which is to add yet another curve. I do want a very gentle curve which will just be essentially a portion of our longer templates that we made. So you can easily line up your center line, draw your line on there and then just either band saw or sand it and call it done. But I wanted to add another detail. So before I put this curve in, I need to think about this because I would like a little trim piece of walnut to go along that curve and follow that curve.
So I've been thinking about how to do that when my first instinct was, well it's kind of a small piece. Maybe I'll go back to the CNC, make another template and then I can cut some stock and use the router table with a flush trim bit to get those down to perfect size. But then if I'm going through the trouble of designing this new little template, like why am I not just cutting these pieces on the CNC in a lot of cases, especially if you still like to do traditional woodworking, That's the reason why I'll make a template like this and then use this to make my part because I still like running my router.
I still like playing with all the different tools in the shop. I don't necessarily want to cut my final parts with the CNC But in this case it just really didn't make a whole lot of sense to make a template so that I could use that template just to generate these little tiny pieces. So believe it or not, I actually made a final work piece with the CNC. Cut it into a thicker piece of material, got my shapes. I only had to make two of them because then it took that thicker piece over to the band saw, sliced it up into eighth inch thick pieces.
And that leads me to this point here. And this will actually be the first time ever. Even though I've had a CNC for a couple of years now, the first time I'm incorporating a completely CNC cut part into my project. Not a big deal to most people, it's a big deal to me. So I don't know, it's kind of cool, a little bit scary.
But now I need to glue these on here and I want to do it before the curve is cut so that we can clean up that bottom edge together. So let me show you the process. So with the center point on my rail and a center point on my template line this up. And I'm just going to look at the ends here on both sides to make sure it's symmetrical. And the overhang is even you can measure this out, but I think it's easy to just eyeball it, it looks close enough.
I'm drawing this line. This line is here, just for reference, because now I'm gonna glue on my little walnut strip. And the thing is the reason I want that line there is because these walnut strips just can kind of change a little bit after the cut. So it's close, but it may not be perfect and I'll be able to kind of bend it in place when the glue is there and make sure I'm right on my line. and before I glue this down, it's not a bad idea to sand this edge here or sand the face because once this is glued onto there, it's going to be a heck of a lot harder to sand that.
And I do want to slight round over here. So all I need is a little bit of glue on the trim here, center it. This piece is a little bit long. That's intentional because I'll be able to trim that overhang flush afterwards. It's just going to put some pressure down to get all the air out of there. Should help prevent it from sliding and some spring clamps.
We knew that once the glue is dry, I could trim off this excess here and we'll flush that up. And now we can take care of this excess and flush up that curve. All right, so the next piece of information we need comes from a dry assembly. We need to get some space between those two bottom rails and find out what the length of the next set of pieces will be. So let's do a dry assembly. Now, according to my plan, the distance between these two bottom rails should be 15.5. But this is why at a point like this where so much has been done with this project. The numbers may be different. So, it's a good idea to measure before I measure, I want to make sure that my legs are straight. So what I mean is when we're only clamping at the top, it is possible that the legs could kind of go in, they could go this way, they can go out one way that I can make sure things are pretty close to where they need to be is by putting it on a flat surface, my workbench is flat and then taking a square to this flat portion of my leg.
And if I don't see any light here, which I don't I know that one's good and same thing over here because if there was any skew, right, this is how we would see it. And I don't see any problems there either. So, what I measure here should be fairly true. And again, it was supposed to be 15.5 in the plan. And it looks like I am coming in just a little bit under 15.5. About a 16th under. So good to know. Great that we measured now, what that tells us is the length of our three shelf pieces.
So now I could just mill those to size. Alright, so with our shelf material cut to size we can think about the joinery now, I definitely want to do a through mortise and tenon joint. So that on the outside of this rail piece, you start to see those tenons poke out. But then I started to think about the overall design and the fact that I do have a walnut accent in other places would be cool if those protruding tenons were actually made of walnut and not cherry. Well, how do we do that? What I thought we could do is maybe a loose mortise and tenon joint in this way we fit a separate piece of walnut into a mortise in the shelf and that passes through the mortise that we're going to cut into our rail using our template.
Now we will have one potential area that we have to be very careful with whenever you use different tools to make a mortise and in this case where it's critical that it fit properly, You could run into a bit of a problem in a mismatch because this template here was cut on the CNC. Yes, it's pretty close to 3/8, But it might be slightly off and then we're gonna cut this mortise with a single 3/8" router bit. So the final dimension of this mortise may not totally match the final dimension of the one in our rail.
So we'll have to see if that pans out the way that I want it to, but for now we got some mortise making to do. So let's start out with the rail using our template. It's the first thing I want to do is trace around the mortises so I get my template as accurate as I possibly can. Nice and centered mark my lines. This way I can clear out most of this material, which means the bit will be cutting nice and clean without much chatter when we do that at the round table. So let's head to the drill press. All right, you know the drill at this point and I gotta be really careful with this placement. So I'm just going to let the glue dry on its own. I don't want it too dry too quickly. Just feeling with my fingers, make sure we get the placement just right at the router table. I've got this little teeny tiny quarter inch flush trim bit.
I love this thing. And the cool thing about this is we have now all of this surface area, which makes this so much easier than trying to balance this with a handheld router and I can keep my template up, top, drop this guy in place, started up and then I can follow the rest of this perimeter here and it's actually very easy and pretty darn safe. One word of caution here, if you have a quarter inch bit, you probably want to use a drill bit to clear out these holes that's fractionally just a little bit larger than that. So you have enough room to get this guy in place center it and then start up the router. That went pretty well. So to make these mortises I've actually changed my mind, I was going to do a 3/8 bit. I've already kind of explain what the problem with that is.
So instead I'm going to use a quarter inch bit and make a pass in from each face. So once like this, then I flip the work piece around and go in once from the other side and I've already set it up to produce a mortise that's the same size as the other one. All I have to do at this point is stop at the two lines that I've drawn and you'll notice I have this other piece here. Well, because this is such a thin piece of material, it's tough to balance your router on that. So this piece of extra material is there just to support the router base and make it a little bit safer. So next up I'm just going to take this scrap piece of walnut and turn it into some tenon stock.
Size it down to the correct thickness and then cut it up into the pieces we need for these tenons. Now each one of these little tenons is going to be sanded as needed to make sure we get a nice tight fit and I'm also being very careful to work on one at a time. So I put a little number inside here in the mortise where you'll never, never see it. Also number the tenon and this way I can kind of from the inside, start working the piece in and if it's too tight I don't want to push too much because I don't want to blow out the grain on the show face but I just want to get to the point where it definitely is gonna go.
You can kind of feel that that's gonna hit home so we could stop right there and that one is finished. But if I need to work on these I could just do a little bit of sanding, get the face nice and cleaned up. Sand those routered edges also sand that end grain. Now if I just dropped my parts here and get my numbers organized, I can actually pre glue these tenons where they need to go that does not go there in this way, I don't have to worry about keeping track of these anymore.
Now one thing I want to add to my tenons here is a nice just kind of rounded softened profile pillowed profile if you will and what I have in the router table is a bull nose bit. Have to be careful with something like this because once I start cutting into this piece I could very easily just pushing further and gouge because I don't really have the benefit of this bearing so I'm gonna use a piece of scrap material here just to back it up. This is almost gonna act like a miter gauge in a way just to keep me nice and square as I push along, keeps this piece from tipping. But also I'm going to tape these pieces together because once I'm in this free zone, I can't afford this piece to move this way at all. So let's get a little bit of tape right along the edge, make sure they are both up against the fence. And now we should be able to safely push this guy through as you can see, they're just a real nice subtle touch. Take a look at this front shelf here.
We have to notch the corners so that it goes around the leg and just kind of fits in there. But there's two dimensions to a notch right? There's this cut back and then the cut over this way. So we need to figure out exactly what those numbers are. And I am not going to use my Sketchup drawing to do that. We're going to use the actual work piece and we essentially have to extract this information, one assembly at a time because we can't put this together. Obviously it just won't go together. So with the rail in this location, all I really need to do for this dimension is set a square so that I get that setback, whatever that distance is, I'm gonna lock this square in.
That's gonna come in handy in a second. So let's take this apart and then put this guy in here. And now the setback here is this distance, right? So if I can kind of mark with a knife along the end grain here or a pencil, I can mark that line. And that should tell me my second cut. Get a little skinny knife in there. Would just be a lot easier if that tenon wasn't there. Who's the idiot that glue that in place. And now I can mark back this way this time I'm going to use a pencil may seem counterintuitive because a knife line is really sharp, but I actually want to leave this pencil line intact. So if I use my knife to do this, I would have a cut line there that I would want to leave intact.
So I'm gonna remove everything inside of this pencil line. All right. Let's see how we did. The first one. Pop that guy in there. Now what we're looking for is right in here. Are we nice and flush? Yes. All right. Let's get that leg and this one I'm afraid this one might be a little bit snug, but we can always make an adjustment, I think. And okay, a little bit of breathing room there and I'm totally okay with that. But that essentially is what we're going for here. So now I could repeat that table saw is already set up. We can repeat that setting on the other three that we have to do two in the back and the one on the other side. So now with our shelves notched, we can now add the curves that we want to have.
So these kind of nest within each other and this is where we're going to make use of both the convex and concave versions of our template. So I'm just gonna line everything up with our center lines, draw it on there and we'll probably just use a flush trim bit to get a nice clean result here. Now, one of the last things we need to do is to add the curve to the bread board on our top. Remember this top was constructed in a totally different videos. So if you want to go check that out, you can, but we're gonna breeze right through it because it's already made. All right. So now we just have a whole bunch of detailed work round overs, little profiles.
I want to do a nice little bull nose profile on the front of that bottom shelf, whole bunch of things. So let's get to it. So there comes a time in every project where you have to make a big decision and that is when to apply the finish. It usually makes the most sense just in terms of storytelling to do the finish after the assembly. It's like the last thing that you do, but in a real working environment, a lot of times it makes more sense to finish the parts before the assembly. It just makes it a lot easier.
Imagine, you know these three shelves for instance trying to get in between them and get into the corners where each one of these pieces meets up to another perpendicular piece. It's just a whole lot easier to do that when these pieces are separate like they are now. So I am going to pre finish this project and I'm going to use a hard wax oil to do it not rubio this time I'm actually using a new competitor to rubio. I can't even really tell you who it is yet because they're not in the United States at this point, but maybe in the future we'll be able to talk about them. But it's a lower cost alternative. Which is good because rubio's expensive. All right, let's get to that hard wax oil.
Alright, now we can move on to assembly and you might be wondering, hey, didn't he mentioned something about a drawer. Well, clearly I decided not to have a drawer. Um we've got an end table in our living room that has a drawer and it kind of becomes a collection of crap and stuff. That's where things go to disappear. So I figured let's go without a drawer on this one. One thing I mentioned is with the pre finishing, huge advantage that it imparts is the fact that the wood is now sealed or mostly sealed, depending on the finish you use.
So if you have a water based glue that squeezes out, it's really easy to just take a damp rag, wipe that away and there's no residue, no absorption into the wood. So it's a huge advantage of pre finishing. Now, strategy wise, I still think it makes sense to kind of break things up into sub assemblies so that bottom shelf, I think we can focus on getting those through mortise and tenon joints installed and get that whole bottom shelf as one sub assembly and then bring the rest of the piece together.
All right, let's do it. I should mention if you wind up getting a lot of oil on your tenons, whatever your finish is, you get that on your tenons, you may want to sand them just a little bit, but I'm not too worried about that here. Okay, here we go. Now for some clean up. Alright, so while that is drying, we can assemble our fronts and backs. One thing you have to be careful of if you remember these two mortise is they meet inside there.
So, you want to make sure you don't get too much glue in there because you wind up having the glue seep out into the other compartment. And my big concern here is making sure I'm flush at the top apron is flush with the top of the legs. And to help protect the finished wood here from the clamp on this curve surface. I am concerned about creating a little bit of a flat there. So just some folded paper towel should do the trick. Okay. And of course we can now clean up that glue. I almost forgot that I need to add some hardware to attach our top. So what I've got here kind of like a traditional figure eight fastener. This is a Izzy Skirt washer. Just a little bit of an improved design here. So all I need is a force in orbit, flat bottom hole somewhere in my apron.
And remember the bottom here is curved. So that's why I just have some stuff serving as a shim. And this guy will then go in like, so it allows for movement this way. But because of this elongated slot, it can also move in the other direction if it needed to. All right. Now we can attach our top and I'm just gonna center it as best I can then uh pre drill and drive a couple screws. All right. Unfortunately these screws are not great for this. They're a little short and I should really have something with a panhead but I got to go to the screw store. Alright. Here we go. Yeah baby. Well there it is. And let me tell you super fun project, exploring the design using that one single curve and seeing how we can apply it all over the place without knocking you over the head.
But then most importantly for me on this one was the incorporation of CNC I don't avoid CNC because I have issues with it. I think it's a great technology and I really respect it but for my own work, I mean I go to woodworking for a certain level of hands on interaction with the tools with the wood and CNC takes me out of that but I still think there's room in my shop for CNC for various things and we'll see how that evolves over time. But this was definitely fun for me to see the different ways that I could utilize the CNC. To improve the results that I get while still satisfying what I go to woodworking for if that makes any kind of sense. I appreciate you guys having patience with me and following me on this build and uh you know I've got a sketch up drawing for this if anyone's interested, I'm more than willing to share that so you could build one for yourself. Alright.
Thanks for watching. We'll see you next time. Hootchie mama..