Welcome to my workshop. My name is Andreas and today we are installing the drill chuck. I have the Hammer C3 31, which is a 5-fold combination machine. However, the assembly process is identical to the assembly of the drilling device on the planing machines A31 or A41 from HAMMER and the FELDER 500 series. First we have to remove the protective cap. The screws are loosened on both sides and the cap is removed. After the cap has been dismantled, we need to remove the worm screw. This secures the 6-point nut on the planer shaft. So we unscrew the worm screw. I use two pipe wrenches to loosen the nut from the planer shaft. The nut has a left-hand thread. Harald and I have already loosened the 6-point nut in advance. Now you can simply turn it down. The worm screws from the drill chuck must be screwed back into the groove at the same position. Otherwise the drill chuck is not secured. In this area you can see the location of the worm screw. The drill chuck is screwed in far enough for the worm screws to grip the groove.
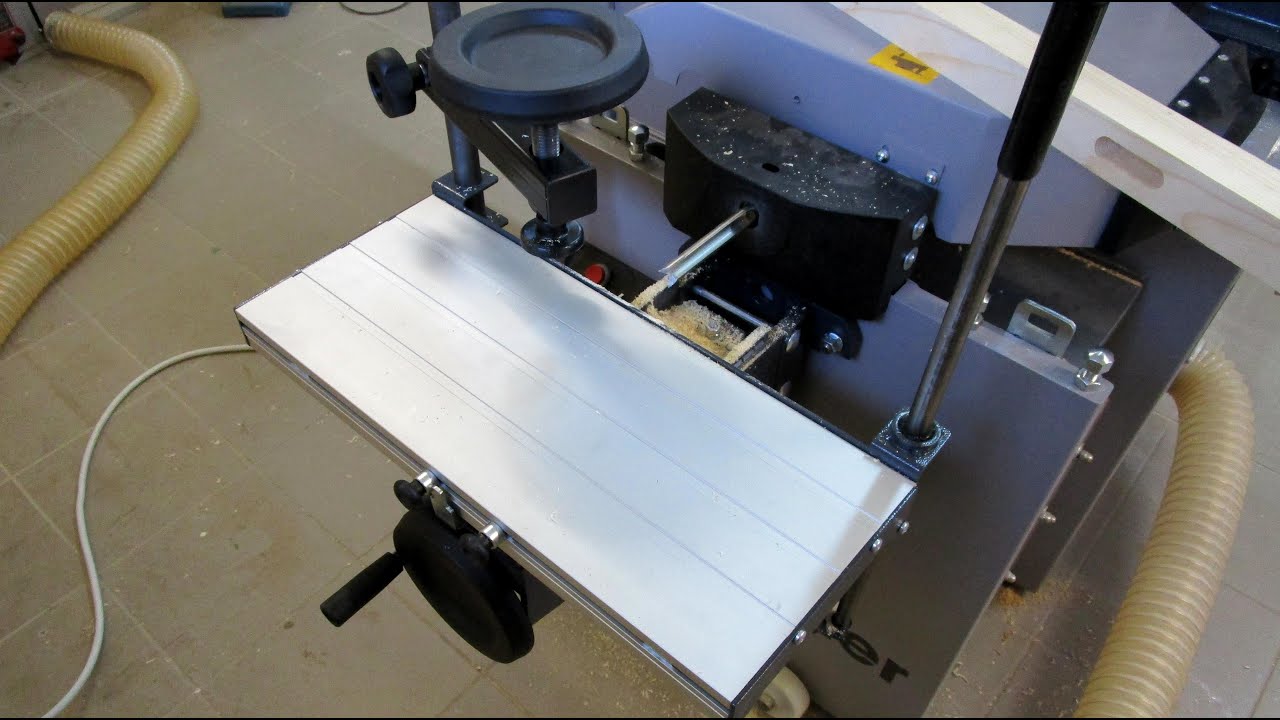
We hold the planer shaft and screw up the chuck and secure it with the grub screws. So that we can put on the drilling support, we have to mount the basic carriage. The basic slide is inserted from behind and fastened with the bolts. The base carriage is inserted into this opening. It is best to start with the insertion at an angle, then the metal strip goes in nicely and the bolts can then be tightened from the outside.
Then we put the drilling support on the bolts and tighten them with a cap nut. The drilling support is now firmly fixed to the planing machine. We'll start with the hold-down. Its task is to fix the workpiece on the table. We take the threaded rod and insert it into the hole. We attach a washer from below and tighten the 6-point nut. Before we machine the first workpiece, we need to check that everything is at an angle. So parallel to the drill. Because otherwise you would drill diagonally into the wood. First we check the inclination of the table at various points with the spirit level. What if the table doesn't really fit, how can you check that. In the meantime I clamped a long slotted drill. This drill serves me as a reference. I now take a chipboard and use the low clamp to fix the board.
Then we operate the hand wheel and turn it in small steps upwards towards the drill. And we check if the drill is parallel to the plate. In my case, we're lying everywhere. I will release the holddown now. The plate can be moved without an air gap and without jamming. Which means that the drill is aligned parallel to the drill table. And that's exactly how it should be.

We will now, of course, drill a test piece and take a look at the setting options in advance. We already got to know this hand wheel. This handwheel is used for height adjustment. This lever is for drilling or moving. With these stops we can set the width of the drilling area. Now when we move the table it doesn't go beyond the specified position. The depth adjustment is located on the underside of the table.
So here we can specify. how deep our borehole should be. So this is to be set here. To fix, we operate the handle. We're going to do a sample. We clamp our test piece and make a slit in it. The edge is placed along the stop and held in position with the hold-down device. I will now move the camera and then we will mill out the slot. The result is impressive, a clean slot. Everything is drilled clean. The machine works fine. We have discussed the height adjustment, the depth adjustment, the limitation of the drilling width and the drilling depth. I would like to mention one more thing, and that is that you can connect an extraction system to the underside to suck away the chips.
This is how you mount the drilling support on the planing machine on machines from the HAMMER brand and the FELDER 500 series. Thanks for watching Goodbye.

