
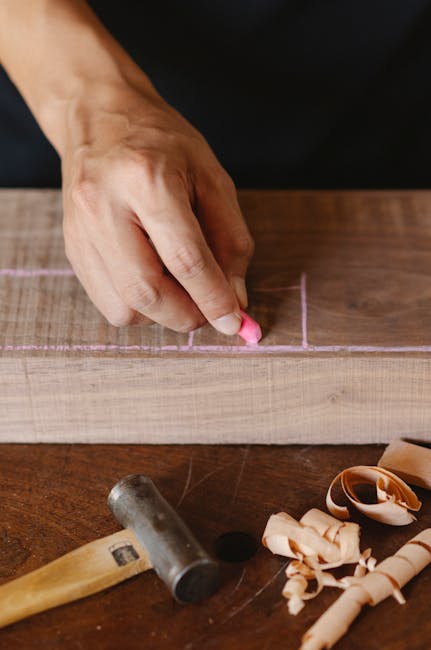
I just wanted to go through some aspects of spoon making and you know we we're introducing this really because we want you to see that making spoons translates into other aspects of the woodworking craft as a whole it's not really isolated just a spoon making and neither does it need to be isolated to woodland spoon making bushcraft or whatever else we just we're just trying to cover some of the different areas for spoon making these are some of the limbs that I cut and split in the woods recently I just took this and took my axe like this and split down this way and that gave me the two halves so I'm going to show you what I would do if I was using either a split half like this or some square stock like this this is bought wood it's been bandsawn but you could just as easily bandsaw this if you wanted to get your width down if you wanted to take off the sides so you'd end up with a square blank like this and you could go from there lay out your spoon on here and start carving your spoon these are a few of the spoons that I carved recently this is the one that I was doing in the woods this is a finished one this is one that I started you can see I've got the bowl scallops a little deeper you can see the knife marks in the back I've got my neck finished out now it's just a question of where do I want to stop do I want tool marks in it do I want the knife marks the the curved knife marks in the bowl do I want to get rid of them that's purely an aesthetic I might be looking for so these are some of the spoons that I've carved recently you can see this is really a stirring spoon or a serving spoon there are short ones long ones I got along here with a twisted handle I'll show you how to do that sometime in the future I've got little chip carvings some of them this one has got a different shaped handle little bit chunky made out of some sapele mahogany and then I've got a chip carved handle there so the choice is about wide and diverse you can really go in any direction you want so let's let me just go through this if I brought this into the workshop I'd be looking for things here I've got knot here knot here how does that translate on this side this is where this knot emanates from here this was a knot here that emanates through to here I probably would still use that I just have to work out where here's a nice clear piece of wood this would work fine for a spoon and my blank needs to be about two and a quarter wide a little bit more so I've got plenty of width on here so I might take this down on this side I just eyeball it here try and get it something like straight I'm looking at this undulation here it's not going to affect it this is where the knot was on this side of the piece of wood so it's not going to affect what I'm doing so first off let me show you I just got a piece of MDF here and I made a chopping board from it so this hooks into the vise here gives just to protect my bench from the axe I'm going to take my axe here and I'm going to chop out some because I want this parallel I'm going to be using the vise it's just another method and it's a very safe method for carving your bowl of your spoon so here I'm just taking off some of the excess see I'm choking up on my chisel on my axe a little bit here so just weaken up wood shut down the side like this cast your eye down it and look for I've got a slight on round on this side and it's really where that nut was you always find wherever the knot the growth of that tree branches there's always a slight variance in the way the growing the grain works with the tools and this is why we're doing this we want to better understand the grain so I'm just taking that down so I've got pretty straight on that side and then I'm going to come up and use my finger as a gauge on this side just run a parallel line here that gets me close to the width I want I probably wouldn't go on the top I'd probably start halfway down just weaken some of the fire usually if you're a novice to woodworking – with an axe don't go more than half way up if there are things that can happen slippages if you're about halfway you have a little bit more of a buffer in there this wood splitting very nicely this is some Sycamore that I had this is really to go in the vise would I axe the back off? I don't really need to I could just take out some of the bulk of that waste this axe is as sharp as my chisels so I might try a little bit down this way now I could rest my axe on here with some shortcuts like this get myself a little ledge and then axe chop to the two together like this just to get me close in and this has got me from some firewood basically into an approximation like this one here so the methodology from here on is going to be the same so we're going to use a different technique now to get this spoon into shape just to finish off on the rougher blank on the this blank here I might do something like this using my axe here I can use it very similar to a paring chisel or just a very wide paring chisel just to get rid of this pith on the center and to give me something of a more smooth surface here you can see I chopped this and it's parallel so it fits in the vise very nicely it's very nicely anchored and it's very safe my hands are behind the chopping edge as my axe now so this works perfectly you can see the axe is a very handy piece of equipment in the hand tool shop in a regular shop like this and I could then take my spoon pattern find the center on here and here oops broke my pencil like this and then trace around this and that gives me the overall shape for my cut when I shape my spoon so there's this part the reason I put this center line on here is so I can bring another shape this one here into here this just gives me the ability to make sure that my bowl is centered in the spoon like that can you see that good great so let me put that one aside because I'm going to work on this one what about your patterns I just took a box here like this can you see to make my patterns I took the corner of the box like this and I came up with a shape like I'll show you how I drew this I just came up with a length that I wanted so my overall length was somewhere like this any length of spoon will work it's up to you and then I just came on this like this and drew a half-share half oval and then I took a parallel line like this and that basically gives me the spoon and then I cut that with a knife like this and followed that so that's how I got that one then I put my spoon blank that I just marked onto this at the other corner and I marked around it here folded it and I came inside it with a little course of an inch rim like this and I cut this one from here like that so that's how we get the shapes our pattern so let's get rid of that one now we've got our patterns I have permanent patterns made out of plastic sign material it's just a sixteenth of an inch thick and it's forever it'll last me forever so those are the patterns that I use alright so I've got a piece of ash here I got two pieces of ash this one will make a wider larger spoon so we'll go with the smaller one and we'll lay this out on here like this just centre it on your spoon the handle length can be any length you want so just leave it to the longer for now and then decide after where you want to where you want to cut it off if you do want to cut it off so that's my spoon in the middle just take your pencil and eye-ball the middle of that and eye-ball the middle of this then take a straightedge anything will work draw the line down the middle like this take the fold of your piece of cardboard like this and mark your spoon on like this and so we've got the centre line this centre line is going to be very important because this next bit is a wonderful part I developed this curriculum for carving spoons using a gouge because I wanted to work with my children and this was one of the very first projects I ever did with my young sons I had five young boys and then we just worked together carving spoons I wanted something that was safe you can see out if you can see this gouge close in this is a Hirsh gouge I bought this from Highland Hardware in Atlanta Georgia and it's probably one of the nicest gouges I've ever worked with it has a good end edge retention but I'm going to show you how to use this.
This comes straight out of the box ready to use of course I've sharpened it many times since I bought it this is a 4x hammer seven one two it's a 38 millimeter inch and a half and it has a hard face and a soft face very useful for different aspects of woodworking I use this as a general chisel hammer and I love the way it works it's very easy on my tools but it has great COP center of percussion so when you strike here it really delivers the goods to the cutting edge so what I'm going to do here I'm going to make a mark across the middle of the spoon this way just to give me a reference you won't need this after you've made as many spoons as I have you won't need this so watch what happens here I'm going to go about about a third of the way along from here and I'm going to just chisel at an angle like that and then I'm going to turn around and come from the opposite end so this is just sure so you can see in the camera so I'm going to do the same from the opposite side and this creates what I call the eye of the spoon watch back to the other side you don't have to turn this around normally but I want clarity for you so back into the same cut watch what happens here I lift this out and I end up with an eye right in the middle so that's one quick gouge cut I move about a third of the way along here two-thirds of the way along and now I'm working towards that centre I'm not so much worried about my width and the same on here I'll lift that middle bit and I might come in from the side here just lift out that middle section and this section here so there's my second eye there and this is very silky smooth here so now I come along right from the very end this time so my chisel I don't know if you can see that in the camera but my chisel my gouge is right on the line there this time I work down here and then I work around the side both direction here just to increase the the width of my chisel now remember I'm working in ash which is a hard wood but you could easily be making your spoon even from pine or spruce or just about anything I don't go too far don't go down into the middle I don't actually hit the middle because it can split underneath this cut here so this next cut is more like a stock cut watch here you can leave it now we're close to meeting the other side like this I'm going back to the other end to work from here watch now there's my eye my third eye is coming out watch what happens this is so fast if I stop talking watch here now I just roll my gouge into the cut like this so I'm feeling the grain I'm responding to resistance if I get too much resistance I might change direction a little bit more I'll use more force now we're refining this just without upper body work this is hard, if this was green maybe I should do one in the green this would just peel out so nicely so look at this now we're already down well into the bowl very safely and this is what the difference is this is the difference between a woodland workout because in the woods you might be using knife you would be paring this and you're using your body to anchor the wood as well as to carve it which is fine I mean that's that's another diverse aspect of woodworking I think so I'm going down into the bowl and then I'll show you what I've got is a bowl that has very little knife work in it very little gouge nothing it's almost ready to sand if I wanted to sand it so that works perfectly now here right in the very bottom where you have the two aspects converging in the middle I'm just going to go across the grain and pare across those fibers and this is the best way I think for getting children involved in woodworking even though this is a sharp tool if you're supervising properly look where my hands are in relation to the cutting edge there behind it not in front never in front that's how I would carve the bowl to my spoon and I would carve it before I shape any of the outside because I've got the anchor of the vise that safety feature in there now then where do I go from here I would probably want to scrape out if I wanted this smooth inside I would want to scrape it fairly smooth or even completely smooth with a scraper and I've got one here that I shaped from a square straight scraper there's a square one and here's another square one all I've done is taken the corners off and filed it so that's given me a very nice scraper so here I go with this see how this basically follows this very similarly this is a number seven gouge it's 38 millimeters which is about an inch and a half wide you can go with a narrow one but the wide one really does it so here I scrape it looks on your side like it's doing nothing but on my side on this side you can see it scraping off the high spots and giving me a nice even surface removing any and all gouge marks so I work the side of this and we'll do another video on how to sharpen this if we haven't already done it yet we'll show you how to make one even that'd be a great one wouldn't it so pull these until you down and if you want to sound you can but this will probably get you smooth enough it's nice and smooth I don't feel any chisel mark can you see inside this bowl in fact I can see it glistening which means we've caught the cutting edge of the tool and presented it to the wood to give a pristine surface alright now then what do we do from here? Well yesterday or whenever in the past we did axe cuts on the side of this to make ourselves the blank to get the rough cut what would you do here? I'm going to show you two quick methods that erm I think will help you I'm going to use this saw like this I'm stopping just above my line now this is one way to ensure they enable you to make sure that you're not running off grain so this grain is fairly straight so which way I'll kind of try and do this in the direction of the camera so I need a wider chisel here's a inch inch and a quarter wide chisel bevel down that's probably the hardest spot on here I'm going with bevel up now going with the bevel up is going to drive the chisel more down the bevel drives the chisel downward so you can see there he's just now what I'm going to do here I'm going to come halfway up can you see that in the camera there? I'm halfway up I split see how the grain rises there and the grain is rising again so I am very safely able to cut along that line I think now watch see how it's coming up stayed parallel there confident get a little near the line I'm going to try higher just to get a direction get some grain direction here I'm going to move along a little more grip on my piece of wood this is one new aspect to getting your wood shaped okay I'm going to go to this side see I left the line in all the way along I've left the line in here when I come afterwards I'm going to show you how we use the spokeshave for some of this so here now I'm going bevel up this time go ahead and take that out that will reduce some of the opposition for you there again now you can see you can hear how hard that is let me show you something bring the camera in here and I'll show you how we address that we're cutting wood that's an inch wide watch what happens when I hear this dead sound watch this now I go about quarter of the width of my chisel see that very little opposition when I take it a little bit at a time like that now I could saw this with a coping saw too see that no resistance I just reduced some of the opposition there now then so we've done this half we could do the same on the other side we could use just a coping saw to go down here I'm going to try something see what you think we can clamp this in the vise perfectly safely without damaging anything I got a bow saw here that I made we'll probably do a video on this at some point so down here I'm going to give you a quick line on where I'm cutting here down here let's see I can't get very far because it's going to hit this bar this is not a turning saw so I'm twisting this because the grain wants to carry the bow saw in another direction which I'm going to use hopefully to my advantage here so I could have done my stock cuts with this side would have worked great wouldn't it let me take this and go a little bit further on with my pressure because I can feel flexing a little bit I'm just putting a little more pressure on my saw blade you can see that side see it's cutting away from the line there so I'm going to take out a little bit more and I'm going to come I'm going to turn this around because I want to now put the bar of my bowl on the opposite side like this so I'm going to flex my blade into that cut and this is going to help me regain a little direction there even if it takes me way off which it's definitely doing here it's not going to really hurt most of what I want to do with this now I come down this side it's got me close to my line so it's question of being versatile adapting your body your expectations just keep changing and shifting direction again safe for children to use here I can read the grain here and what I could do now if I wanted to is I can split that last bit alright that's got me very close so here I'm going to take this other corner off here this is just taking some heavy heavy work out let me show you what we've got now so we got very similar from both sides didn't we this is so now we have to shape this and this means you're going to come from here follow that bowl shape a little bit I'm going to come along here and I want my handle to go down like this in a bit of a sweep you can see that so this is just taking the bulk off ready for more refinement so here I'm going right on this corner then I'm going to take this corner off now I could probably just cut that but I want to show you what I might do as an alternative to the bow saw so I might go back to my chisel and take a look at how this is going to split so I could take this corner off this way and achieve the same results whether I use the bow saw or a handsaw at the chisel so I'm going to take this middle section out here this is where I might I could use the bow saw for the whole of it I'm putting a stop cut here bevel of my chisel down working along this back here just to get my shape watching the direction of the grain see that and the same on this side I come now I could I could go with the bow saw again if I if I chose to here or I could even use the axe if I wanted to or I could just use the chisel what you want to make sure is it that bow saw is going to turn before it makes your neck too thin if it's not turning you just have to stop and then chop down across with the grain with the saw and reposition your saw a little bit further like this that gets most of the waste away then you could refine it more with the chisel bevel down so check your grain direction this is wonderful and the purpose of this especially with the spoon is to get you to start reading the grain looking at the grain trying to find out guesswork sometimes which direction is best for cutting this works so nicely can you see that so there's my spoon handle now I have to take the corners off typically I would probably choose the spokeshave the same on the back here but what I might do first is let me see here see how this might bounce see this is bouncing here if you take something thin what do I have or thick something thin works best this is a little bit thicker than I want you can put this under here like this and that will help cushion that so here now I like it when I can just rest it straight onto the bench like this or the George so here I might go with my jabbing stabbing just take off the bulk of that excess follow the shape what you're doing is carving everything away that doesn't look like a spoon this is hard hard wood really right now then see we're getting something of the shape I want to introduce another tool that you may not have used yet this is very popular for me I love this tool this is the first tool I ever bought for my children and even my grandchildren a spokeshave this works so well here see this so helps me to refine the back of the spoon it really replaces the knife we were using before because if we we have much more control with this especially in the early stages so it's great for children is great for new woodworkers and I just work the back of this spoon taking off the high spots until I end up with a beautiful dome gracefully shaped like this you can see this what about this bit here just drop this right in the vise here if people think this is fat this is relaxed muscle and I just lean into the wood like this works perfectly usually develops around 45 years only males so I just pull this up it's not a lot different than peeling a potato if you can peel potatoes you can make spoons so I'm coming up here taking it all the saw marks all the chisel marks any unevenness see I'm pulling the spokeshave onto the top edge of the spoon here and this grain is rippling I can see it it's really responding to a sharp edge very well working with dry wood like this is a lot different than working with the green wood so it's going to be a different experience for you if you've only worked with green wood we've got the shape of the back of the spoon you can see this beautiful rounded surface we've got the bowl carved this top edge needs a bit of refining to strengthen this edge because this can be weak so just take your spokeshave refine it this way so you're reading the grain again so I'm taking that edge off just to strengthen it it's going to be hitting the side of a bowl for a long time so I may as well take it off now look what we've got here we've got this nice thick edge here coming to a point so what we have to do now is we've got to carve the bowl I mean the handle bit thick here so to do that we just take off the corners at 45 like this like that keep taking it down go right from the edge here what I've done with my spokeshave you can't really see this in the camera this side is set deeper than this side so I have a coarse cut on this side like this listen and I'll go to this side and I have a much finer cut so I go here to remove the heavy stock and and here to make the cut more refined that depends on what you're going to use this spoon for the shape is nothing the shape you can shape any shape you want this is one of the wonderful things about this is you're not buying something that was made in China you're not buying something made from bamboo you're making something from what was literally a piece of firewood probably it's an offcut it's something that fell from the turf chop saw again I've got a spoon coming from my own hands choose direction if you find your ripping in the grain turn it around and pull it up this way this is a great spoke shave did I tell you this was one made by my son probably my son made this spokeshave for me when he was 14 years old so I'm getting there now look at this this is a chunky spoon this is nice I love it I love it so right into the neck here this is just a flat bottom spokeshave I very rarely find I need a round bottom spokeshave except for very tight radius maybe less than six inches in diameter I can get most of my work from this but this spokeshave isn't the finished job usually trying to get rid of a couple of sore nicks here in the surface here not too tight in the vise you don't want to break that bowl imagine you and your kids out in the shop carving a wooden spoon that's going to last a lifetime one more thing on this and that is to scrape this I'll show you what I do just to refine the cut I take a scraper like this one this is just a flat piece of steel but it's special steel it's carbon steel and I pull this here on the back of the spoon on the convex surfaces and this evens out the grain takes out the nicks and angulations left by the spokeshave until I get a smooth surface you can see here let me show you I flex this and bend it so it gives me a very nice even listen to this sound and that's how I would make a spoon this is generally a little bit safer what's the missing ingredient in maybe using the axe out in the woods you don't have the anchor of the vise and it's the vise that makes a big difference to it so from here on this question of refining smoothing scraping and I'll finish off the spoons and I'll show you what we have at the end of the day thank you for watching