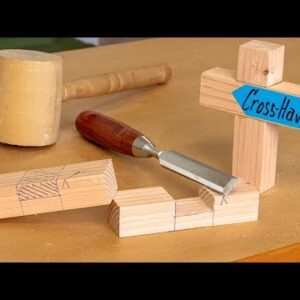
A cross having joint is useful when two work pieces cross paths. Start by making the shoulders of the joint on the cross rail using the vertical piece I use my combination square to ensure that the pieces are at 90 degrees of each other use a square to wrap the shoulder marks around the two adjoining sides. Follow the same steps to mark the vertical piece. I mark the face side with a loop and the face edges with a V arrow that points to the face side. Using dividers I can find the midpoint of the shoulder line on the edge face. Midpoints are marked and connected with a line that marks the depth of the lap. Shade the section that wraps around to the face side and shade the section on the face side. The shaded areas will be removed to make the joint. Other tools such as a marking gauge and a ruler can be used to find and mark the midpoints on the shoulder lines. Scribing the edges of the waist area may prevent blowout while making the cross grain cuts. Removing the ways can be done with hand tools.
Using a handsaw cut the shoulders near to full depth of the lap. Then cut a series of relief cuts between them. Make sure to stop short of the depth line on all cuts use a chisel and a mallet to remove the waste a razor sharp chisel will give better results. With the chisel pair the remainder down to the lap marks. Cutting the lap can also be performed with power tools using a crosscut sled on a table saw the blade is lifted to the depth line.
The first cut is on his shoulder each following cut removes more of the waste away. Some pairing with a chisel may still be required to smooth the rough surface left by the saw. If the fit is good then the two pieces can be joined with glue and clamps otherwise use the chisel to pair it closer to the fit. The cross having joint is also known as a cross haft lap joint or center lap it is a strong joint useful in building joinery and furniture construction I hope you enjoyed this video if you did please subscribe to my channel to be notified of upcoming videos you.