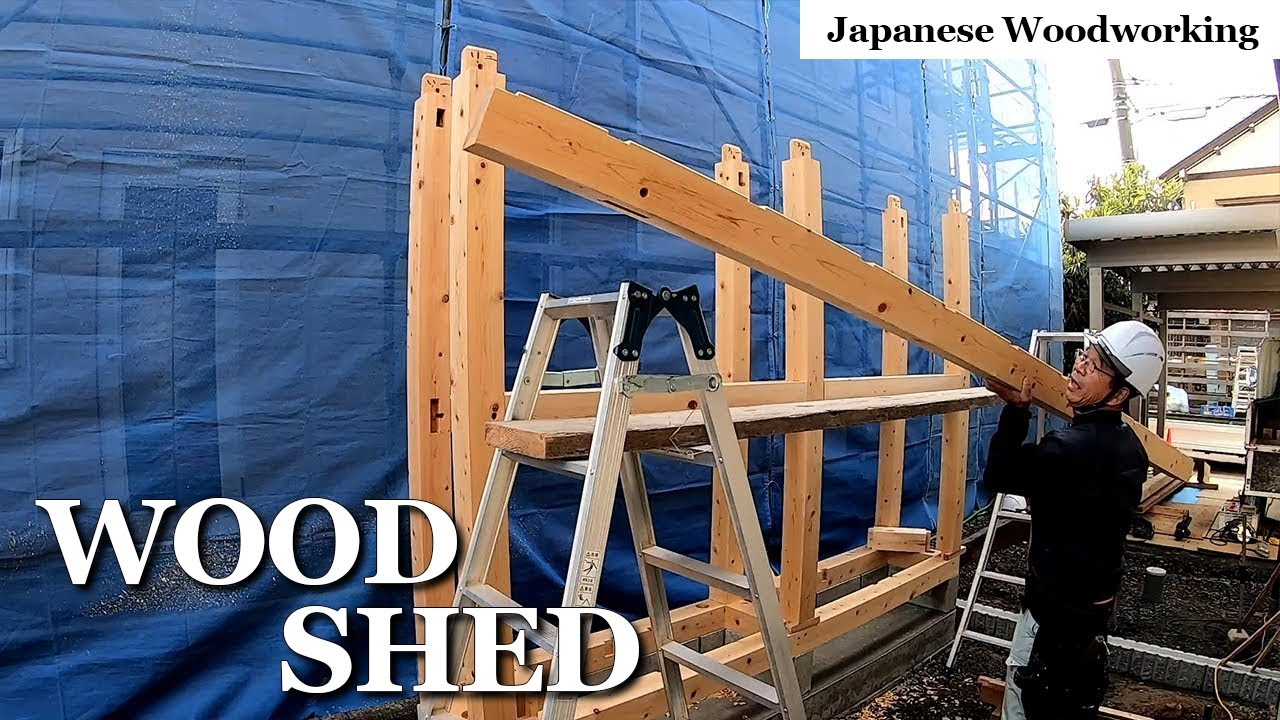
Hello. This is Sho-yan a Japanese carpenter. Today, I’d like to make an outdoor woodshed which is my last job at this site. This time, I’ll make a woodshed. It will be a 400mm deep and 3m wide shed roof. I’ll confirm the shape by a full-scale drawing. The material is 105mm square lumber of Japanese Cypress. I’ll use this for columns, foundation, and beams for all of the material. This is called “Shakuzao”. A long time ago, we write dimension to the thin timber just like a furring strip that was about 30mm lumber. We marked the whole house using that. “Shakuzao” is an aluminum box-shaped scale just like that. I’ll mark each part by using this. The materials are planed timbers. I’ll draw a marking by a ballpoint pen. It can draw beautifully and it’s easy. Since the dimensions of the materials are the same, there are no wastes of material for foundation, joints, and columns. Now, markings are completed. It’s a small building, but there are a lot of parts. Now, I’ll start to cut from the columns.
Because it’s an outdoor shed, it’ll be exposed to rain. So, I don’t want to use any metal as a material because it will rust by all means. So, I’ll use plugs for the joint. Even if for a woodshed, it’s a decorative beam. I’ll hit the hole portion by chisel. And carve holes by a hole drilling machine. The joint portion is called “Komisenuchi” I’ll carve the holes as deep as I can. Also, I’ll cut tenon as wide as I can.
The parts are thin. So since the remaining thickness after carving the hole is also thin, it is difficult to carve the hole. Since the remaining thickness is only 15 mm, be sure to attach a column underneath, then carve the hole. Otherwise, the bottom part may crack when it goes to the bottom. When finishing a mortise in a deep hole, place a column underneath more carefully and carve it to finish. Cut the length of columns at once by Ohmaru saw. Next, cut the foundation and the ceiling joists. Make a plug hole using a drill in the same way as the column, and make a mortise by a hole drilling machine. Cut out the joint portion called “Ari” Because the blade of the “Ohmaru saw” can’t cut well, I’ll hit it by a chisel to the top of the “Ari” portion.
This tool is called “Ohire router”. It can cut both “Ohire” and “Ari”. Nowadays, we don’t cut it manually, but way back when each carpenter was cutting manually, this was one of the most dangerous tool. Because it’s easy to reach the blade, a lot of carpenter cut and blow away their fingers. But it’s a convenient machine. What looks like smoke in the video is because the blade can’t cut well and the material is abnormally dried by artificial drying. It's not burning, but it's powdery like smoke. It’s a small joint, but this is the processing of the original "Ohire" blade. Cut out and finish the “Ohire” and “ari” portion by a chisel. I’ll cut out the “Kogaeri” of the rafters at the top of the ceiling joists. If I don't cut out the “kogaeri” properly according to the slope, the ceiling joists will tilt when I screw the rafter. So, I have to cut it out exactly according to the slope. Make tenons. This machine is called “Ari・Kama・Hozo tori” It can make “Ari”,”Kama” and tenon.
Actually, I need to put the cover properly in front of this. But if I put the cover on, I can't see it well and it doesn't move smoothly. It would be good if the material was a little larger, but I'm using it a little pushy. It‘s dangerous, but It’s a really convenient machine among all carpentry tools. I wouldn't think to cut out manually without this machine. Chamfer the surface of the tenon and finish it. Cut out 30 mm from the bottom edge of “Ari”. In the case of “Ari”, take a large surface so that it is easy to insert. Make a plug hole to the tenon by using a drill. The position of the plug hole is 3 mm off from the hole and the tenon. It’s offset by 3mm so that it sticks together. If you hit the plug, it will stick no matter what. Since I finished cutting the material, Finish it by electric planer. If the blade cuts well, it’ll be finished beautifully by electric plane. Cut out the timber for the roof. I don’t use the tin plate for the roof of woodshed.
I’ll process timbers as a decoration. To be honest, it doesn't last longer than tinplate, but it’s like a typical shed and it looks cool. Make a gable board according to the roof slope. Both the gable board and the roof board are cedar boards. It’s made only from heartwood material. It’ll not rot if I make it from heartwood material. It will last for a long time. I’d like to install 4 roof boards. Since the allocation is a little bad, I’ll only cut off one piece and plane the overlapping part to a slope. Since the board is relatively thick, the overlapping part will be overloaded. So I'd like to take a little slope and install it.

I’ll make a “Mizutare” to the gable board as a decoration. Now, I’ve cut all the parts. First, I’ll install the foundation. Straighten the anchor bolts, remove the nuts and mark it. It's a small shed, but if I don't tighten the anchor bolts firmly, it'll be a problem if it will be flown away to neighborhood when a typhoon comes. Duck boards will be placed on the top edge of the foundation so that the anchor bolts will not stick out. So, I’ll do ”Zabori” and place there. There are many cases where the concrete is high around the anchor bolt for some reason.
So, shave off the concrete just in case. Install the foundation. The anchor bolt will be inserted on the side that holds the foundation beam. It means to insert on the tenon side of the joint. Tighten the anchor bolts firmly. and make holes for the plugs. Stand the column and assemble it. Actually, I started working from noon, but then, it started to rain, so when I assembled it in a hurry, I assembled only one upside down, and it was very difficult to fix. It’s a small shed but it's quite difficult to assemble because I made a lot of tenons. So, the bottom tenon is floating and assembled. If I float one thin timber, it will spread above. After all the tenons on the side are assembled, I will lower the columns together. Hit the plug. The stopper is designed to be 3mm closer, so it will always stick if I hit it. Install the rafters.
The rafters are cut at the workplace, so as not to generate even a little garbage at the site. I’ll drill by long screws. This is the fascia in the back part. I'll attach it only to the back so that even a little rain won’t blow in. Install a gable board. I hit it with a stainless steel round head nails. Install the roof board. I’ll make that the side doesn’t stick out. I’ll make the side a large rafter style and fix the end of the surface. The length is cut to fill the inner surface of the gable board. Overlap about 20 mm and fix the roof with stainless round head nails. The roof is quite high from the ground, but when viewed from inside the house, it will be below the line of sight.
The top side can be seen well from there, so, I will hit the nails’ interval neatly. Put the thin packing inside the board. Also, I want to hit the nail in the middle of the board. The rain will hit this directly, then exposed under the sun again, it will repeat warping and bulging. So, if I don’t hit the nail in the middle firmly, the board can crack. Only the front board is single, So the nail was so long for it. So, I cut the nails by a wire cutter and used them after adjusting the length. Cut out the length of the gable board and chamfer the end surface. I wanted to hit the big rafter as it’s to finish the roof, but it started to rain. So, I’d like to hit the horizontal materials first. Since I carved the foundation beam, I’ll fill it with urethane foam spray.
Install the substrate material for duck board. Allocate the horizontal materials that’ll be installed outside. I’d like to finish the outer by hitting the horizontal material. First, hit the horizontal material from the back side. The back side is built on the edge of the boundary. So, I can only do it from neighbor's premises. It's annoying, but I entered there. Back side can’t be seen so I’ll drill it by screw. Of course, the side can be seen, so I’ll hit it by decorative round head nails. After all, it’s better to finish the visible part with round head nails than to finish it with screws. Hit the opposite side as well. The rain has stopped, so I want to finish the roof as soon as possible. Caulk between the boards to keep out even there’s soaked rain. And I’d like to finish it with a decorative large rafter. Cut out the swollen urethane foam. Then Install the drainboard. I’ll drill the drain board by screw. If the firewood is on it, it won't be seen.
so, I think screws is enough. It was quite difficult even if it’s a small building. I think this can stack firewood for one winter. Now, I’ve completed the woodshed. It took 4 days since I started cutting. It is a sturdy woodshed. That’s all for today. Thank you for watching..

