Hello, this is Sho-yan, a Japanese carpenter. Today, I'd like to finish the common space
for a family. I'll make a desk for a laptop and study here, handrails over there, and ornaments here. First of all, I'll make handrails for fall prevention. Chamfer all materials of handrails. This time, handrails are not for the support
for walk. They are for the prevention of fall accidents. The handrails run not vertically, but horizontally
this time. Actually, it's better if the handrails are
vertical because children cannot go over them. But in this case, vertical handrails are not possible to be
installed due to the shape of the space. In addition, it's important to make the pitches of the
handrails narrow enough.
The bodies of children are as narrow as their
heads. So if the pitches are too big, children can fall from gaps between handrails. The location of handrails are the outer corner
of the room. Layout is a right angle. The corner supports are made of Japanese cypress,
and will appear. So on that support, make mortises called "ohire" and fix the handrails in them. The corner support will appear, but both ends of handrails will be fixed on the substrate materials in the wall, so those ends will be hidden. This side also used to be planned to appear, but the designer asked me to hide the ends in the wall. So this side also will not appear. Let's make mortises on the supports. First, do "nomiuchi" "Nomiuchi" is to make guidelines along the
marking by hitting with a chisel lightly. It also can be done with a cutter. But this time I use a chisel.
Make holes by drill that is a little thinner than actual dimension
of mortises. It takes time to make mortises only by chisel. So carve rough shapes by drill carefully little by little. Thanks to "nomiuchi" the drill doesn't slip off and the edges of timbers don't tear. After that, finish the ,mortises by chisel. Don't carve the outlines, carve in front of the outline until the depth
first, then shave along the outlines. There are so many mortises, so it's hard work, but finish one by one carefully.
Both ends will be hidden in the wall, so make mortises by saw. I'll slide handrails from the side, here. This portion will be hidden, so can be finished
by saw. It's not a very difficult work. It takes only 1/5 or 1/6 times as the supports
that will appear. "Ohire" for appearing portion is a hard work. The material of handrails is "Akami" portion
of cedar. It's straight grain but not all materials
have the same grains. So decide where to use which material based
on the balance of looking. Chamfer a little bigger at the end surfaces, not to make timbers tear when install them. The handrails are horizontal this time. Basically, at the time to fix the horizontal
members, raise the center portion up. And use the vivid portion from the top side. Do "Kigoroshi" of the material to appear. The mortises are made a little smaller than
handrails. So, do "kigoroshi" to make the edges a little
smaller.
OK, let's install them. Fix them from the bottom side. The portion to appear cannot fixed by screws, so fix them only by glue. It's hard to install, so drive in wedges to make the mortises wider then install the handrails. This time, I made 5 steps at the front, and 6 steps at
the side. Actually it's easy to make both sides steps
to be the same. But children of the client are small and 1 more baby will be born. Children often try to climb up the handrails. So I decided to install 6 steps of handrails
until the ceiling to keep safety. Install 5steps of handrails at the front side. This side cannot be fixed from the back side. This is the tool to fix flooring, called "tonton". I'll use this here. The third handrail cannot be installed from
the side. So install it by "yariokuri". Install the first end deeply into the support,
then pull it back at the position. This way is called "yariokuri".
Lastly, apply enough water on the ends. It's better to apply water as soon as possible after "kigoroshi" to expand timbers as original. Fix the portions to be hidden in the wall by screw. OK, handrails for fall prevention have been
finished. This material is also for fall prevention of the other area. This is for foot level. I'll make it look like an ornament. This area is a little narrow. I'll install 3 materials of different shapes. The top one and the bottom one are timbers
of square section. Rotate them for 45 degrees, to look like rhombus shapes. They can prevent fall accidents. This time, I didn't make mortises.
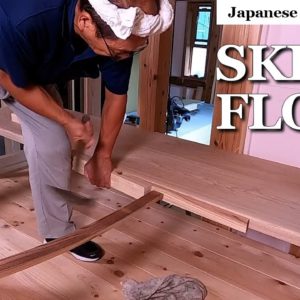
Fix them by screw and glue. Ok, fall preventions have been completed. Next, let's make a desk for a laptop and study. This material of the plate is ash of 40mm
thickness. This plate was made by a furniture dealer. It's 600mm wide. The common space seems to be narrow, so I'll make it 500mm wide. Two knot of 40mm thick boards are sticked
to make this one plate. 40mm thick ash plate is very heavy. To support that heavy plate, Cut out 15mm notches on the columns and fix the plate tightly.

It cannot be supported only by substrate materials. The floor level of the common space I'm making
now is a little higher than second floor level. It's a kind of a skip floor. Usually, a skip floor means the floor between first floor level and second floor
level. But in this case, it's made at the higher level than second floor level. That means a small floor comes in the space above an
atrium. That space will be used as the common space
for a family. If there is a knag where I want to make a
notch, carve it by drill to break the knag.
Chamfer the corner of the plate to go into
the notches. Measure the length and cut it. Here will be the low handrail of the front
side. This substrate material to fix the desk also works as a handrail. Chamfer the top side corner of the plate roundly by trimer. This chamfering is called "bozumen". It's round shaped chamfer. There are many kinds of shapes of chamfers. If it's complex shape of chamfer, it hurt elbow when someone leans on it.
So "bozumen" of simple round chamfer will be a good texture. Lastly, adjust the round shape by paper confirming the texture by finger The furniture dealer finished this plate well, but I finish it by paper once again. Finish it by rough paper once first, and by fine paper lastly. Ash is hard material. It's used for bats of baseball. It will be very clean by finishing by paper. Let's install the top plate. The dimension of the notches I made is the
same as the thickness of the plate. So, it will be tight.
To install such kind of tight materials, it's better to prop a timber. By doing like this, the material go into the
notch easily, and it will be more tight than hitting by 2 workers. At the handrail side, fix the plate only by glue. Keep it fixed by clamps for a while. In the case that it cannot be fixed by clamps, put support timbers beside it, and hold it. Fix the other locations by screw. Of course, drive in screws from the top side. If I drive in screws from the bottom side, the front side of the plate will come down.
So, keep the back side down by 15mm by driving in screws from the top side. Then there is the force to make the front
side come up, and the plate is less likely to come down. Now it's hard to come down, but just in case, fix the support on the right side. It's a little too big, so process it a little to look good. The support is also made of ash. It's too hard, so make a hole by drill in
advance. It's difficult to drive in a drill into this
kind of hard timbers straightly. It's broken. Drills tend to enter along the grain of woods, so cannot enter straightly easily. Hide the head of the front screw by a plug. Apply strong urethane glue on the support, and fix it by screw tightly. The plug is also made of ash. Drive in the plug into the hole I made before. This kind of plug is called "tarusen" in Japanese.
The shape of it is the same as plugs of barrel
for alcohol, as you can see. so it's called "tarusen". Remove the overhanging glue by cutter. Install the coping of front handrail. Apply the same glue on this as well, and drive in screws from the bottom side. Lastly apply wood glue on the end section of ash timbers. This is for the prevention of tearing of timbers. This glue will be clear so will be finished beautifully. OK now I've finished this common space. The 40mm thick ash desk for a laptop and study, it looks splendid. That's all for today, thank you for watching..