
https://youtube.com/watch?v=8yNU9GM3F0w
The mallet has seven parts to it. Two faces, two fillers, the handle and two wedges that get crammed in there as we'll show you here… Here's the two fillers, the Handle, face… and the wedges. We laid them all out for you here so you're gonna cut them out on the bandsaw but for those of you who want to get fancy and build from the ground up, we dimension them for you. For everyone else We're using these outlines so go print these out and we can start cutting. Now that it's printed just cut out the shapes. You don't have to be too exact because you're just gonna trace these on the bandsaw anyways, and you'll just follow along that line.
We decided to use Purple Heart and Hickory for this. Okay so all we have to do now is glue the paper onto the wood. I'm using this spray adhesive. The brand probably doesn't matter but you can find it at home centers or craft stores. Just spray some on the back, give It a little wave in the air until It gets tacky… and attach It to the wood. Make sure to take into consideration the direction of the grain you want the handle to go with the grain – that's where the strength is. For these smaller pieces you want them in this orientation, with the grain running this way Okay so now we have to remove the paper. We glued It on with the spray adhesive and that could be a little bit of a pain to deal with so maybe if you have a heat gun or something like that to melt the glue that'll help a little bit.
Since i don't have that I'm gonna use my torch. Alright that worked pretty well. Now i just have to remove the rest. And now we can put it all together. So there are a lot of parts to this. We have the handle, These are gonna be the internal fillers and this is the outer part of the mallet. These wedges are going to be driven into this part of the handle right here, which will spread It out and make it fit snugly. Okay let's do a quick walk-through of how it'S all going to fit together.
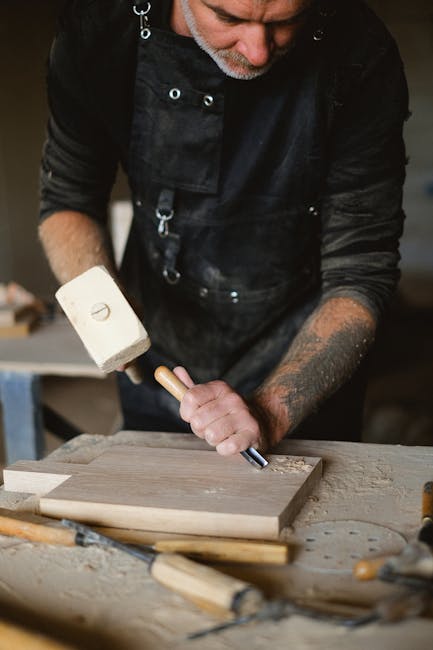
The handle will go here. These filler pieces will go right here, and you can see how by using the same material for both of these there are no height differences so there should be no gaps. Then This piece sandwiches all together. These little wedges are going to go in the slots here You can see how it's causing them to bend a little. When we put two of them in there it causes them to spread out and fit snugly. Just a couple degree angle holds it all tightly. What we want to do next is add some glue. We're going to glue these to that and this part on top. Then we'll go back and do some cleanup.
We'll let that sit for… 20 maybe 40 Minutes. It sets up pretty quickly but just don't put It under any stress for the next 24 hours. Now just give It your finish of choice – i'm using Polyurethane. Alright guys so that's it! And the really nice thing about this mallet is you really only need one or two tools to complete it. You can use a scroll saw, band saw, a jigsaw and really you don't have to be perfect i kind of like the… gives It a sort of handcrafted rustic quality when all the bevels aren't you know, perfectly made on a table saw. I sort of sanded them on and you can tell from the handle you know it's not… these aren't perfect fillets done with a router bit, Just a band saw actually is good enough and then just sand It down, and you know it feels good it's nice and shiny and The two different opposing color woods i think go pretty nicely together.
So give it a shot, make your own it takes very little time and very few tools..