I'm Brad and today I'm building my
biggest project yet this a seven foot so I enlisted help from my buddy Matt at
Rustic River Creations he makes custom tables in furniture south of Nashville
and has this amazing shop and some great machinery to match oh and a green Grove
now the dining table is gonna be seven feet long and almost four feet wide and
Matt had some white oak boards that would fit this build perfectly if you
don't start with good lumber your projects can go south pretty quickly so
we sorted through the boards checking their shape and then their moisture
content now to check their levels we use the Orion 950 pinless moisture meter
from Wagner meters the sponsor of today's video I'll talk more about the
meter later but we calibrated it for the white oak that we were using in pick
boards for the top with similar moisture levels even though we picked some of the
straighter boards we're still dealing with rough lumber and these suckers were
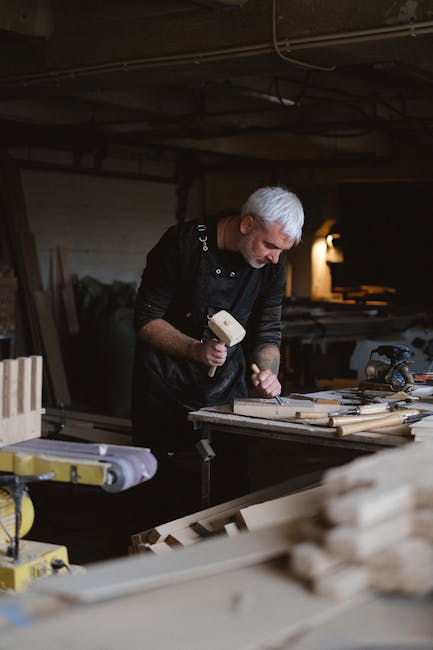
nine feet long in an inch and a half thick so Matt being the stand-up guy he
is graciously offered to help me mill the boards to get a flat face in one
straight edge he does this day in and day out so he's set up with all kinds of
awesome side feet and out feet on his machines they can handle this size
lumber after cutting the boards to rough length he showed me this cool jig that
he uses to straighten the planks before hitting the jointer
it's an eight-foot length of plywood that he attached two by fours and toggle
clamps onto a foot board has a large bend or crook in it you can quickly get
a straight edge on it with one run through the saw as it cuts the front in
the back of the board that overhangs the jig after this we could hit his
ridiculously large jointer for face and edge joining to get the board's flat on
one side and one edge this 16 inch beast of a jointer made my 8 inch jointer look
like Steve Rogers before the Super Soldier Serum how honestly I don't think
I could have managed lumber this size in my current shop so if you don't have a
friend like Matt and you can't handle this much lumber you can go to a lumber
yard that sells both rough and milled lumber we ended up with what you would
call s1 s1 II which means surface one side and one edge and this is gonna let
me finish it off on my shop so you might be able to buy that at your local lumber
supplier and you can also still get a discount versus buying s4s which is
serviced on all sides if you need any custom rustic furniture please hit up
Matt and he's gonna take care of you I brought the wood back to my shop and I unloaded it onto my table-saw
to acclimate in my shop artem back in my shop and now I'm gonna take the board
I've got a straightedge and one straight face and I'm gonna run them through the
planer and then the table saw to get them to the right size for their glue up
I also set up a temporary work table I'm dealing with some really large boards
here there's seven 1/2 feet long right now and the tables gonna be 4 feet wide
so I don't have a full four by eight sheet of MDF I'm gonna use this as my
work surface because none of my benches are gonna be close enough to even being
able to handle all that lumber so I'm gonna go ahead and mill this stuff up
and then we'll get to the Assembly of the top and while I'm planing these
boards here's why I let them sit for a week in my shop in how I knew when they
were good now at Matt shop we use the Orion 950 from Wagner meters to measure
the woods moisture content this is a premium pinless moisture meter it's got
a seven year warranty and calibrated accuracy but what moisture is relative
to the environment that you're in so things could change at my shop now the
Orion 950 has a feature called equilibrium moisture content or EMC it
uses a built in temperature and humidity sensor to calculate the percentage where
wood is gonna stop losing or gaining moisture in that specific environment I
saw that the EMC in my shop is nine point eight percent and when the board's
got close to that I knew that I was good to start milling if you want to get more
information about the Orion 950 I'll have a link down below in the
description to it and thanks to Wagner meters for sponsoring this video and now
I just needed to rip the boards down to the final width for the size top that I
wanted I find that top over 40 inches it's gonna give you the best chance at
avoiding prying hands from stealing your food across the table now of course if
you run out of a suits dealer you may want to go narrower for a full table
access got all the boards cut to length and I put them out I went ahead and
clamp them together because one of the things I want to make sure is that the
joints were all good you don't want to get into the glue up and then notice
that you have gaps so I did see some areas where there were gaps and they're
a little bit too much for what I wanted and I squeezed them together and it
still didn't pull them tight so I'm gonna join a few of those boards that
are next to each other to get those joints just right and then we're gonna
go on to getting some alignment on them and when you're joining two boards that
will be glued together the best option is to fold them up onto their sides like
you're closing a book right along that joint
then take the boards to the jointer in that exact orientation now this is gonna
eliminate any gaps caused by a slightly AB square setup on the jointer I went
through and I folded up each set of mating boards that had gaps and I ran
them through until everything fit tightly now after that I laid the wood
back down on the table and I set it up how I wanted it for my finished product
I put a big V across all the boards with a pencil as a reference mark to keep
them in order then I went through and I made marks across the joints about 20
inches apart for every board and this will be for biscuits that I'm gonna use
for alignment during the glue up I cut the biscuit slots on the mating boards
using the marks across the joints as indicators and just be careful to make
sure that the biscuit joiner's fence is rested firmly on the board now without
knowing it I cut this slot too high as because the dust hose was hitting the
board behind it and not letting that tool set flat and I didn't recognize it
I cut the slots in all the boards and then did one final dry fit just to make
sure everything was good before I glue up and I used the biscuits in there as
well now the last thing you want here is to run into an issue when you're three
minutes deep into assembly with glue drying and you're gonna start panicking
believe me I have been there and after all that prep the glue up does go a lot
more smoothly since you know how everything fits together and you've
already done it once I glued one board at a time putting the biscuits in for
registration and lining the board's up with the marks that I've made earlier I
only put glue on one side of each board and it's always served me well gluing
both sides is overkill in my book and it's a lot Messier all you really want
to have is some good glue squeeze-out when you put the clamps on it and then
you know that you've got a good joint I used a mallet to level out a few spots
that had crept up and then I put a few more clamps on the top and after 45
minutes I came back and I scraped the partially dry glue beads off of the top
it makes final flattening a bit easier plus it is super satisfying now the next
day I came back and I cleared out any of the knot holes in the table and gave it
a rough sanding – 80 grit in those spots this is basically just to get rid of any
glue around the knot holes so I can make sure I cleanly filled them the boards
are full of different knots and imperfections which I love because it
adds some nice character I marked all the spots that needed
filling with blue tape and then I mixed up some epoxy I'm using total boat
high-performance with a fast hardener for the filling here and instead of
leaving it clear I went ahead and added some black mix all tint to it
I think the black accents the knots without being too gaudy I filled all the
holes and I used the torch to release the bubbles and help level it a bit I
tried to top the knots off as the epoxy seeped into the cracks but I came back a
couple hours later in a few spots still needed more filling so if you want to
hit them in one shot you're gonna need to babysit those voids and keep adding
epoxy until it all hardens I decided to switch gears and jump to the metal base
before finishing the table top so then I could bounce back and forth between them
while the finishes were drying the worst part about metal working in a wood shop
is the metal shavings go everywhere so I decided to rig up a quick barrier to
capture it before I spewed steel all over my shop I used big sheet of
cardboard that I got from a plywood stack and I cut and bent it to make a
4×4 box that was 12 inches deep and I put that right behind my chop saw it
only took me a few minutes to make and it was well worth the time in the effort
I think this might work the table is going to have a metal base at each end
made from 1 by 3 rectangular tube steel the eighth inch thick each base is a
t-shape on the floor with vertical supporting legs going up to a top plate
I started off by cutting the six vertical leg parts to rough size that I
could manage the steel a little bit easier each upright is square at the top
and it's gonna be joined into that lower T shape with a 45 degree miter I set the
fins using a carpenter's square which I think is illegal when you're
metalworking but then I just started cutting the 45s on the end of each leg
and I quickly realized something aren't a quick little tip here you may have
just seen that but one thing you want to think about when you're cutting the tube
steel is that there's a seam so the way that this is made is exactly rolled in
on each other in seamed here and that actually does have a little texture to
it so I actually don't want these on the outside of the legs I want the smooth
side to be on the outside so I cut the miter on the wrong side on this one but
what I'll do is I'll put this on the inside where you're not gonna see it in
the outside legs I will make sure to cut the 45s so that the smooth side is gonna
be on the outside I finished up cutting all the minors on the legs and then I
switched to the lower T pieces now the longer top portion of
the tea has miters at both ends to match up with the legs
for this part and the smaller base piece I position the metal seam down towards
the floor I finished up by cutting all the legs to
final size a scrap block clamped down to the bench gave a stop to make repeatable
cuts and since I have six legs to deal with the chances are pretty high that
can get out of whack so starting with the exact sized pieces at least gives me
a fighting chance now next I went outside and I ground down all the parts
where they would be welded to give me a good base for the filler material to go
I'm by no stretch a good welder yet but I am learning I have this small folding
welding table that's a bit undersized for the task at hand but using some
right angle jigs and clamps I was able to get everything aligned in in place my
Lincoln Electric Power MIG 210 mph and is more than capable for this job I love
this thing because it's simple as dialing in the wire size and the gauge
of the steel that I'm using and then I was ready to go I'm figuring out the
best way to assemble this was a good mental exercise and I'm pretty sure that
I do it the same way next time I started by attaching the upright legs to that
lower piece that had the two miters on it i tacked those pieces in place and
then I marked and cut a top plate from quarter-inch flat bar stock the top
plate is gonna extend a few inches past the legs on each side for extra support
for the top I turned the assembly upside down on top
of the flat bar and then I pried it back into square using a spreader clamp the
heat from the welds on those miners that I'd already done tends to move things in
so the metal was inside a bit checking for square is really crucial before you
weld your final pieces after tacking the plate in place I went around and I
finished all the welds on this square assembly and made sure everything was
sealed up and then I clamped and welded together the third leg and that small
base piece from there I butted this assembly against the square that had
already made to form the t shape and the last piece of the puzzle was to flip the
whole thing over and add another top plate to lock everything together after
that I could repeat this entire process on the second base and these are super
sturdy again I am NOT a great welder by any stretch but I here grinder and paint
make you the welder you ain't so I got to grinding
the wall does now before painting the basis I hop back
to the tabletop so that I could fit the threaded inserts I knocked off the
majority of the epoxy with a block plane and then I finished smoothing off the
surface with 80 grit sandpaper we have left the boards about 6 inches long when
we milled them which was great because I did have a little bit of snipe on the
end of them I measured in three inches from each side and I set my tracks all
square at 90 degrees to the long edge then I cut each end to give my final
length for the table after that I could drill the mounting holes on the top of
the metal bases I put them at the ends of the tee as well as the intersection I
used a step bit and I drilled them a little bit oversized to allow for wood
movement then I hooked the base up onto the top which was bottom side up so that
I could mark for the inserts and that grimace on my face means I need to stop
skipping workouts I put the base 12 inches in from the end and I centered it
on the table and then I drew pencil marks through each hole and after that I
can take the bases off and prime and paint them outside with a matte black
finish while the paint was drying I worked on finishing up the top I added a
chamfer on all the edges of the table and if you start off putting the chamfer
on the corner first and then you rout around it on the top you get this really
cool-looking detail on the corners I finished up routing all the other edges
and corners and during the whole ordeal we had to flip the top over a couple
times I really can't understate how heavy this thing is or how much I need
to work out but after I routed all the edges and sanded everything smooth I
decided to go ahead and apply finish to the bottom before doing the inserts I'm
using rubio pure as my finish and it goes on easily but you have to rub it in
with a white scotch brite pad so i thought it would be smart to put it on
my sandra do this I poured finish on one spot and then I put the sander down in
the finish and turn it on and spread it around and this worked great but then I
poured a big line of it and went into that line of finish with my sander
running full board this did not work great it's not finished
all over my shop so don't do that anyway after that I used a center punch where I
had made the pencil marks for the inserts and then I drilled out the holes
for them and I installed the inserts with an impact driver
we flipped over the table again so that I could finish off the top and here's my
recommended approach spread the finish on so that it's not pooled anywhere and
it's got a nice coverage then you can go back with a sander with a white pad and
buff things in unless you like spraying oil all over your shop then by all means
go the other way now the nice thing about this table is that you can move it
separately and attach it to the bases with set screws and I'll have to wait
until after lockdown to get some help so I can move this into my dining room and
get my dining room table out of there and everything in place I've got some
more build up for you you can check them out right over there and I will see you
in the next video where we're gonna