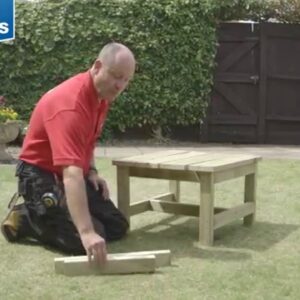
How to Build a Bench and Table – Easy Steps for Your DIY Project
Building a bench and table for your garden can be a great way to add extra seating for guests or to improve your outdoor space. With a few tools and some basic materials, you can easily create a custom bench and table to meet your specific needs. In this article, we will provide a step-by-step guide for building a bench and table, including all of the necessary measurements and dimensions. Whether you are a beginner or an experienced DIY enthusiast, these instructions will be easy to follow and will result in a beautiful and functional addition to your garden.
Before you begin, it is important to gather all of the necessary tools and materials. For this project, you will need:
– Safety glasses, mask, and gloves
– Measuring tape
– Saw (tenon or circular saw)
– Drill
– 2.5-inch decking screws
– P4S (pressure treated timber) in the following dimensions:
– (2) 36 by 88 millimeters (mm)
– (3) 36 by 63 mm
– Full lengths of deck board (2.4 meters)
– Wood glue
Once you have all of your materials, follow the step-by-step guide below to build your bench and table.
Building the Bench
Step 1: Make the Back Leg
Your first task will be to create the back leg of the bench using 88mm be forest timber. Cut the timber to 795mm, and then mark it with a line 50mm from the top and another line 400mm along from the bottom. Secure the timber and cut along the marked lines using a saw. This will create your back leg.
Step 2: Make the Front Legs
Next, it is time to make the front legs of the bench using 575mm P4S. To ensure that the front legs are square, use the bench as a guide, making sure the distance between the inside of the legs is 335mm. Join the two front legs with two crosspieces that are 445mm long. Mark the crosspieces with two measurements of 280mm and 270mm to create a slight slope for a comfortable seating position.
Step 3: Attach the Back to the Front
Once the front and back legs are complete, it is time to connect them with the back of the bench. Use 1136mm deck board for the back, making sure there is an overhang on all sides. Secure the back panel to the frame using two screws on each end.
Step 4: Create the Seat
To create the seat, cut three pieces of deck board to 1096mm. The front piece should be cut at 88 by 36mm to fit snugly around the front legs, while the back piece should be cut at 45 by 36mm to do the same for the back legs. The middle piece should be cut square and placed in the middle. Drill pilot holes, and fix each piece of the seat with screws.
Step 5: Attach the Arms
To add arms to the bench, use a piece of 560mm, 36 by 63mm timber. Cut the ends to create an angle that will fit snugly around the back leg. Secure it to the bench with screws, making sure to drill on an angle so that the screws do not come through the front of the wood.
Step 6: Add Back Panel and Cross Braces
Attach the final back panel to the bench, securing it with two screws on each end. Finish your bench with a couple of cross braces using the same timber as the armrests. Cut them to size (360mm) with 45-degree angles at both ends, then attach them with screws at the back.
Building the Table
Step 1: Create the Legs
For the legs, use the same P4S material and cut four pieces to 370mm. These will create two leg sets.
Step 2: Make the Crosspieces
You will need seven pieces of P4S, each at 490mm long, to make all of the crosspieces that will go underneath the table. With a drill, fix two screws each fixing point.
Step 3: Create the Top
To create the table’s top, use four pieces of deck board, each cut to 600mm. Fix the boards together using wood glue and screws to make a solid surface.
Step 4: Attach the Legs to the Table
Using wood glue and screws, attach the legs to the table in pairs. Make sure to drill pilot holes, and use two screws at each fixing point. Keep the same distance from the corners.
Step 5: Add the Cross Braces
Once the legs are attached, add three cross braces. Two should be at the top, and one should be in the middle at the bottom. Fix the braces with two screws each fixing point.
Finishing Touches
Once both the bench and table are complete, you can add your finishing touches, such as color or varnish, to protect them from the weather and make them look attractive. You can use garden furniture finish or add a pop of color with garden paint.
Conclusion
Building a bench and table is a great DIY project that can improve your garden and provide a comfortable space for you and your guests to enjoy. With some basic tools and materials, you can follow our simple guide to create a beautiful and functional addition to your outdoor living space that will serve you well for years to come. Remember to take safety precautions, such as wearing safety glasses, a mask, and gloves, and take your time when cutting and measuring the wood.

