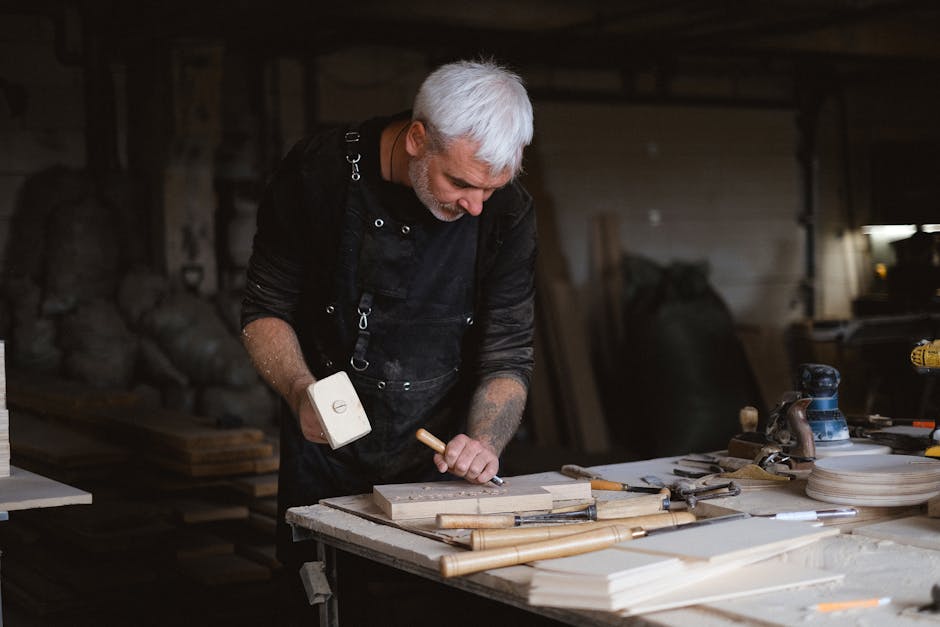
hello friends i'm max and this video is about the construction of my water wheel running of a small stream near my log cabin deep in the woods over the past two years harnessing my water wheels power output has helped me with a handful of everyday tasks as you can see for yourself i used this wheel as a drive for my wooden washing machine which currently has only a washing cycle but i have plans to add a spin and green cycles to it and of course i used the water wheel as a drive for my mini power plant made from a conventional electric screwdriver primarily for charging batteries for my phone video equipment drone cell signal booster two batteries and to a lesser extent for my log cabin slides at night when the solar panels are of little use quite often i use the water wheel as a drive for my cast iron mini meal on which i milk grain for homemade bread and pies as well as coffee beans for making freshly ground coffee which once tasted is so difficult to refuse occasionally i use the water wheel as a drive for my drum type grinding wheel with interchangeable abrasive belts or as an inertia drive for a wood lathe as well as a drive for my other bushcraft mechanisms designed to free up time at comfort and just to dispel bottom after all the use of a water wheel in an everyday route scene undoubtedly adds variety to life pleases the eye and to some extent even acts as an attraction frankly the very process of the water wheels manufacturing gave me a lot of pleasure without previous experience of constructing water wheels on top of having to work in a bushcraft setting this task is not trivial and now i invite you to join this adventure friends i'm sorry to see an original but the implementation of this project began with preparations beforehand in fact my previous videos about organizing an open air workshop described the preliminary stage for the water wheel construction there were other essential steps that contributed to this project such as building a topsy-turvy workbench a primitive tool rack a shaving horse and saw horses as well as milling logs into boards forging a two-handed chisel and a clogger's knife also other diy projects including building a log cabin for that matter it turns out that even the construction of a dam and a swimming pond on this stream in 2014 was a necessary stage for the current waterwheel project i think this channel's regulars noticed that all my videos are story related and just like in chekhov's guns concept if in one video i hang a shotgun on the cabin's wall there will definitely be a video where i make a water pipe for a distillation cube or a coil for a tie distillery from its barrel i drew a couple of sketches of the water wheel and thought of the available materials of the camp i also figured out what tools i would need in the woods what tools and materials i already have at my local cabin as well as what critical parts can only be made at my home shop having reached the cabin and delivered the main tools and perishable provisions the first thing i did was prepare the lambo materials for the wheel boards milled from downed trees are especially damp and will warp while drying so it is better to start harvesting wood ahead of time initially i decided that the water wheels assembly parts would be as simple to manufacture as possible this means that they should be short rectangular boards not much longer than my chain saws guide bar i've already used all of the good wind throw lumber around the camp however i managed to quickly fill the cabin with short wood pieces transported on my homemade pack frame one can easily carry a heavy load through difficult terrain using a pack frame while the lumber was drying and warping inside the log cabin i prepared two workbenches one made from a falling pine has warped last year and had to be leveled this season and the new workbench made from a log which i named a topsy-turvy workbench the flat workbench's countertop with bench dogs allowed not only to secure the work piece but also to quickly evaluate the work pieces geometry now i'm flattening the work pieces the second time as when i finished joining the last piece the first ones dried and warped some more thick could be restrained simply by wetting after all the wheel will be partially submerged in water but i was afraid that the wet work pieces would not accept an oily finish well and mold so i flattened the entire set of work pieces i didn't perfect the boards surfaces with a smoother plane but only rough shaped them to the needed size with a scrap plane the scrap plane's blade has a semicircular cutting edge for more aggressive material removal this is why a scrap plane leaves a smooth but wavy surface that can easily be smoothened with a regular plane my thoughts were that the water wheel is not a fine woodworking but right there carpenter project so the wavy wet surfaces would glimmer nicely in the sunlight also they would give the water wheel the charm of a handmade product in this footage you are looking at the already laid out pre-drilled and countersunk work pieces which means that i'm planing them for the third time however this fine-tuning procedure is not about correcting a boards cupping or twisting these particular work pieces turned out to be a bit thicker than the others and would create a noticeable discontinuity in the final assembly so i planed the work pieces faces with a scrap plane by securing them on a workbench however joining the workpiece's side and end grain surfaces would require a shooting board jig that i don't have so i decided to use my topsy-turvy workbench that allows to secure a board vertically using diy bench dogs and hold down clamps this time i used both a scrub and a smoother plane along with a tri-square to properly joint the board's edges i like to work with wood using well sharpened tools i like everything about it the rustle of wood shavings the smell of wood the tactile sensations from touching a smooth plain surface in this project i planed wood to my heart's content i could barely keep up with the process of burning the shavings in my campfire back home i made a trapezoid mdf template using it i laid out the contours of the side pieces that form the wheel's rim as well as the locations of the screws mounting holes note that i'm trying to use straight grained hardwood and discard the sap wood nuts and other defects over the years i began to consider sapwood as a defect in pinewood using a max you can predictably split a heart with board to size with a small allowance without risk to mess it up an untidy board's edge after having been split by an axe can be smoothed with a scrap plane in seconds at this point i had satisfied my hunger for manual wood planing and decided to switch to earth work there is a stream with a waterfall and a dam but there is no room for a water wheel on the stream the situation has to be addressed in previous years i removed the debris from the damp side rather just sawed off and moved dry branches up and down the stream now it is a high time to complete the job but first i need to scythe the meadow suite there are ticks and snags that hide in the tall grass so it is important to be dressed properly for the job as a bonus by scything the grass in the area you can noticeably reduce the number of mosquitoes mats and other insects that are hungry for your blood and flesh a little further downstream there is a 10 foot 3 meter high waterfall where a large water wheel may fit well it could be up to 26 feet 8 meters in diameter if a forward rotation design is used or even close to 40 feet 12 meters with a more popular reverse rotation design are you thinking what i'm thinking my water wheel under construction is 10 times smaller but the height difference immediately behind the dam is still not enough for it i don't want to build an aqueduct longer than 10 feet 3 meters so i need to either build up a dam or deepen the bottom of the stream it is more rational to move large boulders down the stream while small stones can be thrown in any direction but it is wiser to throw them closer to them they will serve as good material for strengthening and building up the dam after all if you look closer at the dam you will notice that it was made briskly as a temporary structure eight years ago i simply moved some branches and stones down the stream to create a small swimming pond in subsequent years i added more material to the dam and now it would be good to fully rebuild it but i was too lazy and decided to just strengthen it once again i was glad that i had brought the trenching tools to the camp digging gravel with a spade is not effective but if you first remove large rocks with your hands it works okay then i understand that without a sealant the stones that i put in the dam's base will not add air tightness to it but i did not intend to do this in the first place from this digging i solved two problems first of all i removed the soil from the stream bed thereby freeing up space for the water wheel and secondly i reinforce the dam which protects it from the destructive effects of spring floods standing barefoot in cold running water is pleasant in invigorating but it is time to take a break from earthworks and return to woodworking i intend to make two products from this rotting trunk of falling pine at once the first will be the wooden gutter to deliver water from the pond to the water wheels blades and the second product will be the water wheels octagonal shaft so after hanging the lock on supports and securing it with the lock dog i roughly trimmed its hands while assessing which side of the log rotted more then i sawed off the rotted exterior wood leaving me with not that much lumber the second and the last exterior slabs were laid out and sawed off much more carefully than the others these cuts will affect the geometry of both the tagonal shaft and the integrity of the wooden gutter however the next cut is even more crucial because this is a partial cut if it is not done just right the gutter will leak and some water will miss the water wheel given that my stream's power isn't that great i have to maximize the flow of water passing through the water wheel so i carefully control the depth of the cut with the tri-square the last fourth cut is the most difficult because you have to cut a log in an unstable position therefore i added two additional stops to the supporting pads this is a partial cut too and according to my calculations it should connect to the third cut inside creating a wooden corner and a square beam if you want to learn more about my freehand milling technique with a low power chainsaw equipped with stock guide bar i will refer you to my video two saw secrets turning a tree in the perfect boards there will be a link to it below the chainsaw is not a precision tool and hearing to make a through cut i decided to complete the task with my diy two-handed chisel by the way these are the same wedges that were used to raise the cabin's door header along with the whole roof having inserted wedges into cuts from both ends i managed to achieve the necessary internal tension in the workpiece then by carefully lowering the chisel into the cut i chopped up the residual wooden fibers connecting the rectangular beam with the rest of the log and they safely separated the beam which was cut entirely from the log's heart wood turned out to be nice and straight but i put it aside for the time being and began to work on the wooden gutter hosted the work piece onto the workbench made of a falling pine and secured it the cylindrical outer surface of the gutter makes it difficult to secure i did not like the surface left by the chainsaw and decided to finish it with a scrap plane this vintage scrub plane is a present from a friend alex thank you again this is german quality at its best i understand that it is not necessary to plane the gutters in the surface but forgive me my weakness for smooth plain surfaces a smooth wooden surface is safer less absorbent and more rod resistant what remains is to fine tune the contact surfaces of both gotta work pieces and then connect them using a reliable but simple way i decided to use screws knowing that 99 of the water that gets into this gutter will flow from the dam to the water wheel which is good enough for me however the reliability and durability of such a console mount is questionable so i reinforced the structure with two wooden dowels acting as spreaders by the time i had not yet built a bowl lathe as you might have seen in the previous video so i had to size the dowels to the right diameter using a plane and a caliper if you look closely you will notice an extra pair of holes in the gutter i missed the mark a little and the counter holes were not coaxial as a result i could not drive the dowel in i had to plug the unusable holes and drill new ones even when the holes were drilled right it was not possible to match the end of the dowel with the second mating hole with bare hands so i use the lever for help okay the spreaders are installed as a result the cantilever structure was transformed into a closed one and gained rigidity perhaps it would be faster to cut three boards from this log and assemble a simple rectangular cutter from them but then additional time would have to be spent on sealing the joints and there would be no additional heartwood beam most importantly the cutter would not have the same aesthetic appearance of an untreated log and it would fit worse into the dam's landscape back at the dam i decided to take a break from working wood by doing more earthworks fortunately you can actually relax from that switch because completely different muscle groups are involved in this activity all the sand that i poured on top of the dam last year was washed downstream by the spring flood but large stones and the dam itself remained in place the washed away sand is clearly visible against the background of blackened stones in the stream bed traditionally a roughly put together lock frame filled with rocks becomes reliable gutter support that will not be washed away by a flood but for my project's scale i could do with two short logs that i shaped to fit the rocket bottom for extra stability these logs are so long for the reason that they will support both the wooden gutter and the water wheel itself and for greater stability it would be good to reinforce these two logs with perpendicular member using tenon cutter attachment i nailed the round tenons and then drilled the mortises for them with a forstner bit the joints ended up having an extra tight fit and it took a little of my mallet's preservation to fully put the h-shape structure together it turned out to be very strong i'm quite satisfied now we can install the wooden gutter resting it with one end on the dam and with the other on the h-shaped support this fitting task proved that it was time for a meal and contemplation on how to seamlessly mate the dam and the gutter together after lunch i went for a short swim that cheered me up then changed my clothes and decided to warm up with the scrub plane in my hands i couldn't wait to start assembling the wheel and to do that i had to prepare a full set of work pieces it would seem like a simple task to make a set of identical short boards which it would be if i had one long jointed board of uniform thickness but when you have a bunch of short pieces of different dimensions it takes time it is also less convenient to immobilize and handle short boards than a long one i planed the secured short pieces on my topsy-turvy workbench which made me glad i took the time to make it at the end of the day i laid out the mounting holes when drilling the holes a countersink with a stop ring helped me now i have all of the holes countersunk to prevent the screw caps from protruding beyond the dimensions of the water wheel the next day it cleared up again and i happily returned to carpentry work fortunately the workplace was prepared yesterday and there is no need to be distracted by its organization i had to reject and replace a couple of yesterdays short work pieces then i finished the long work pieces i also made four wooden wheel spokes this is a board with two rectangular cutouts on the screen lastly i marked the pieces before applying finishing them now that the complete set of parts for the water wheel ring assembly is ready and is drying up in the shade i needed to prepare a large and flat assembly table as my narrow workbenches wouldn't work the final assembly is not as trivial as it might seem it may not be possible to assemble a water wheel of my design unless the work surface is fairly flat i assembled temporary structure from two massive sawhorses and three black older slabs which i milled last year looking back i know it would be better to flatten the slabs but i was trying to save time at least i have aligned the working surfaces of the saw horses in one plane i did not want to flatten the slabs now because i have big plans for them i am going to use them to make a bed for the cabin the two inch thick black older slabs need to finish the drying process for another year or so while i'm deciding on the bed's final design among other things the sun came out which means it is time to apply a protective finish to the water wheels parts i first applied a layer of oil-based antiseptic and waited until the antiseptic was absorbed into the wood it was warm outside and the weight took no more than an hour and then i applied an oil wax mix which dried up only the next day the wax is almost colorless and did not noticeably change the color of the pine wood which remained light yellow now the wood will be protected from fungus and rotting in winter the wheel will be stored under a roof but in summer time it is open to all winds and rains after two summers of use the water wheel has not dried out and still looks almost new i'm happy with the finish the most awaited moment of this adventure has come the moment of assembly are you excited i know i am as you know proof of concept is a realization of an idea in order to demonstrate its visibility i have not seen such a water well design anywhere and i'm not entirely sure it will work as intended the conceptual design and the actual assembly brought to life are two different worlds it can happen that the designed parts may not even assemble intel will during any complex structure assembly some errors are almost inevitable especially when you're manually assembling a structure in the woods while being distracted by mosquitoes when assembling multiple handmade parts into a single closed symmetric structure errors will inevitably accumulate and i used the life-size drawing in order to verify the product against it this way i could detect the accumulated error in time make an adjustment and get a chance to fix the matter for example while fitting only six parts together it is easy to see that accumulated error exceeds seven millimeters which means that the complete side wall with a total arrow 14 millimeters will not fit on the already assembled closed ring this is unacceptable as a result i had to disassemble it correct the layout and reassemble again using the new layout such procedure had to be done several times by evening i got the hang of it and assembled a six segment half ring in just five minutes as practice has shown it is not advisable to sequentially assemble more than six segments at a time as it is much more convenient to close the ring structure by connecting two halves that were fit to size the design solution when each water wheel's blade is connected to two adjacent ones forming a closed almost cylindrical surface is both functional and elegant the downside is it requires precision in execution when all 12 segments assembled into a single structure matched the drawing i gained confidence that everything will work out so far the structure is not rigid however adding more work pieces will dramatically increase its strength please note that each part is connected to three adjacent ones at two attachment points this ensures the rigidity of the attachment saves materials and minimizes installation operations each blade is connected to six trapezoidal segments with 14 screws two screws per segment there is not a single loose hinge in the design at the moment each blade is connected to the adjacent one by only one screw allowing for more final tuning but once one side made of the trapezoidal segments is fully mounted it is time to secure and align the blades in one plane by installing the remaining screws into the blades as you may have guessed using these nails i properly oriented the most stubborn blades and forced them to take a symmetrical position along the outer radius of the wheel before installing the remaining screws it is gratifying to see that the most important part of this project resulted in success it will be much easier to assemble the second rim i can finally breathe a scythe relief and take a break from driving screws by switching to another task but for now i'd better protect the border wheel from rain inside my low cabin so i equipped myself with a chainsaw for my new task i need an octagonal shaft and only yesterday when building a wooden gutter i milled the blank for it this is a four-sided heart with core from a log i have already trimmed it in such a way that the beam would have a square cross-section that is i tried to make all four sides to be equal and all four angles to be right then i laid out the beam now the number of beams edges must be doubled which means they just need to be sewed off for the convenience of work the beam needs to be secured horizontally on its edge to do that i turned my workbench upside down it was named attaxitory workbench after all then i secured the work piece on it in such a way that the cutting plane was vertically oriented a year later i made an extra long guide bar for a chainsaw using it makes it easy to make long straight cuts but i did not have this bar at that point so i used the same freehand milling technique to produce a straight edge that i already mentioned earlier when the two side edges are removed it is necessary to turn the log 90 degrees secure it again and sew off another one once done i proceeded with doing my favorite activity which is plating the top edge while it is conveniently facing up and then i sewed off the last edge turned the lock with the non-planed edge up and planed it to size such procedure needs to be repeated two more times as you can see the matter is not tricky but i did not have the opportunity to use this shaft for my water wheel i messed up the shaft's dimensions and it will not fit the pulley without installing and bushing so i had to put this shaft aside for my water mills gearbox project the next day i had to walk a decent distance to another wind blown log and mill a larger shaft out of it for the convenience of work right on the spot i decided to make primitive saw horses to do this i hammered six spurs stakes into a tree laying on the ground of course i pre-drilled two inch 52 millimeter holes for them the dry spruce stakes hammered into such holes are held firmly much more reliably than if i simply hammered these stakes directly into the ground perhaps you will say that such saw horses are too low and it is not convenient to plane while standing on your knee and i would partially agree with you however the same planing activity in the new position brings variety note how easily and quickly i can change the edge of the octagonal work piece on these saw horses i should say it was quite convenient for me to plane the shaft leaning on my knee the japanese woodworkers for example use their hand planes while sitting in addition their planes don't even have handles and they plane by pulling the tool towards themselves rather than pushing it away some people say you get a better tool control this way actually the choice of such sawhorses height was motivated by the fact that i planned to work the shaft with the chisel securing it with my weight i used the chisel the same width as the wooden spoke i need to make four long mortises for four wooden spokes as you understand this task will take a long time fortunately this work is not tiring but rather pleasant and even meditative when you do such a primitive mechanical work you can meditate about anything i was thinking about the question of how to organize the wooden gutter damn junction an experienced woodworker must have noticed that i'm not an expert in using a chisel so i will not comment my actions in the meantime take a moment to rest from my voice i'm sure i have tired you by now [Music] okay i hope you had enough time to take a break from my commentary working pre-drilled grooves is faster but the work loses its meditativeness between the third and fourth mortises i walked to the dam and measured the exact center to center shaft supports distance it turned out that this octagonal workpiece has a fair amount of extra length and there is no reason to drag it to the camp so i set it down to size the shaft should be protected with the same oil wax mix since it also needs to leave under the elements as long as the weather is good the wheel assembly can continue outside i will say a couple of general words about the water wheels design it is easy to see that the wheel is assembled from only two kinds of workpieces connected with overlapped joints a total of 12 rectangular and 24 trapezoidal work pieces make up the wheel that is connected to the octagonal shaft by four rectangular wooden spokes as far as the water wheels size i wanted to build the most efficient water wheel i could lift and move at least 60 feet 20 meters which is the distance from the dam to my low cabin i forgot to mention i pre-drilled all of the holes to prevent splitting as a result after two seasons of use not a single water wheels part cracked i think this is a testament to the design's viability i didn't additionally seal the cone-shaped water scoops even though water will inevitably leak through the gaps however this will not have any effect on the productivity of the wheel well the hottest part of the project the wooden wheel is finished now it is necessary to ensure that the wheel can properly rotate around its axis and transfer this rotation to the shaft for which it is necessary to connect the shaft to the wheel with wooden spokes fortunately all the parts in stock so i laid out and cut the spokes mortises on both the shaft and the wheel's inner surface there is a russian proverb originally referring to carpentry measured seven times cut once therefore i fitted the parts together many times before assembly the first fitting showed that the spokes should be secured to the shaft first the second feeding of the shaft with the secured spokes made it possible to do the precise layout and fine tuning this is an important step as the amount of the wheels radial run out depends on it the shaft and the wheel are not perfectly concentric so in order to compensate for this manufacturing error there will be four custom-made spokes of slightly different length now the wooden spokes are shortened each to its own size to fit its own mortise in other words they are not interchangeable note there are planks to the left of the wheel next to the mallet i plan to use them as fasteners to screw the spokes to the inner surface of the wheel oddly enough they were not used the four spoke shaft installed so tightly inside the wheel that i decided not to add additional fasteners now but install them later when the wheel is dry or it gets loose the wheel worked for two seasons and neither dried out no it got loose so the fasteners never ended up getting installed a year later during the modernization of the wheel into the flywheel of an inertial lathe and then into a sharpening wheel i disassembled and reassembled this shaft spoke joinery and was quite surprised at the absence of any loose joints there should have been some play here as the whole assembly fully dried out but there is none i'm at a loss to the reasons for this phenomenon even assembled with the massive shaft the wheel can be lifted and carried by one person this works well to one of the main objectives after trying on the wheel on the spot i could finally decide on the design of its supports as well as about the way of organizing the intersection of the wheel to the gutter and the gutter to the dam this requires wooden blocks but this time i used up all of my high quality pine that was wind blown near the camp so i used whatever materials that were left around this log's sapwood is rotted but its oily hardwood is still intact and suitable for use directly from this block i need to mill three thick slabs of beams as you can see i did not use any preliminary layout as the dimensions are not that important as long as there are two faces are parallel to each other and perpendicular to the third one the fourth face may remain as is having casually planed this semi-beam i put it aside and made another one this work pieces size and shape is even less important therefore i used a piece of a falling aspen i just needed to add this wood piece of the dam the material of the product can be neglected so i sawed off three exterior slabs from the log section and fitted this semi-beam to the dam there are three perpendicular logs that reinforce the top of the dam i used one of them to attach a cantilever structure to create a hermetic seal that will ensure waterproofing of the gutter junction i used three rolling dowels to secure the structure for this i drilled three diagonal holes in the dam's log right through the aspen beam and then i simply hammered the extra large dowels in reinforcing the structure now it is necessary to create a secure watertight attachment of the gutter to the supporting structure the rounded outer surface of the gutter does not make the task easy i made a concave groove in the aspen block so that the gutter's bottom is flush with the bottom of the water channel so there is no water flow under the gutter to do it i use the max a chainsaw a two-handed chisel a mallet and some ingenuity ok both goals are achieved now it is necessary to make the water channel's sidewalls the easiest way would be to make them from dirt and sod but i often use the dam as a bridge and such dirt walls would not hold up for long this is why i used wooden blocks i could safely snap on perhaps you remember how i made a wooden ladder to the dam's pond many years ago i found the rest of that wind-blown aspen sewed off a segment of wood from it slightly longer than the width of the dam milled a beam from the block and sewed it into two pieces that will become the side walls now they need to be attached in such a way that they would form a water tight channel along the goddess walls of the dam to do this it was necessary to trim the beam's hands at the same angle as the goddess ends in addition it was necessary to trim the saw and align the top edges of the dam's logs at this stage everything became clear with the gutter installation it remains to secure the shirt blocks with dowels and to build up the dam for managing the water flow which means i can switch gears for now and return to the assembly of the water wheel now i can try on the wheel on its supports and decide how to mount it on the tivo axle wait a minute there is no pivot yet so the wheel should roll back to the workshop disassembling the water wheel by separating the octagonal shaft from the wheel turned out to be more difficult than assembling it i had to hoist the wheel on the improvised supporting crotches as i simply could not press the shaft out while the wheel rested on the ground the shaft had to be carried to my most massive workbench that will need to work as a lathe the fact is that i need to install pivot pins at each shaft's end and these metal pins must be coaxial so that they don't have axial nor radial run out also because the wheel assembly will rotate on them they must be located strictly in the center of the water wheel i don't know how to achieve all of these engineering goals in the bush without using a lathe so it's necessary to build a simple lathe or at least its substitute a workbench made from a falling pine will serve as a foundation for the lathe so the bed is already there and now the first step is to make a headstock this year there will be no spindle in the headstock but only primitive wooden chuck to hold a spiral drill bit and then a pivot pin the center of the chuck should be located above the bed so that the octagonal shaft clamped between the head and a tail stock could not rotate freely as you can see my wooden chuck consists of three holes in the log one is for a drill bit and the other two are for adjusting wedges by choosing the side where to hem the wedge you can adjust the location of the drill in the horizontal plane if necessary you can also make a horizontal hole and then it will be possible to adjust the position of the bead in the vertical plane however i did not find an error in the drills bits vertical position and will skip that step understand that this wooden chalk is extremely primitive i didn't make a more advanced collate chuck due to lack of time i really wanted to get to grinding flour and baking bread from it before the end of the so vacation is the head stuck with the chuck now we need the tail stock directly behind me there is a wind blown log and i can mill two blocks of wood one of which will be the tail stock for the convenience of attaching the tail stock to the lathes bed and the rear spindle to the tail stock it would be good to mill a groove in this block using a chainsaw this can be done quickly and the fact that the result is untidy is not important because this is a single use part and will do its job well as is in the tail stock i need to organize a seat for the octagonal shaft's rotation axis even though the shaft is heavy it doesn't experience lateral loads during rotation so i did not drill a hole but made a v-shaped cut for this axis i decided to use a large forstner bit to give rotation to the shaft with a drill to do that i hammered the drill bit in the center of the shaft and being unable to clamp the work piece between the headstock and the tail stock secure the shaft on the drill bit using before added tape and screws so the forcement drill bit became an impromptu tailstock's life center having guided the shaft with one hand on the spiral drill bit and clamping the forstness bits shank in the screwdriver's chuck i started drilling perhaps someone will ask why all these complexities the fact is that when you rotate the shaft around its axis and drill the work piece with the stationary drill bit the hole will be drilled strictly along the axis of rotation if the axis of rotation of the shaft is located strictly in the center of the shaft both pivot pins inserted from the shaft's ends will be centered and concentric preventing the wheels radial and axial run outs if you know another simpler or more reliable way please share it with me below i would appreciate it i drilled the second hole using only muscle strength to do that i installed the pulley on the shaft which i brought from home and completed the drilling by rotating the shaft directly with my hands either way works but the first one is more fun at first glance the result is not bad but now we need to check everything first i hammer the pivot pins into the shaft's ends using a homemade aluminum mallet without fear of leaving a nick or otherwise damaging the workpiece then i pressed the spoke shaft back into the water wheel it was much easier to do this the second time and finally i checked for the axial and radial run outs of the entire assembly the results of the tests made me happy both axial and radial run out measurements are within the desired tolerances this is my first water wheel i'll make the next one better the only thing i improved was drilling the shaft's holes deeper and reinstalling the pivot pins to reduce the shaft's overhang during these days the wheel must have dried up and it is getting easier and easier to carry it from the dam to the workshop and back or maybe i'm just imagining it perhaps i've just gotten used to this activity well the wheel is back at this regular place and it is time to return to organization of the water flow the wooden sidewalls have to be secured i drilled two holes in each wooden wall two counter holes in the dam and joined the parts with roman dials note i made two vertical grooves inside the side walls to accept a wooden gate that will regulate the water flow turning the water wheel on and off it is probably uncomfortable for you to follow the plot where i do not complete one task move to another one and then without completing the second return to the first but this is a true story and the only way to partially reveal my planning method i believe that the work should not be tiring and the best rest is a change of activity so when i feel that i'm tired i just switch to another job or go swimming fishing cooking or washing dishes work should be harmless and enjoyable and often hard work will do more harm than good although occasionally in the fit of enthusiasm it is permissible to perform feats of labor but only in moderation at this point i post the damn work and return to the installation of the gutter the lower end of the gutter must be secured somehow it would be desirable to be able to adjust the water flow's angle of inclination the inclination of water flow determines the speed of rotation of the wheel i already have a cross member connecting the two log supports that can be used for the task so i can drill a blind hole in it to accept support without weakening the structure much i made three pieces of different length that will make it possible to adjust the wheels rotation without changing the water flow's intensity the structure is sturdier than it seems it has stood in the open air for three winters and shows no signs of decreasing strength as you might remember i prepared these two quality blocks of wood in advance they will act as the bearing housings so i will call them such they have to be fixed on the log supports to do that i made two large niches with vertical and horizontal surfaces to securely install the bearing housings in there once they were milled and planed i installed the wooden housings inside the niches using large dowels to secure them in order not to get hurt in the bush i planed the outer surface of the supports with the scrap plane now i can drill a hole for the pivot pins before the first assembly of the entire mechanism i lubricated the holes with chainsaw bar oil after the preliminary shaft installation i will add ptfe plates acting as slight bearings to minimize friction and improve the reliability the assembled structure has the perfectly horizontal shaft and the gutter water wheel gap is minimal it took a dozen of preliminary fittings to get there though it was not easy to install a massive shaft on both bearings however in a hurry i forgot about the pulley i had to press it on the shaft and reassemble the entire structure when all of the parts came together perfectly on the first try i was pleasantly surprised before installing the sliding bearings i hammered in oak inserts into the pivot holes to minimize the pins side friction and to horizontally center the shaft between the bearings however the main friction reduction effect was achieved by installation of the ptfe slide bearings that i milled at my home shop in advance the wheel is now spinning as if it was installed on two ball bearings only silently in addition such ptfe bearings will not rust or get clogged i made three sets of them other fields that they would wear out i noticed somewhere only after two years of the water wheels operation so now it would be nice to make good use of the water wheel let's have this wheel grind some flour now to do that it is necessary to install a small manual mill on a rigid platform and add two pulleys one to the mill plus one detector shaft and connect both pulleys with a belt friends small disclosure in this video i often use the same electric screwdriver i'm not trying to recommend this screwdriver or the company so do not ask me about the model so i made the mill platform attached to a lock support secured a cast iron mill on it and only hesitated a little while positioning the pulleys however my tricep dial indicator helped me out the problem was the v-belt that i had was defective and had a tendency to fall off in any case the water wheel is a machine and precision never hurts in mechanical engineering the defective v-belt caused me to waste time and over tighten it to improve the reliability which negatively affected the water wheel's efficiency when i install a better belt my mini mill will perform even better while it rains and there is an abundance of water in the stream i decided to test the dam the aqueduct and the emergency water discharge system i plugged the hole in the dams pipe closed the goddess gate and began to monitor how the water level rises while distracted by lunch i overlooked the moment causing the damn to overflow as a result it was slightly damaged however i wasn't upset it became clear that the dam needs to be built up and strengthened as a bonus the flat washed away the construction debris accumulated in the pond during zagato construction it will be more pleasant to swim in it now the good weather has returned so it is time to pick up a shovel and build up the dam to make it stronger at the same time this work will widen the grain embarkment as the dam gets higher the water level will rise resulting in increasing water flow so the mill will grind flower faster the waterwheel project is a construction project which means like any construction project it should be complemented with landscaping as well you might remember there is a tree nursery near my cabin as the tree saplings grow i transplant them around my low cabin camp some trees do not grow fast and remain in the nursery for years but for example the yellow birch is hardy in the winter grows fairly fast and likes swampy areas most importantly the yellow birch is long-lived typically 150 years so i decided to plant two saplings near the water wheel one on each bank with the rich silt feeding the sapling established well and grew quickly the following season after the waterwheels assembly i didn't trim its elements in any way however the gap between the wooden gutter and the wheels blades is measured in millimeters for each blade so there is almost no radial run out after tightening the v-belt it stopped falling off the pulleys and i was able to load the wheel with useful work it is pretty sad to live in the bush without bread for 20 days in a row as it was gone during the first week of my stay but now my dream has come true which was that i could work at the workshop near my local cabin while the new grinds grain for fresh bread surely many people will question the effectiveness of my water wheel design choice for example why didn't i place the wheel lower turn it 180 degrees and let the water stream into it from above essentially making an overflow design the fact is that overflow water wheels use only a potential energy of water when the wheel's rotation speed increases it scoops below the axis of rotation do not perform useful work as the water splashes out of them under the influence of centrifugal force at the same time reverse spinning water wheels are capable of using both potential and kinetic energy of the water flow so this is why i chose the latter option i will be grateful for any additional water will design ideas and considerations as i might have overlooked some looking at the aesthetic landscape with working water wheel gives me pleasure it's quite possible it is a self-persuasion but the bread baked in my earth oven using flour milled from grain grown harvested quinoa with my own hands is the most delicious bread that i have ever tasted yet the pleasure of the final result is still less significant in comparison to the pleasure of the process i could say i envy myself the water will was my old dream and this adventure will have many sequels here's a few words about my plans for the future the water wheel has limitations for example changing the wheels rotation speed and torque is possible only within relatively narrow ranges however having cut belts from a tire i can either increase the shaft's speed of rotation or increase its torque with the cascade system of pulleys and that means i have a lot of interesting opportunities can you guess what i'm driving at at the end of this story i want to remind you that i made this water wheel primarily for utilitarian purposes i wanted to use the stream's energy for something useful as you probably noticed this was a very long experimental video by far the longest on my channel as for me the video is overly detailed i could show the wheel building process in about 15 minutes and the editing would be a lot easier however many subscribers asked me for longer videos with more details i will leave the judgment of this experiment up to you i'm waiting for your feedback should this experiment continue and if so which of the projects briefly shown in the video should be edited first friends i'm very pleased that you watched almost an hour long video to the very end which means you found it interesting perhaps even helpful and the many hours spent to film and edited were not wasted you may have noticed i do not publish my videos often and even if you subscribe to the channel you will most likely not receive a new video notification but you can try to set up a bell for all notifications they say it helps additional thank you for sharing my videos with your friends and writing comments i read all of them this was max igorov saint petersburg russia and let good people watch good videos ps below i left a link to my diy projects playlist as well as playlists about my locating building bushcraft projects kayaks making and outdoor cooking i hope to see you back on the vocal makes you