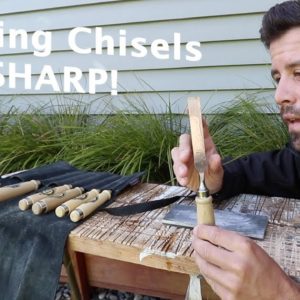
let's go browning here and today's exciting
episode we are going to discuss chisels so let's take a look at the man alright so what we
have here is the two cherries hornbeam handle sit you see it's got like a steel ring at the
top it's a wooden handle this is the twenty mill and the twenty-six twelve sixteen ten and
finally the six move now the other thing that is in my sit is this sucker here the qunari know me
hearing chisel from Fujikawa in Japan this thing is a beauty basically it's a paring chisel used
not with a mallet it's used with just the force of your hand to just slice those last uneven
layers of a chick out or a you know if you're doing a check out for ahead and review or doing
like a mortise and tenon this is just to shave those last little bits and get a mint they come
in different sizes as well but this is the only size I have and I really like it the hoop on the
back here so the sides are the only power that you need to flatten when you put it on the stones
now obviously you've got to get your chisels in to where you want it to go using something
and I use the two cherries Carver's melon when you're carving something you change angles all
the time so I like it just because I don't have to look at the chisel when I'm hitting it I can
just focus on what I'm choosing but it's awfully big it's quite a big thing to use especially
when you're in and around door locks and you know little tight areas so for that kind of turn
this with two cherries extravaganza that I use this is a heavy little mallet the mallet does all
the work if you know what I mean you just have to go out there the downside is that it tends to
where the timber on your chisel a little bit quicker okay so that's my basic chisel set a lot
of people have asked me about is how I sharpen these chisels so there's two stones that I have
I have the Norton the Norton India oil stone here this is the one I've had the longest and that's
okay it's not bad it just requires a bit of oil in order to work for smells like a mechanic's
garage but I've since moved on to a whetstone and I basically copy the samurai carpenter here he's
got wet stones like this and he's got about half a dozen of them and he's got he's built a pond
and you know it's got a drip pipe and everything and I mean a lot of you guys would have seen this
video so you'll know what I'm talking about but I've only got the one whetstone so far and it's
the 500 do you call it grit as a like sandpaper with a bit of water and patience this is a great
stone to use to sharpen these two cherries chisels this is how I've been sharpening things for a
while just by hand on this wit stuff I'll put a little link to the summer carpenters video on
sharpening because you're gonna get a lot more from that than you Wilson this so I basically
just start with the back and work on getting it flat sometimes they do a figure of eight
so I don't put a gouge in the winter so this is the hard part getting this bevel consistent
I recently added to my sharpening collection after an event I went through on Thursday last
week it was a tool demo from Veritas tools they make amazing planners and spoke shaves and a
guy named Vic Teslin from Canada was here in New Zealand to do some demos and I think he's
touring around Australia as well he showed us a bunch of things he showed us the low angle
Jack plane and why it's so good and how many different angles the blade can be sit in order
to plane and smooth different things he also showed us the sharpening guide and we all put
our names in a hat and basically pulled it out and my name didn't come up but the guy in front
of me my mate his name came up and without even looking he just grabbed the prize and handed it
over shoulder to me because he already had it at his workshop at home and now I have it the Veritas
honing guide mark to standard I had a little play with it last week I'm not really I'm no expert
and using this stuff Vic Teslin did show us but I'm a notoriously bad classroom students so it's
gonna take a few more watching of YouTube videos and trial and error for me to get it but what I
do know is you basically get a chisel like this or a planer blade and has different settings up
here it comes with this little gauge as well this is how you actually [ __ ] it but like I said
I neither be more acquainted with it before I show you that you put it in like this and then you
tighten it now the whole idea of this honing guide is it keeps the blade in the correct position
as you continuously sharpened the beveled angle and the little wheel at the bottom here helps
you roll along and you just continuously go like that oh my god cuz that I didn't even know
this existed until until I saw on Thursday so one thing one thing that Vic Teslin said last
week which is which I thought was a good way of looking at it is it doesn't really matter how
you sharpen it or what you sharpen or wealth the goal is to get through flat plains to meet
at an edge that needs to be flat that needs to be flat and that edge needs to be sharp that's
the goal two flat surfaces meeting at an edge so I also keep the chisels and this
Taurus chisel raw so a company in New Zealand they make tool belts as well it keeps
it pretty men you know nice and snug in there you roll it up this handle sticks out but
it's okay you go like that the clip broke off but that's okay to think about that
Wow unroll it and you're ready for action


