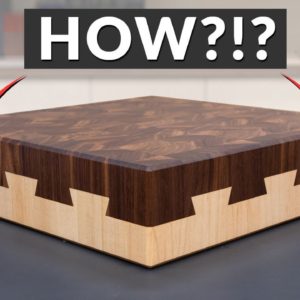
Today we're building an
impossible dovetail cutting board i love watching puzzle box videos and
the impossible dovetail is one that has locking joints on all four sides so it looks like
you can't even assemble it but i want to take that idea and scale it up and make it look even cooler
let's build something awesome this is a lot of cutoffs from when i used to make cutting boards
when i was trying to make money and a side hustle to become a full-time content creator so excuse me
if i shed a tear when i'm pulling these out oh yes i remember you old friend hello black walnut my
old friend let's make some cutting boards again all right enough weirdness let's mill some wood so i'm going to start off with the thicker
boards and get these glued up and i am using a waterproof glue to make sure that it
stands up to washing and use in the kitchen while those boards are drying i'm going to head
inside and start setting up the computer programs that'll let me do the cnc cutouts and all the
3d designs at first i drew a model in sketchup of what i thought the impossible dovetail
would look like with the joints on all sides but that's like beethoven and i'm still trying to
learn chopsticks so i modeled up a small prototype single sliding dovetail design in fusion 360.

Now
i'm totally new to cutting in three dimensions all the work on my X-carve cnc from Inventables
has been just 2d pattern and shape cutting so far so it took a while to figure out the cnc side
of fusion and i was ready to start testing now it's time to find out if i can
actually make a dovetail work on the cnc having one that actually fits nice and tight
that will still move but not have enough slop that it jiggles around so that's gonna be
the challenge let's see if we can do it all right so working with the cnc and working
with Fusion 360 for the first time to make my tool path has been a bit of a challenge and i
actually ran several different shapes and designs or several different runs so what i've realized
is that i needed to calibrate my machine a whole lot better than it was because i never needed
that level of accuracy before and also i was being too aggressive much too aggressive i think
i got it figured out and i think it's gonna work all now i'm going to do the test cut and it's kind
of awkward because i have to leave this in place in case i have to make adjustments but i have
the male dovetail piece and i just cut the ends off it so i can slide it in here and now
we'll see if it uh fits into the female side that's not even close wow that is so far off so
i'm gonna have to go into the program figure it out and just work through it because there's a
bunch of settings in there about what to leave and offsets and all these things and apparently
i messed that up so i'm gonna go in there try to figure this out and then i'll come
back and see if we can make it work all right so I ended up actually remodeling the
entire thing but I think I have it right now so i've got it to the point now where
it will just slide in oh that is a good fit and you can see it slides nicely but there
is a little bit of a gap you can see some gaps around there a little bit more than i would
like but i'm a perfectionist so what can you do i think we're good enough to go to the next level
which is to make a full-sized sliding dovetail into the cutting board of one of those ones i
glued up earlier we'll see how that works and then gear up to do the impossible joint so the first
glue up is dry and i have started taking some of these out so the next step i need to get this flat
you can see this has a very rough surface to it but first i'm going to get these out of the
clamps and clean them up before i hit the planer so now each of these is nice and smooth on each
side and it's parallel and now we can move on to step two which is making the ingrained cutting
board so these are long grain these would look great just as is this could be a nice cutting
board but if you cut it into sections and then turn it 90 degrees that's how you make an
end grain board so i'm gonna go do that on the table saw and that's going to let us get
into the next step all right let's get cutting all right here are the blanks for the boards i
do have these turned on in so you can kind of see what the end grain is going to look like and with
end grain especially with walnut it can have some pretty crazy patterns in here and if you turn it
certain ways you can make diamonds and different kinds of shapes as you look at i actually did
a video where i made a diamond cutting board if you want to check that out but i don't want that
here because i want the eye to go to the edges and the dovetail feature not to the top so i'm
going to rearrange it so that it doesn't really draw the eye as much i've got the cherry one
then the other walnut so i am going to go ahead and glue these up and then we can start doing some
prototyping for the cnc design that we did earlier so these boards are pretty flat coming off of the
drum sander so what i'm going to do is take these over the cnc and actually use a surfacing bit
on these to get each side completely parallel with the other and that will just go through
and basically take a little bit off of each side i can square them up on the table saw
and have them ready for the dovetail joinery all right it is time to do the first actual cut
on an ingrained board i gotta be honest i am very nervous about this i've done some practices
and stuff and i think it's gonna go okay uh but you never know so i'm gonna do the tool path so
i'm gonna cut the uh the male side first actually then we'll cut the female side on the walnut
board and we'll see if they slide together but uh i don't know i feel pretty good
about it we'll see what happens all right the first cut is done the the cnc is
buzzing in the background because i can't turn it off or i'll lose the position but i just wanted to
let you guys know i did it for you all this dust i left the dust shoe off just to get those sweet
time lapses but i'm not going to do it again so now i'm going to switch out to the dovetail to get
that cut and then i'm going to switch out and go into the next board it's looking good so far other
than that dust this drive me crazy all right this one turned out really nicely the lines are nice
and crisp and the dovetail there's no tear out there everything is flat so this went really
well so now all i got to do is clean off the cnc from all that dust put the dust shoe on there
and then cut the complementary female dovetail on the walnut board and then we can do the test
fit but it's looking good i'm digging this all right just got done and now
i'm going to try the dry fit i have to leave it in place
because if it doesn't fit then i have to do some more machining but
the test piece fits so this should fit this should fit let's measure this and see what's going on because
this does not look like it is fitting at all this is 5 inches and 13 thousandths and this
is 4.98 so what is that 32 how am i 32 000 okay so i'm 32 000 off apparently missed it
by that much uh which is significantly more than i should be i'm just going to keep running
this until it expands so i'll just take off a little at a time and then test it uh but clearly
this is a little bit too small but it's better than the alternative all right uh since we're
at the desk you probably already know i did take a little uh just the beginning to
see if it would fit and check this out this fits so nicely oh this looks
cool so i'm super happy with how this is working but i just had an idea and i am now
going to do something different with the project so i want to have some magnets to hold
this in place so i'm going to figure that out and then we can go start
working on the impossible dovetail all right i got the magnet all worked out here
and it works pretty well though it could be a little bit stronger so i may have to go
with a bigger magnet for the larger one and speaking of the larger one it is now time
to start on the impossible dovetail joint i've got two little blocks that i have glued up
and made square and it's important that these are square you'll see why in just a minute
so i definitely want to try these out as test pieces first because there's a lot more
complexity than with just the sliding dovetail oh yes yes yes yes yes check this out this is so
cool i got it assembled the fit is almost exact and i tell you what it is really tight i'll do
some close-ups you can see the grain and how tight it is there are not any gaps i am extremely happy
with this and here's how the impossible joint works you can see it looks like four separate
joints but really it is just two that are cut at 45 degree angles so you can slide them when you
apply the pressure diagonally pretty cool trick but i am ready to go full scale and what i'm gonna
do on the full-size board instead of just having one i was gonna make it wider i'm gonna do three
dovetails across it's gonna look crazy so it'll look more like an actual dovetail board than what
my original idea was which just one wide one which i don't think would have had the same effect after
looking at the single dovetails versus the three i had to go with the three the modeling for this
one was a bit intense though this is about a half hour of modeling cut into this short clip but my
main concern is that with three dovetails per side any poor fit or air might just make this whole
thing not work at all and after i finished the modeling i just needed to do a little more work on
those blanks while i'm prepping those boards let's talk about the sponsor today's video Skillshare
now Skillshare is an online learning community for creative and curious people they've got thousands
of courses and things like design productivity photo editing and lots of other things
i've been watching productivity masterclass create a custom system that works by Thomas Frank
and last year my kids were remote learning which led to more distractions when working from home
and led to unfinished tasks now thomas suggests having a central digital task management system
versus letting things live on paper or post-it notes like i tend to do i'm gonna give todoist
a shot this year and see if that'll help me with my task management Skillshare has a growing
community of millions with teachers publishing new classes all the time members get access to
all those courses for less than $10 a month with an annual subscription and the first 1000 people
to use the link below in the description we'll get a free trial of Skillshare's premium membership
to see what you can learn thanks Skillshare let's get back to the video so the boards are prepped
and ready for the cnc so what i did on the blanks is i put some little trim of just uh it's just
poplar and i used some blue tape and ca glue to attach it there and as soon as it goes through
there it should have support so it shouldn't blow out this should help protect that so we'll see
if it works or not or if it just blows it off but now i am ready to start the machining on
the impossible dovetail we'll see how it goes the first round of machining on the
base is done i'm going to pull it out but it looks like it turned out really nicely uh
the back end did blow off the little strips but it looks like these did a really good
job at uh everything else stayed on and there is no blowout so it's gonna be super
clean in the final product so those worked out really awesome let's throw the walnut
top in there and we'll get to milling that and that's where the fun comes in and
trying to get the fit this is the easy one all right guys we are like right here this i i
am a little nervous because this like right now it fit just it's barely starting to fit and i
feel like i'm just i pushed it in about like an inch and it was just starting to bind up i'm just
super scared if i get it in here that it's gonna it's i'm not being gonna be able to remove it
and not even be able to close it the right way so i think i'm gonna err on the side of just
getting one more pass at it i've already done like four or five passes one more pass to hopefully
free it up enough and not have a bunch of gaps i hope this will be the one let's see
if it passes this first one then um i think i'm just gonna take
it all off oh there we go there we go there we go all right see if this
goes by oh it's still catching a little bit it's past them and it's going i'm gonna take
all the poplar strips off but leave it in the thing and see how it works should i do
that no um ah i'm gonna push it a little bit more ah there's so much friction
here i knew this was gonna be an issue all right it just hit me that uh i saw the
rubbing is happening like i said because there's so much more surface area but i'm
not really concerned about the surface in the middle all i want is the outside
to look nice and crisp so what i can do is come in here and relieve some of these
edges so that there's not as much rubbing i'm going to try to do some sanding and you know
spend a few hours just really massaging the fit if you will all right i just spent like an hour
sanding everything and i think this is gonna be it come on go go go go go yes that is it oh man that is it i don't
want to slam it all the way in there but that is it i'm gonna clean this bad boy up and
we'll see the final look all right guys check it out oh man this thing turned out so amazing and
i haven't even put the finish or the oil on it so i will do that i'll have some beauty shots for
you here in just a minute but it fits together perfectly and there is so much friction in here
i was worried it was going to slide apart like like the sliding dovetail did it did not uh but
i can look at it now and i'll show you how it opens up just slides oh you gotta really put
some pressure into it and then it slides right open check that out that is so cool if you don't
know how an impossible dovetail puzzle works now you do and if you've never seen a three dovetail
puzzle i've never seen one now you have so i'm gonna sand this up and put some finish on it i
am so happy how this thing turned out it looks amazing hey if you're loving these hidden and
secret feature videos i've got a playlist queued up for you right there that's got a few more
in it i think you're going to love as well i want to give a big thank you to all those
folks that have been joining the builders club you can get more information down below but
i'll catch you guys over there on the next video