I'm starting the project out as usual
cutting and milling the stock roughly two size I'm ripping down the dividers that will
separate the panels I cut them about a quarter inch wider than what's needed
this is just in case there's some tension in the wood that releases and
pulls it out of square. This way i have room to rejoint the edge, square it and
flatten it, and rip them to the final size. Here i'm cutting a dado in the face
frame that will accept the panel Dividers I run them through flip them
around and then run them through again to be sure that the dado will be
centered on the face frame. i'm using a little tight bond wood glue
on the dados then I gang them together in the clamps to dry once the glue is dry on the panel
dividers a square them off at the table saw and cut them to length.
I needed to cut a
notch in the top and bottom of the panel dividers so I can join them to the top
and bottom rails of the headboard. This was a two-step process here at the table
saw. I cut the notch to length then cut it to the right depth I used the Domino as my main joinery
method. My clamps weren't long enough to reach all the way across the panel
dividers so I hooked several together to give me the length i needed for the glue
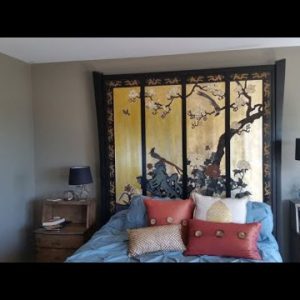
up. Once I had the panel dividers figured out I moved on to building the legs. To
get the thickness I wanted I laminated two pieces of eight quarter lumber
together my design incorporates a compound angle at the top of each leg.
Do to the thickness of the material and the length of the compound angle my saw
bottom out before cutting all the way through the leg. So I came back with a
handsaw and finish the cut. To lay out the curve I first found the center of the
leg and then plotted out the apex of the curve.
I drove a nail in on my central
plot point and used a thin scrap of wood to bend around the nail to create the
curve once I was happy with the shape I marked it out with the pencil and headed
over to the band saw. it is times like this when I wish I have
had someone to help me out. cutting the curve on that long piece of wood was a
bit awkward. Once I got done at the bandsaw there were some saw marks left
so I use the belt sander to smooth them out and refine the curve.

I test fitted
it before taking it to the clients house because I have to fit it up a flight of
stairs I'm not gluing the legs on. They are being screwed on instead. The
dominoes are just there for alignment purposes. The art panels are then dropped
in place and secured with strips of wood screwed to the dividers. This way the
panels are free to float in the frame the strips of wood i use to hold the art
panels in place were cut at a two degree angle on the outside edge when attached
to the frame the drill would be angled away from the art while driving the
screws and not scratch the panel's. when I pre-drilled the screw holes I used a
custom jig that had a matching two degree angle and the dado to hold the
strip's parallel to the drill press table.
This ensured that all the holes
were centered and at the proper angle to protect the art from being scratched
during installation you.

