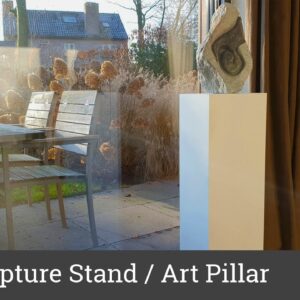
Welcome to the Cornerfield Shop,
today I'm building this pillar. As always I started my project by making
a 3D model in Sketchup. After that, I started by cutting all my pieces to size. Making this pillar is not very difficult to do
without a 3D model but I had some additional requests from
the client to consider. The sculpture that had to go on the top had it's own metal baseplate with an 8mm rod, to support the stone and hold it upright. Additionally the pillar could potentially be used for displaying different pieces of art in the future so I had to consider that as well. I ended up making a base that has an
interchangeable top. One that included the metal plate with the rod for the stone and the other is flat and can be used when the stone is replaced with something else. Once I had all the pieces cut to size and mitered I could start making the center of the pillar.
You don't want something like a rock falling over your floor when someone bumps into the pillar so I wanted to give it some weight. I did this by laminating pieces of MDF together. The final thickness of the laminated MDF needed to fit exactly within the four walls that make the outside of the pillar. The outer dimensions are 200mm and the walls are 12mm thick, so I had to figure out a way
to get the stack 176mm square. A combination of 8 and 12 mm thick sheets did the trick. I laminated them together using glue and brad nails. Once those were in place I clamped everything down for good measure. While the glue on that was drying I cut the hole in one of the tops for the metal rod to go through. Since the metal plate at the bottom was
smaller than my finished top I only had to worry about centring the hole. For cutting the hole perpendicular I used a jig that I made in a previous video.

Now that the glue is dry, I could flush trim the sides and the sand the whole center nice and smooth. Next up was determining how much I
needed to cut of the height of the center to make the plate sit flush
underneath the top. Once I knew how much I needed to remove, I could cut the center to the correct height. My saw unfortunately didn't reach all the
way to the middle so I had to use a chisel to finish the cut off. Final step in the assembly was to wrap
the center with the sides. The sides are mitered at the top and at the corners so that the lid can fall into it and you get a nice sharp finished edge all around. To make this step of wrapping it a little easier I used painters tape to hold the sides together. I then applied glue to the sides and folded the whole thing together. Because of the weight of the centre it
didn't quite work according to my plan but it was good enough.
Once it was wrapped I could add some clamps
and wait for the glue to dry. A quick test fit of the top shows that it fits perfectly. Nice. To make sure the sides stay attached to the centre I used some small finish nails in addition to the glue. After letting the glue dry for a while I could apply the first layer of primer paint. I first sanded it again and cleaned it with some thinner. Apparently that helps for the paint to stick to the MDF. Once the first layer was dry I lightly sanded in between and added the second coat of primer. The customer wasn't sure about the final color so I delivered the pillar without the final layer of paint. Once that's done I'll be sure to share it
with you guys on my Instagram. I hoped you liked the video, if you do please like and subscribe and I'll see you guys for the next project
at the Cornerfield Shop. Noooo!!!.

