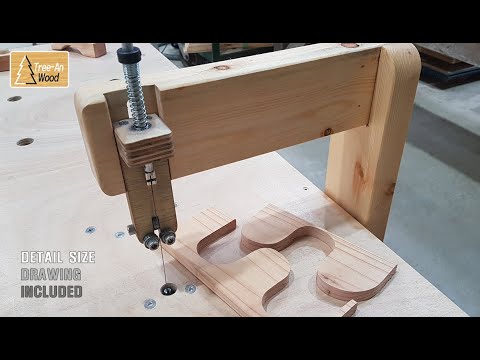
The video you are watching is the result of the scroll saw. This animation shows when to use as a jigsaw. The following animation shows when to use it as a scroll saw. If you need a drawing, please leave your email address in the comments. I will send you the png drawing file. Mark the position of the jigsaw. Drill a 6mm hole in the marked location. Screwing the bolts from above, and tightening the nuts from below. I'm making additional parts in the size shown in the drawing. Glued two 12mm plywood. Creates a vertical arm. Mark the horizontal arm so it is centered. Please cut the part marked. The hole-down clamp (Holdfasts) you see now has been uploaded to our DIY video. I cut it using a Oscillating Multi Saw, but you can cut it using another tool. Leave the horizontal arm in position and mark the part to be grooved.
Dig a 12mm deep groove in the area marked. The groove is well ~~ Center the jigsaw blade and mark the bearing position. Drill the bearings 6mm on both sides. In this video, only the equipment that used the LM8UU bearing had a problem, so I replaced it with an 8mm self lubricating bushing. The bearings used here are 15mm outer diameter, 6mm inner diameter, and 5mm high. Assemble in order of 6mm screw, 2 washers, and nut. If only 1 washer was used, both side bearings would interfere with the rear bearing, so 2 washers were used. This is a part to assemble the LM8UU using exposition. LM8UU bearings for swinging vibrations caused problems and replaced with lubrication bushings. If you request a drawing, we will send you the drawing replaced with a lubrication bushing. Drill an 8mm hole in the position of the knob handle shown in the drawing. 번데기 너트 길이를 12mm로 샌딩하여 가공하였습니다.
It was processed by sanding the insert nut length to 12 mm. Securely fix using bond. It is a part that receives a lot of power due to vibration. You can make a hole for height adjustment of the support. Inside, use a router. Vibration is severe during operation, and screws are also tightened to the support. Assemble in the order of 6mm knob handle, washer, and support. One by assembling a vertical arm and a horizontal arm.

At this time, please align the right angle accurately. The vibration is severe, so tighten the screw. Mounting base is installed. Fix the body made earlier to the base. I'm making a bottom clasp used for a scroll saw. It is used by cutting the lower part of the jigsaw blade as a connecting part of the lower clasp of the scroll saw and the jig saw. I am making the part where the scroll saw blade is mounted. I made it after failing several times ~~~ Please make it like this. This is the part that connects with the jigsaw. Attach the two parts using epoxy bond. I used the part on the jigsaw as the upper clasp part. Attach the two parts using epoxy bond.
In this video, it is made using an 8mm steel pie and a upper clasp. But you can make it with an 8mm steel rod in the same way as the bottom clasp. The epoxy bond alone could not withstand vibration, so a 3mm pin (drill blade) was inserted. In the same way, a 3mm pin was inserted into the bottom clasp. We are now doing the overall assembly.
Assemble by assembling in the order of upper clasp, spring, and stopper. The previously assembled bearing is disassembled and reassembled in case of interference when assembling the upper clasp.
Combine supports. Let’s look at it now. First is the jigsaw mode. It can be used by inserting various jigsaw blades. It cuts nicely ~~~ Next is the scroll saw mode. Insert the lower clasp into the jigsaw first, After appropriately adjusting the height of the support, Hook the blade to the lower clasp first, then press the spring and hook it onto the upper clasp. Let's test it. Unlike jigsaw mode, scroll saw mode allows you to cut more smoothly and freely when cutting curves. Satisfactory results ^^.

