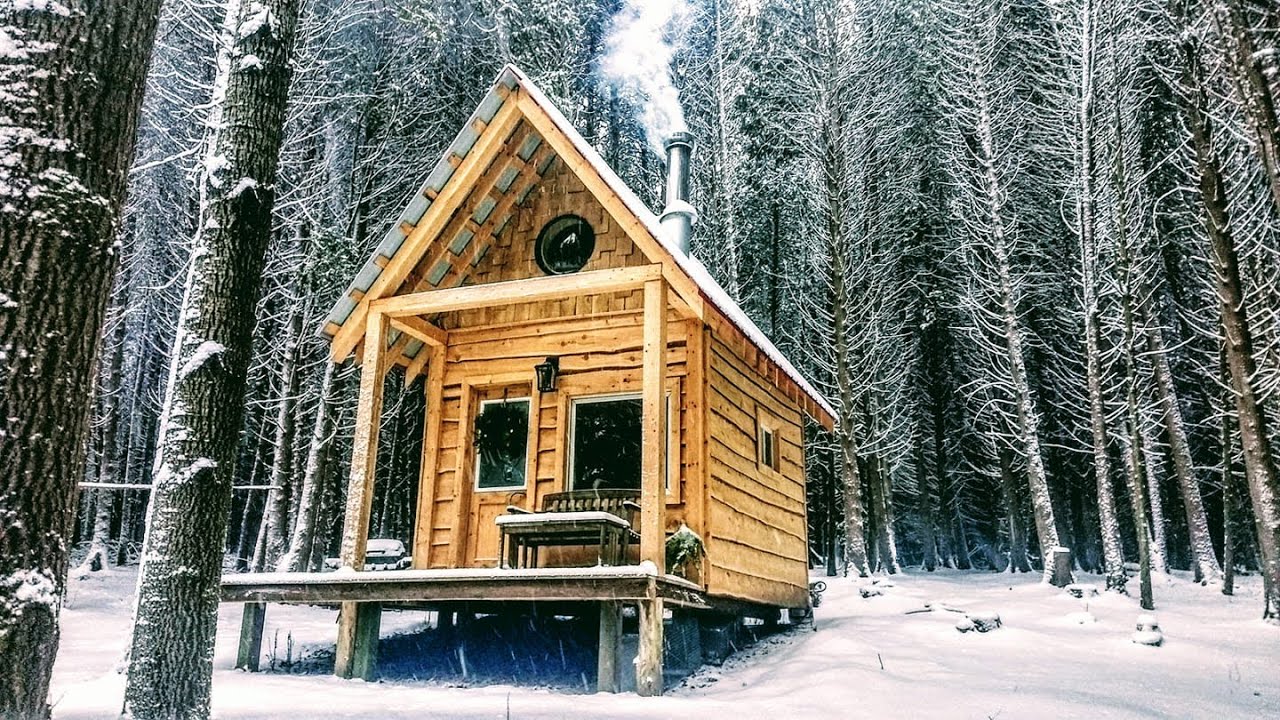
We are digging in post holes to hold up the small cabin on stilts. Back filling the 6 x 6 posts. We made sure to use a level and cut off all the posts which were on a hill so the final cabin would be level. Some trees that were dead, but hung up. Cutting 2 x 6 for the floor joists. We used dead cedar trees. These 6 x 6's are from dead pines from the property. One board every 16 inches. OSB plywood for the subfloor. We have a lot of resources on the property but mostly use dead trees. The cart is a tombstone hauler. Our Norwood HD36 makes short work of the trees into dimensional lumber. A collection of 2 x 4's. Walls go up quickly when they are build on the ground first. We planned ahead for doors and windows. The cabin takes shape quickly. These pine logs will hold up the upper sleeping loft. These planks for the floor are dead ash trees. The ridge beam is 16' ft long. Cutting and installing our trusses, these are pine logs.
We realizes that we needed to finish up the front porch to carry the load from the roof down. Couple extra posts to hold up the covered front porch. Winter is setting in as we build. This is a cedar log. Notching out for the floor joists of the wrap around porch. These are held in with giant spikes. Milling our porch planks out of dead cedar. The porch goes in quickly. This will support the open front porch area. These were the hardest to put in as they are the front roof joists which needed a birds mouth cut. The windows are from a house tear-down and were free. Cedar trim to abut the cedar siding. These are from both live and dead cedar trees, the biggest we could find. Some of the trees where 80 years old. Siding the cabin was lengthy, took us many days.

After installing the roof strapping, we nailed in the roof drip edge. The Vic West metal roof actually goes up fast. We are using a special screw with a rubber gasket to prevent leaks. Before we can install the other side we need to put the wood stove in. Now we can plan for where the chimney exits the roof. With flashing we ensure that the roof will never leak. First fire to test out the chimney. Now we need to make it more air tight. Plywood for the front so we can fasten shingles for a more decorative feature. A circular front window. Ash wood shingles. Notching for our custom build front door. Re-use front door window. Winter is in full force now. Finishing touches on the ginger breading. Cutting out the circular window. Trim. Antler door handle from a shed I found nearby. Just in time for a sled ride! Daddy.
Uncle Chris. How old are you? I'm 2. Moving in some firewood..

