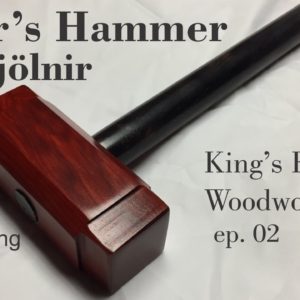
I Do a lot of woodworking with my [daughter's] my youngest is 12 She can't use many of the stationary tools yet But she loves what she can do [I] decided to build her a small replica of Thor's hammer for her to use as a woodworking mallet The Red heart for the head. I bought from Rockler. It was just about right, and I only had to trim the end I Set the bevel of the saw at 15 degrees and cut the corners off the ends this gives it the characteristic taper of Thor's hammer You can see the wood has quite a bit of wax on it I probably should have cleaned that off before starting work on the mallet heads as I was making these cuts I realized that it was not exactly a square something else that I should have checked before I started I Couldn't think of a super safe way to cut this So I just gripped it tightly with two hands and moved it slowly over the blade.
[I] Normally don't wear gloves when woodworking and I don't advise it. [I] just felt I could get a more secure grip this way I'm taking some time here to square up the blank It was a little bit wider in one dimension than the other now. It's all squared up, and it looks a little bit better time to get that wax off Cutting the corners off to define that shape a little bit better measuring for the whole location of the handle I Really like to use a one inch strip sander to take off the burn marks and rough Edges It also helps to do a little bit of contouring before I get to the final sanding I think it's really starting to look a little more like the head of [forest] hammer at this point Now it's time to turn the handle for the mallet.

It is made from African Blackwood that I got from wood craft I believe it was a one inch by one [inch] by 12 inch long turning black this is a fairly dense piece of wood and doesn't quite turn as nicely [as] [some] of the other exotics that I've used I'm using a carbide tipped turning tool with a round carbide cutter at the end You can see that the turning blank has a check in it right at the end here But I'm going to use that to my advantage later Now I'm turning down a round tenon at the end of the handle in Order to try to get it to fit perfectly into the mallet head With the turning down I'm starting to sand down the handle [I'm] using a very light pressure with my drill and the slowest speed setting for my lathe I started the sanding process at 80 grit and Gradually progressed all the way through to a thousand grit The ultrafine dust from this [African] [Blackwood] left me coated in black Powder, and it was very hard to wash off I have fight a wax finish using wax bar from a company named hut It is called Hut perfect Pen Polish [High-gloss] It is made for woodturners who turn different types of pens It is very hard in Durable wax, and I thought it would be an excellent choice to finish the mallet handle with Here, I'm buffing off the extra wax with the towel Make sure to keep the lathe at the slowest speed And they don't have a very tight grip on the towel In the event that the lathe decides to grab it and jerk it out of my hand As you can see this wax allows it to polish up to a beautiful shine fine-tuning the tenon for an exact fit inside of the mallet head If you remember the split that was in the end of the wood You can see here that I'm drilling a hole right [at] the bottom of the split So the split won't continue any further down the shaft of the mallet handle I'm sawing a very thin curve into that split in order for me to drive a wedge through the top of the mallet I Made sure never to give any wax on the tenon so that it would bond properly with the mallet head I'm using Titebond 3 glue here and [I] put some inside of the mallet and on the handle both You can see I have the slot lined up to drive a red heart Wedge down into the top Lock the handle into the mallet head after some finish sanding down to about 400 grit I have taped off the amount handle and I am spraying the head with clear Satin lacquer, the [lacquer] is made by deft, and I thought this just might look a little bit nicer than waxing it I Give it a light sanding with some 600 grit sandpaper between coats In total I put four coats of lacquer finish on it you Thank you for watching my video I think my [daughter's] going to love this mallet since it is a scaled-down replica Of the one I built for myself [a] few weeks ago If you enjoyed the video please [subscribe] [to] my channel you can click on the link down below to [subscribe] I will try to put out about two videos a week now that I'm learning how to edit I'm also happy to answer any woodworking questions.
Just leave them in the comments below.

